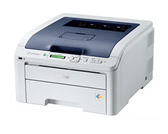
HL-3070CW
常見問題&故障排除 |
How can I configure my machine in a wireless network using SecureEasySetup™, Wi-Fi Protected Setup™ or AOSS™?
Please follow the steps below:
- If you are going to connect your Brother Printer to your network, we recommended that you contact your system administrator prior to installation.
- If you are using Windows Firewall or firewall function of antivirus applications, temporary disable them. Once you are sure that you can print, configure the software setting following the instructions. After configuring the network setting, enable them again.
- If you have previously configured the wireless settings of the printer, you must reset the print server back to its factory default settings.
Please refer to the instructions, "How do I factory reset the network settings?".
- Press any of the Menu buttons (+, -, OK or Back) of the control panel on your printer to take the printer off-line.
- Press the + or - to choose "Network". Press OK.
- Press the + or - to choose "WLAN". Press OK.
- Press the + or - to choose "SES/WPS/AOSS". Press OK.
- The printer searches for an access point that supports SecureEasySetup™, Wi-Fi Protected Setup or AOSS™ for 2 minutes.
- Put your access point in the SecureEasySetup™ mode, Wi-Fi Protected Setup mode or AOSS™ mode, depending on what is supported by your access point. Please refer to the instruction manual came with your access point to see which mode is supported.
- If the LCD shows "Connected", the printer has successfully connected to your access point/router.
You can now use your printer in the wireless network.
If "Connected" message does not appear on the LCD, the printer failed to connect to the access point/router using SecureEasySetup™, Wi-Fi Protected Setup or AOSS™ for some reason.
Please refer to the message below and follow the instruction.
Connection Error:
Session overlap has been detected. The printer has detected more than one access point/router on you network with the SecureEasySetup™ mode, Wi-Fi Protected Setup™ mode or AOSS™ mode enabled.
Check that only one router or access point has the SecureEasySetup™ mode, the Wi-Fi Protected Setup mode or AOSS™ mode enabled and try staring from the step1 again.
No Access Point:
The access point/router detection failed. The printer has not detect your access point/router on your network with the SecureEasySetup™ mode, Wi-Fi Protected Setup™ mode or AOSS™ mode enabled.
Move the printer closer to your access point/router and try starting from the step 1 again.
If the same message appears again, reset the print server back to its factory settings. Please refer to the instructions, "How do I factory reset the network settings?". And then, try from the step 1 once again.
Connection Fail:
Connection to access point/ router failed.
Try starting from the step 1 again.
If the same message appears again, reset the print server back to its factory settings. Please refer to the instructions, "How do I factory reset the network settings?". And then, try from the step 1 once again.
相關常見問題
- Reset the network settings to the factory default
- What is SecureEasySetup™, Wi-Fi Protected Setup (PBC*)or AOSS™?
- Configure the Brother machine for a wireless network with a USB or network cable using the Installation CD-ROM
- Important points you need to confirm before configuring your Brother machine for a wireless network.
內容意見回饋
請於下方回饋您的意見以幫助我們提升服務的品質
