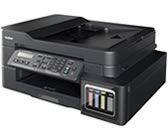
MFC-T910DW
常見問題&故障排除 |
Set the Date and Time
(MFC models)
The LCD displays the date and time. If they are not current, re-enter them. You can add the date and time to each fax you send by setting your Station ID.
(DCP models)
If the machine's power has been off, the machine's date and time may not be current. Re-enter them.
DCP-T310/DCP-T510W/DCP-T710W/MFC-T810W
- Press Menu.
- Press
 or
or  to select the following:
 - Select [Initial Setup]. Press OK.
- Select [Date&Time]. Press OK.
- Select [Date&Time]. Press OK.
- Enter the digits for the date in one of the following ways:
- Press
 or
or  on the control panel to set the last two digits of the year. Press OK. Repeat these steps for setting the month and day. (DCP-T310/DCP-T510W/DCP-T710W)
 - Enter the last two digits of the year using the dial pad, and then press OK. Repeat these steps for setting the month and day. (MFC-T810W)
- Press
 or
or  to select [12h Clock] or [24h Clock], and then press OK.
 - Enter the digits for the time in one of the following ways:
- If you selected [12h Clock]:
- Press
 or
or  on the control panel to set the hour. Press OK. Repeat these steps for setting the minute. (DCP-T310/DCP-T510W/DCP-T710W)
 - Enter the time (in 12-hour format) using the dial pad, and then press OK. (MFC-T810W)
- Press
 or
or  to select [AM] or [PM], and then press OK.
- If you selected [24h Clock]:
- Press
 or
or  on the control panel to set the hour. Press OK. Repeat these steps for setting the minute. (DCP-T310/DCP-T510W/DCP-T710W)
 - Enter the time (in 24-hour format) using the dial pad, and then press OK. (MFC-T810W)
- Press Stop/Exit.
MFC-T910DW
- Press Settings.
- Press
 or
or  to select the following:
 - Select [Initial Setup]. Press OK.
- Select [Date & Time]. Press OK.
- Select [Date]. Press OK.
- Enter the last two digits of the year using the dial pad, and then press OK.
- Enter the two digits for the month using the dial pad, and then press OK.
- Enter the two digits for the day using the dial pad, and then press OK.
- Press
 or
or  to select [Clock Type], and then press OK.
 - Press
 or
or  to select [12h Clock] or [24h Clock], and then press OK.
 - Press
 or
or  to select [Time], and then press OK.
 - To enter the time, do one of the following:
- If you selected [12h Clock]:
- Enter the four digits of the time (in 12-hour format) using the dial pad.
- Press
 ,
,  ,
,  or
or  to select [AM] or [PM] using the keyboard on the LCD, and then press OK.
 - Press
 ,
,  ,
,  or
or  to select [OK] using the keyboard on the LCD, and then press OK.
- If you selected [24h Clock]:
Enter the four digits of the time (in 24-hour format) using the dial pad, and then press OK.
- Press Stop/Exit.
內容意見回饋
請於下方回饋您的意見以幫助我們提升服務的品質
