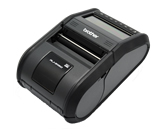
RJ-3150
FAQs & Troubleshooting |
How can I connect the printer to my mobile device via Wi-Fi®?
- To connect to a wireless network, you must use the Li-ion battery (Optional: PA-BT-001-B for RJ-3050, PA-BT-001-A for RJ-3150) and AC adapter (Optional: PA-AD-600).
- To print wirelessly using iPad, iPhone, iPod Touch, etc. (hereinafter referred to as “Apple device”), you must use AirPrint.
- AirPrint (compatible with Apple device) can print pictures, PDF files etc.
Choose a connection method to wirelessly connect the printer and your Apple device.
> If you have a wireless router/access point:
> If you do not have a wireless router/access point:
If you have a wireless router/access point:
Connect using a wireless router/access point (Infrastructure mode)
If you have a wireless router/access point, do the following:
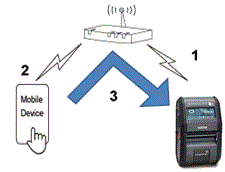
-
Connect your Brother printer to your wireless router/access point.
- Connect your mobile device to the same wireless router/access point. (You can skip this step if your device is already connected to a Wi-Fi® network.)
-
You can now print from your mobile device wirelessly.
Connect using a wireless router/access point (WPS): RJ-3150 only
If your wireless router/access point supports WPS (Wi-Fi Protected Setup™), do the following:
If you cannot use the wireless router/access point, go to "Connect the printer to the wireless router/access point using your computer".
-
First, confirm that your wireless router/access point has the WPS symbol. Place the printer close to the wireless router/access point.

WPS -
Press the [Menu], [
 ], or [
 ] button to select the [WLAN] menu, and then press the [OK] button.
- Set [WPS] to [Start] in the menu.
-
Press the WPS button on your wireless router/access point and the [OK] button on your printer, and then [WPS setting] is displayed on the LCD.
-
When the connection is established, the WLAN (
 ) icon appears in blue.
If the WLAN icon does not appear in blue:
Go to "Connect the printer to the wireless router/access point using your computer". -
Connect your mobile device to the wireless router/access point. (You can skip this step if your device is already connected to a Wi-Fi network.)
- Tap [Settings] - [Wi-Fi] on the mobile device, and slide the toggle button to activate Wi-Fi.
- Select the SSID (Network Name) of the wireless router/access point that you connected to in step 6, and then enter the password. The connection between your mobile device and the wireless router/access point will be established.
-
You can now print from your mobile device wirelessly.
[ ![]() Back To Top ]
Back To Top ]
Connect the printer to the wireless router/access point using your computer
Before you proceed, make sure your computer is equipped with a Wi-Fi interface that is connected to a wireless network. If it is not, the computer will not be able to connect to your printer wirelessly.

-
Connect your computer to your wireless router/access point.
-
Connect your Brother printer to the same wireless router/access point.
-
Connect your printer and computer.
-
Connect your mobile device to the same wireless router/access point. (You can skip this step if your device is already connected to a Wi-Fi network.)
- Connect your mobile device and printer.
Before you begin, confirm the SSID (Network Name) and the password (Network Key) of your wireless router/access point.
a. Download the printer driver from the [Downloads] section of this website.
b. Double-click the downloaded file to begin the installation.
c. Select [USB cable/WLAN], and click [OK].
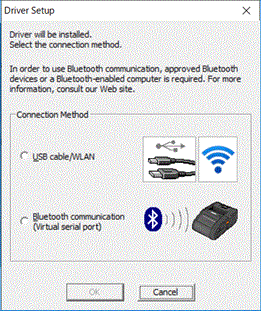
d. Click [Next].
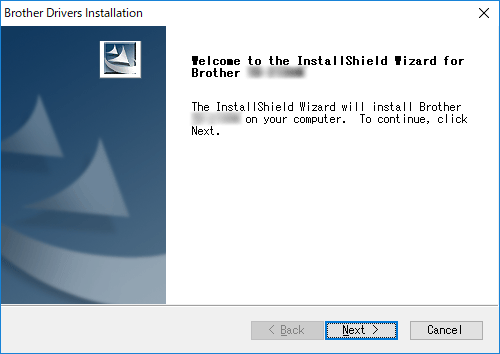
e. When the screen for selecting the connection method appears, select [Wireless Network Connection], and then click [Next].
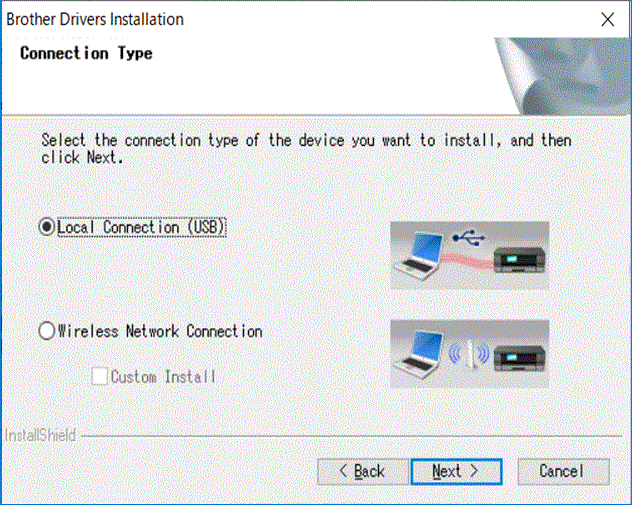
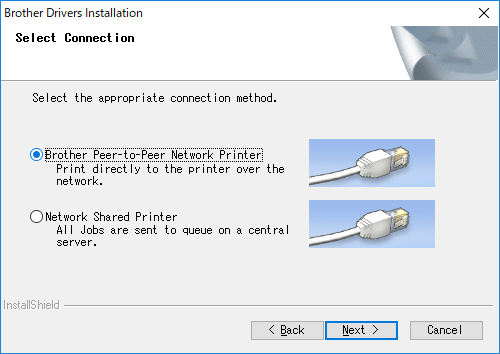
f. Select [Brother Peer-to-Peer Network Printer] and then click [Next].
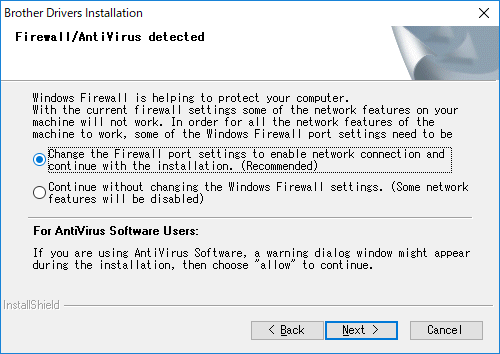
g. Select [Change the Firewall port settings to enable network connection and continue with the installation. (Recommended)], and then click [Next].
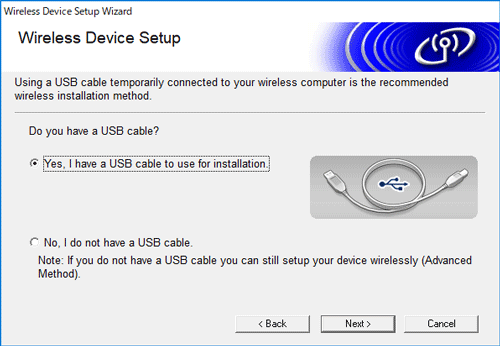
h. Prepare the USB cable, select [Yes, I have a USB cable to use for installation], and then click [Next]. Follow the on-screen instructions.
i. The wizard will search for wireless networks available to your printer.
j. Select the SSID (Network Name) noted beforehand, and then click [Next].

k. Type in [Network Key(Password)], and then click [Next].

l. Make sure that the setting of Wireless LAN is correct, and then click [Next].
m. Disconnect the USB cable between your computer and printer, and then click [Next].
n. Select the printer from the list, and then click [Next].
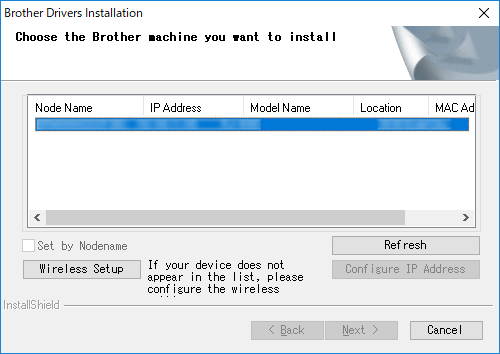
o. Follow the on-screen instructions to complete the software installation.
p. When the installation is complete, and then click [Finish] to close the installer window.
q. When the printer is connected to your wireless router/access point, the Wi-Fi indicator flashes in blue or the WLAN (![]() ) icon appears on your printer's LCD.
) icon appears on your printer's LCD.
r. Connect your mobile device to the wireless router/access point. (You can skip this step if your device is already connected to a Wi-Fi network.)
i. Tap [Settings] - [Wi-Fi] and slide the toggle button to activate the Wi-Fi function.
ii. Select the SSID you connected to in step j. Your device and the wireless router/access point will be connected.
s. You can now print from your mobile device wirelessly.
If you do not have a wireless router/access point:
Connect using Wireless Direct
-
Download the printer driver and the Printer Setting Tool from the [Downloads] section of this website, install it in advance.
-
Turn on the printer.
-
Follow the instruction below.
For RJ-3150:
Press the [Menu] Button and the [ ] Button to select the [WLAN] menu, and set [WLAN (On/Off)] to [On]. The WLAN (
 ) icon on the LCD appears in blue.
For RJ-3050:
i. Press and hold the power ( ) button until the Wi-Fi indicator flashes in blue.
ii. Use your computer or mobile device to select the SSID of your printer and, if you set a password in the Printer Setting Tool, enter the password.The default SSID and password are as follows:
-
SSID:
RJ-3050: "DIRECT-brRJ-3050[the last five digits of the serial number]"
RJ-3150: "DIRECT-brRJ-3150[the last five digits of the serial number]" - Password: 00000000
- If you cannot find the serial number label, see "Where can I find my Brother printer's serial number?".
- If you set a password with the communication settings, enter the password.
-
SSID:
Ad-hoc mode allows you to connect the printer to your computer or mobile device directly without a Wi-Fi access point/router.
- Turn on the printer.
-
Follow the steps below.
For RJ-3150:
Press the [Menu] Button and the [ ] Button to select the [WLAN] menu, and set [WLAN (On/Off)] to [On]. The WLAN (
 ) icon on the LCD appears in blue.
For RJ-3050:
Press and hold the power ( ) button until the Wi-Fi indicator flashes in blue.
 - Use your computer to configure the Ad-hoc mode settings of the printer.
- Use your computer or mobile device to select the SSID of your printer, and if you set a password in the Printer Setting Tool, enter the password.
For Apple devices
The following devices may not support Ad-hoc mode:
- (iOS 14 or later) iPhone 12 series, iPhone 11 series, and iPhone SE 2nd generation
- (iPadOS 14 or later) iPad Pro 5th generation and iPad Air 4th generation
- iPad and iPad mini released after 2021
To connect your printer to these devices, we recommend using Wireless Direct.
For computers
Not all computers and operating systems support Ad-hoc mode.
[ ![]() Back To Top ]
Back To Top ]
