QL-580N
FAQs & Troubleshooting |
How do I install the software from the CD-ROM? (for Windows)
You can download and install the latest version of the software from the [Downloads] section of this website.
To install the software from the CD-ROM, follow the steps below:
(The following is an example for Windows Vista)
-
Insert the CD-ROM into your computer's CD-ROM drive. "Setup.exe" will start up automatically.
If it does not start up, open the files on the CD-ROM and double-click on "Setup.exe".
Click [Standard Installation].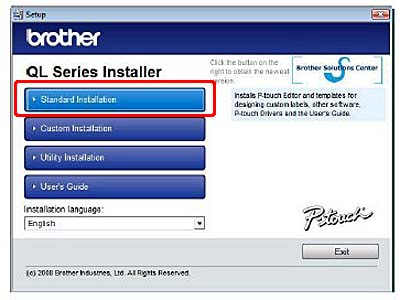
-
Read the licence agreement and click [Yes] if you agree with the terms and conditions.
-
Follow the on-screen instructions.
-
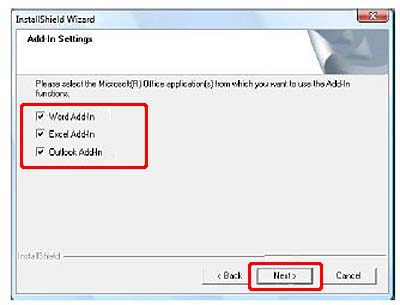
Put the check mark in the box to install the Add-Ins and click [Next].
-
Click [OK].
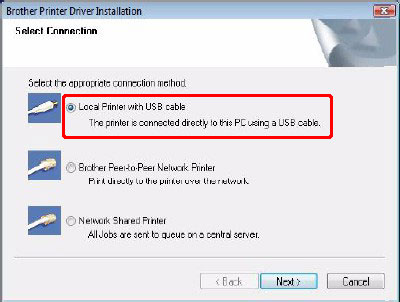
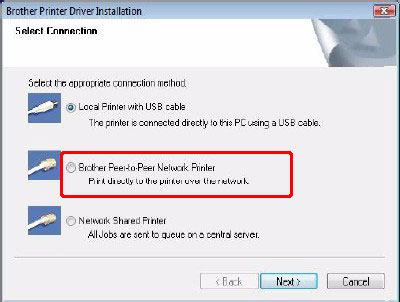
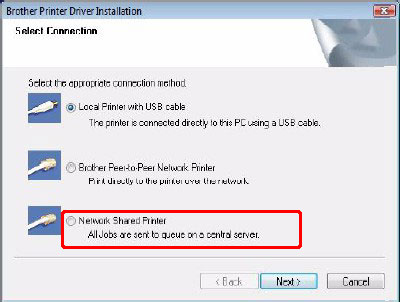
- Choose your connection method and click [Next].
![]() For USB interface cable users (go to 7)
For USB interface cable users (go to 7)
![]() For Network interface cable users (go to 11)
For Network interface cable users (go to 11)
![]() For shared network printer users (go to 16)
For shared network printer users (go to 16)
<For USB interface cable users>
-
Choose [Local Printer with USB cable] and click [Next].
-
Follow the on-screen instructions.
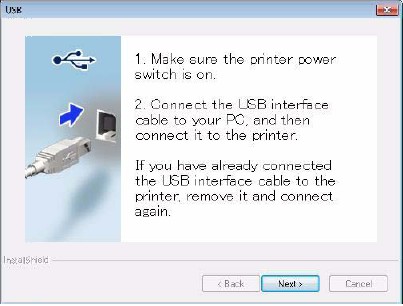
When this screen appears, make sure to turn on the power.
Connect the USB interface cable to your computer, and then connect it to the machine.
-
Click [Next]. Choose "Yes" or "No" depending on whether you want to go to the online user registration page.
- Click [Finish] and start the software.
<For Network interface cable users>
-
Choose [Brother Peer-to-Peer Network Printer], and then click [Next]. Check that the machine is connected to the network by a LAN cable.
- Choose [Search the network for devices and choose from a list of discovered devices (Recommended)]. Or enter your machine's IP address or its node name. Click [Next]. You can find your printer's IP address and the node name by printing out the Printer Settings Page.
- Choose your printer.
- Click [Next]. Choose "Yes" or "No" depending on whether you want to go to the online user registration page.
- Click [Finish] and start the software.
<For shared network printer users>
-
Choose [Network Shared Printer], and then click [Next].
-
Click [Next]. Choose "Yes" or "No" depending on whether you want to go to the online user registration page.
- Click [Finish] and start the software.
Content Feedback
To help us improve our support, please provide your feedback below.