HL-4050CDN
FAQs & Troubleshooting |
Adjust colour settings by using the custom setting in the printer driver
You can adjust colour settings in the Custom Setting dialog box of the Windows printer driver, or in the Effect dialog of the Mac OS X CUPS printer driver.
Please note that this feature is available in the Windows printer driver and the Mac OS X CUPS printer driver, not available in the BR-Script printer drivers of Windows and Mac OS X.
NOTE: Illustrations shown below are from a representative product and operating system, and may differ from your Brother machine and operating system.
STEP 1: Check the current colour tone
- Click here to open the sample images, and print them. [46KB/ PDF]
- Compare them with the following images, and find out which ones are similar to the ones you printed. Click the image to enlarge.
Case A: The print is reddish.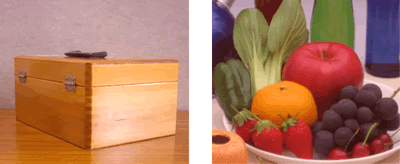
Case B: The print is yellowish.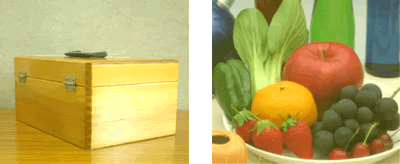
Case C: The print is pinkish.
Case D: The print is greenish.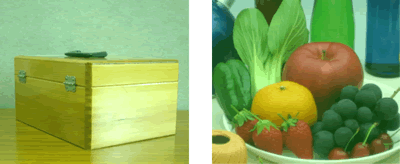
Case E: The print is bluish.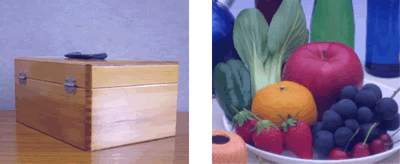
Case F: The print is lightly bluish.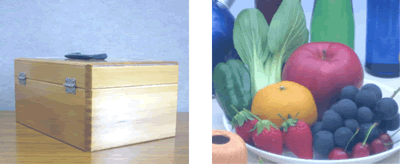
STEP 2: Adjust colour settings
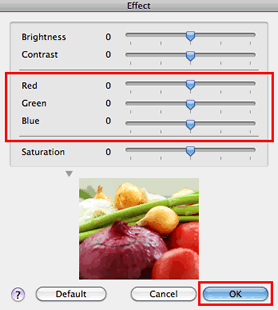
- Open the Custom Setting dialog (Windows) or the Effect dialog (Mac OS X).
For Windows printer driver:
- Open Printing Preferences. (Click here to see the details of how to open Printing Preferences.)
- Click the Advanced tab and click Setting....
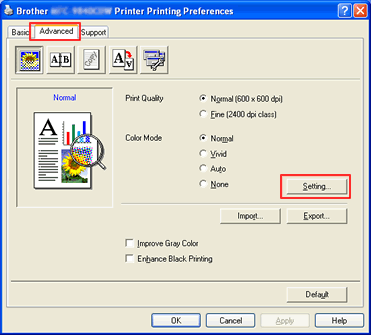
- Now, the Custom Setting dialog box is open.
- Open Print dialog. (Click here to see the details of how to open Print dialog.)
- Choose Print Settings from the pane pop-up menu. Click the Advanced tab and Settings....

- Now, the Effect dialog is open.
- Open Printing Preferences. (Click here to see the details of how to open Printing Preferences.)
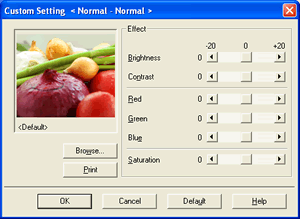
- Adjust the colour settings with reference to the following table and the check result in STEP 1, and click OK.
NOTE:
Colours the machine can print and colours you see on a monitor are different. Computer monitors can display millions of colours as RGB (Red, Green, Blue). The colour laser machine uses a 4-colour printing process of CMYK (Cyan, Magenta, Yellow, Black). The machine uses these 4 colours to create as many colours as possible, but may not be able to reproduce the colours on your monitor.
Additionally, what we see on a computer monitor is emitted light, while what we see on a printed document is reflected light. Due to this difference, we can't get a 100% accurate match. The nature of both types of light and how our eyes react, makes colour matching between them a bit of a challenge. Even LCD monitors are different from CRT monitors, as the brightness and contrast differ greatly.
The paper brightness and smoothness will affect the colours you see printed on the page. The colours you see on the page may look different in natural light, soft white light, and fluorescent light.
The images you printed in STEP 1 are ... Reference RGB value
Red
Green
Blue
reddish (Case A) -8
4
4
yellowish (Case B) -4
-4
8
pinkish (Case C) -4
8
-4
greenish (Case D) 4
-8
4
bluish (Case E) 4
4
-8
lightly bluish (Case F) 8
-4
-4
Content Feedback
To help us improve our support, please provide your feedback below.