HL-3070CW
FAQs & Troubleshooting |
Carry out calibration to improve the colour density
Calibration helps you to improve the colour density.
The output density for each colour may vary depending on the environment the printer is in such as temperature and humidity.
The instruction varies depending on what kind of the printer driver you are using.
- If you are using the printer driver, perform the calibration from the printer driver or using the status monitor.
- If you are using the BR-Script printer driver(PS driver), perform the calibration from the control panel of the printer.
Follow the appropriate instructions for your printer driver and Operation System (OS).
Perform the calibration from the printer driver or using the status monitor:
From the printer driver (Windows users only):
The screens are from Windows XP. The screens on your computer may vary depending on your operating system.
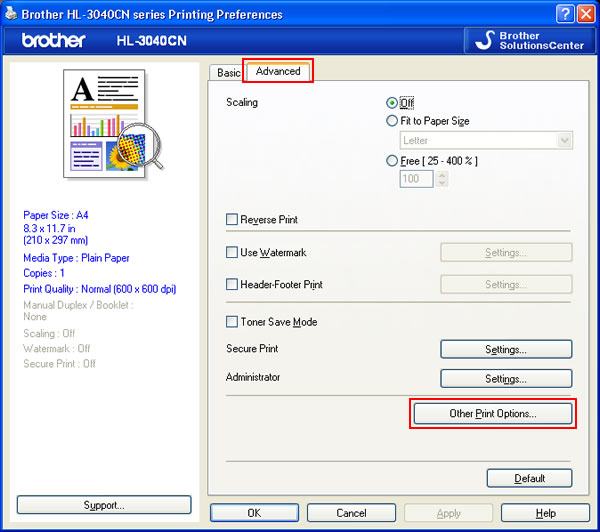
- Open Printing Preferences. (Click here to see the details of how to open Printing Preferences.)
- Open the Advanced tab and click the "Other Print Options".
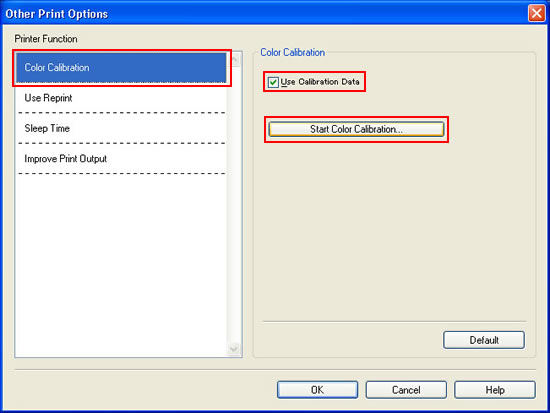
- Choose "Colour Calibration" and make sure the Use Calibration Data checkbox is checked.
* Only when the latest calibration data is available, the Use Calibration Data checkbox will be checked.
- Click the "Start Colour Calibration".
- Colour Calibration window appears. Read the message and click OK.
The printer starts colour calibration and then the printer driver attempts to get the calibration data from the printer.
If you want to reset the colour calibration parameters back to the setting at the factory, please refer to the instructions at the bottom of this FAQ.
Using the status monitor (Macintosh users only):
- Click the Apple icon and open the "System Preferences".
- Click the "Print & Fax", "Print & Scan" or "Printers & Scanners" icon.
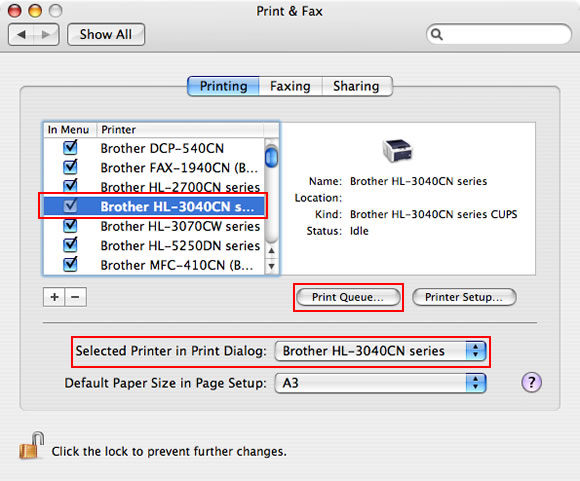
- [Mac OS X 10.3.9 or 10.4.x users]
- Choose your printer model name from the printer list. E.g. Brother HL-3040CN series.
Make sure your printer model name is chosen in Selected Printer section.
- Click the "Print Queue".
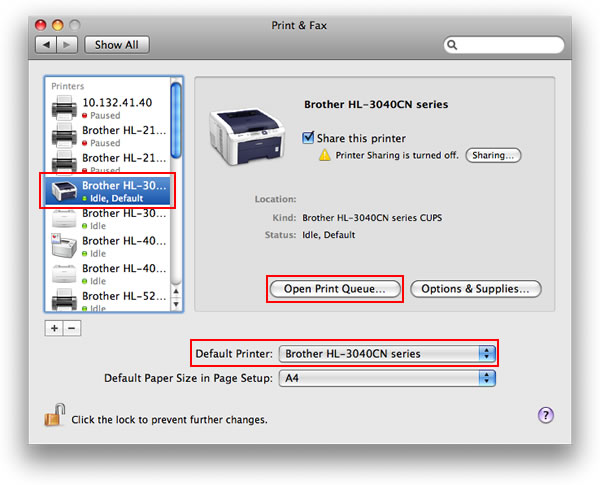
[Mac OS X10.5.x or greater users]
- Choose your printer model name from the printer list. E.g. Brother HL-3040CN series.
Make sure your printer model name is chosen in Default Printer section.
- Click the "Open Print Queue".
- Choose your printer model name from the printer list. E.g. Brother HL-3040CN series.
- Click the "Utility" icon in the top menu.
(For Mac OS X 10.6 or later Users: Click Printer Setup or Settings. Choose the Utility tab then click Open Printer Utility.)
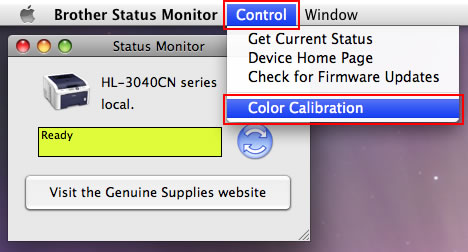
Now the status monitor is turned on.
- Go to the menu bar, click "Control" => "Color Calibration".
- Colour Calibration dialog appears. Read the message and click OK.
The printer starts colour calibration and then the printer driver attempts to get the calibration data from the printer.
Perform the calibration from the control panel of the printer:
- Press + or - to choose "Color Correction". Press OK.
- Press + or - to choose "ColorCalibration". Press OK.
- Press + or - to choose "Calibrate". Press OK.
- When the message "OK?" appears on the LCD, press OK.
For BR-Script printer driver(PS driver) users:
* This instruction is both for Windows and Mac OS X 10.3.9 or greater users.
The printer automatically adjusts the colour density after performing the calibration from the control panel. So, you don't need to perform the calibration from the printer driver or using the status monitor. Please finish the step here.
- Press + or - to choose "Color Correction". Press OK.
- Press + or - to choose "ColorCalibration". Press OK.
- Press + or - to choose "Reset". Press OK.
- When the message "OK?" appears on the LCD, press OK.
Now the setting is reset.
