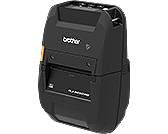
RJ-3250WB
FAQs & Troubleshooting |
How do I connect my computer to the printer using the Wireless Direct mode?
-
Download the Software/Document Installer from the [Downloads] section of this website and then start the installer.
P-touch Editor, Printer Setting Tool, and other software are installed in addition to the printer driver. -
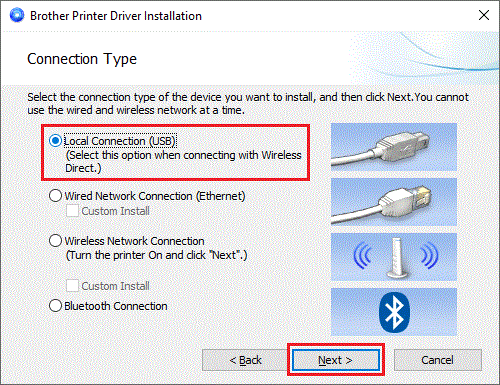
When the dialogue box for selecting the connection method is displayed after the printer driver installation starts, select Local Connection (USB).
Click [Next], and then follow the installer instructions.
-
On the printer, press the Menu /
 (Select) button to select the [WLAN] menu, and then press the
  (Feed) / OK button.
Set [On/Off] to [On]. The (Wi-Fi®) icon appears on the LCD.
 -
Change the settings of the printer.
- Connect the printer and computer using a USB cable.
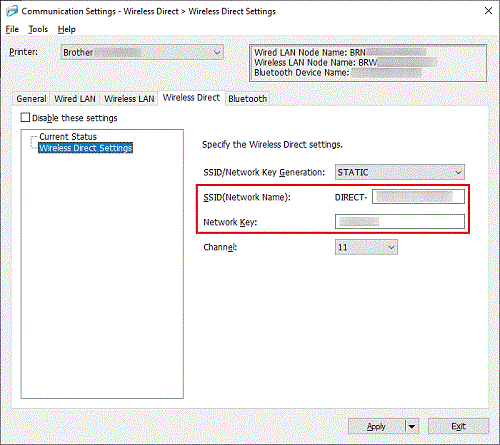
- Start the Printer Setting Tool on your computer, and click the Communication Settings button.
- Confirm the SSID (network name) and password (network key) in the Wireless Direct tab.
- Confirm Wireless Direct is selected for Selected Interface in Communication Settings in the General tab.
- Click the Apply button.
-
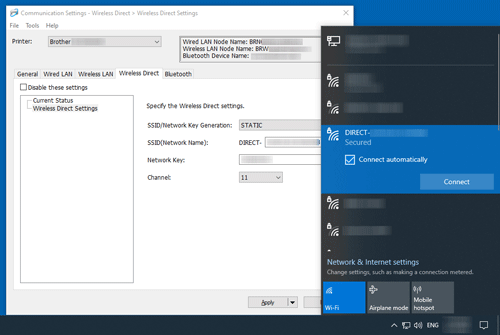
From your computer, select the SSID you confirmed in step 4 and connect to the printer.
-
The factory default SSID and password are as follows:
- SSID: "DIRECT-*****_RJ-3250WB" where *****is the last five digits of the serial number. (The serial number label is located on the base of the printer. You can also confirm the serial number by printing the printer information.)
- The password: "325*****" where *****is the last five digits of the serial number.
- We recommend setting a new Wireless Direct password using the Printer Setting Tool to protect your printer from unauthorised access.
- If you are prompted to enter a password, enter the password (network key) you confirmed in step 4.
- For Windows 10 or later, check Connect automatically.
- It may take several minutes until the connection is finished.
-
The factory default SSID and password are as follows:
-
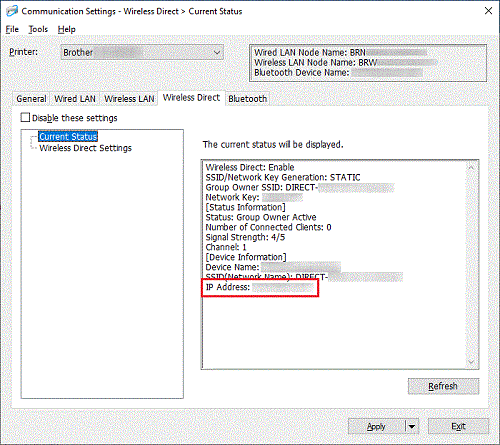
Start the Printer Setting Tool on your computer again, and click the Communication Settings button.
Confirm the IP address in Current Status in the Wireless Direct tab.
-
Open the Devices and Printers window. (For more information about opening the window, click here.)
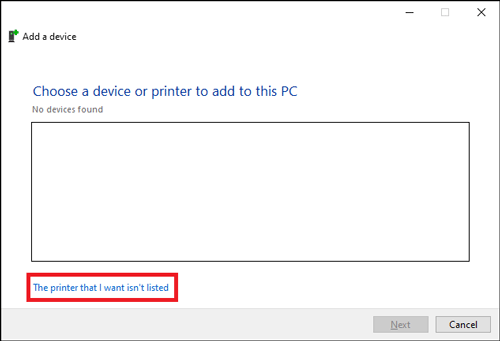
Click Add a printer.
For Windows 8 or later:
Click [The printer that I want isn't listed] on the bottom of the window instead of selecting the displayed printer icon for your model.
-
For Windows 8 or later:
Select the [Add a local printer or network printer with manual settings] option, and then click the Next button.
For Windows 7 or earlier:
Click the Add a local printer. - Select the Create a new port option, select Standard TCP/IP Port, and then click the Next button.
- Enter the IP address you confirmed in step 6, and then click the Next button. The computer will start searching for the TCP/IP port.
- When the dialogue box with [Which version of the driver do you want to use?] appears, select the [Use the driver that is currently installed (recommended)] option, and then click the Next button. Confirm the printer name, and then click the Next button. You have finished connecting your computer to the printer.
- Open the Devices and Printers window again, click the Ports tab in the Printer Properties dialogue box, confirm that the IP address for the printer is the same as the address you confirmed in step 6 and that the Standard TCP/IP Port option (not WSD port) is selected.
- Start P-touch Editor to create and print labels.
Content Feedback
To help us improve our support, please provide your feedback below.
