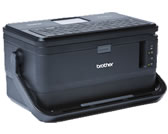
PT-D800W
FAQs & Troubleshooting |
How to create serialised tubes / labels
In the following description, "tube(s)" supposes E800TK and E850TKW.
Example:

Using the printer's keyboard
-
Enter the text except the text that you want to serialise.
Example: Create tubes or labels like the example above. In this case, enter only "1A-A0"Tube creation screen Label creation screen 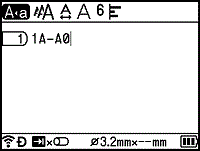
-
Position the cursor where you want to insert serialised text, and then press the Serialize key.
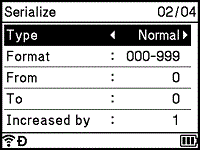
-
Select [Type], [Format], [From], [To] and [Increased by] using the
 or
or  key, and set the values using the
  or
or  key.
key.You can also set [From], [To] and [Increased by] by typing in the numbers you want.
Example: [Type]: Normal, [Format]: 000-999, [From]: 1, [To]: 4, and [Increased by]: 1
See the following Serialise Settings table (factory settings are shown in bold):Attribute Value Description Type Normal, Octal, Hex, Alphabet Specifies the format of the serialised number from decimal, octal, hexadecimal, and alphabetic. Format Normal 000-999, __0-999, 0-999 Specifies how the digits of the serialised numbers are aligned.
- 000-***: Zeroes are used to align the digits.
- __0-***: Blank spaces are used to align the digits.
- 0-***: The digits are not aligned.Octal 000-777, __0-777, 0-777 Hex 000-FFF, __0-FFF, 0-FFF Alphabet a-z, A-Z From Normal 000-999 Specifies the starting text for the serialised numbers. Octal 000-777 Hex 000-FFF Alphabet a-z, A-Z To Normal 000-999 Specifies the ending text for the serialised numbers. Octal 000-777 Hex 000-FFF Alphabet a-z, A-Z Increased by 1-9 Specifies the increment for increasing the serialised numbers. -
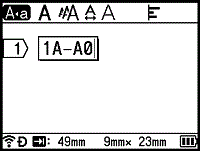
Press the OK or Enter key to display an image of the tubes or labels on the screen.
For tubes, the starting text and ending text for the serialised numbers are indicated using a mark as shown in the following illustration:Tube creation screen Label creation screen 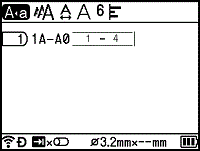
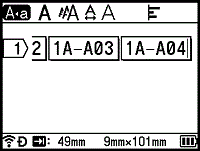
- For tubes, when you select the serialise mark and then press the Serialize key, you can do the setting again. (Not available for labels)
- For labels, although the printer creates multiple pages of labels after you complete the serialise settings, you can select the pages and print only the pages you want.
- When you want to print multiple copies of the serialised tubes or labels, you can select [Serialize] or [Copy] for the printing order in [Settings] - [Print Order] in the Home screen.
- When creating labels with a serialised barcode, select the entered barcode, and then press the Serialize key. (Barcodes cannot be printed on tubes.)
- To return to the previous step, press the Esc key.
-
Letters and numbers increase as shown below:
0, 1, 2, 3, ... 999, 0, 1, 2, 3 ...
A, B, C, D, ... Z, A, B, C, D ...
a, b, c, d, ... z, a, b, c, d ...
Using Cable Label Tool
-
Start the Cable Label Tool on your computer, and select the cable label type you want.
For more information about using Cable Label Tool, see "Using the Cable Label Tool". -
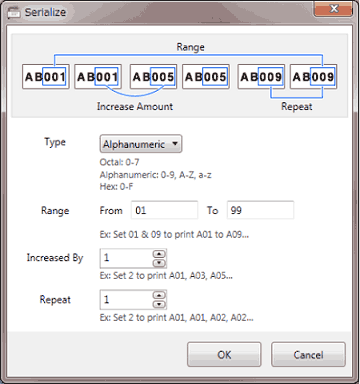
Highlight the text you want to serialise, and then press [Serialize].

-
Specify the settings using the screen image as an example.
Movie: How to create serialised tubes/ labels
*The video clip is being streamed from YouTube.
Content Feedback
To help us improve our support, please provide your feedback below.
