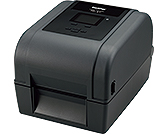
TD-4650TNWB
FAQs & Troubleshooting |
How to configure your printer by web browser
You can use a user-friendly setup interface and the capability to manage the printer remotely over a network.
First, confirm your printer's IP address.
- You can find your printer’s IP address with the BPM (Brother Printer Management Tool).
- This utility works with the printer firmware V6.61 and later versions.
- Open your web browser. (We recommend using either Internet Explorer or Mozilla Firefox.)
-
Type your printer’s IP address in the address bar, and then press the Enter key.
If your web browser displays an additional security dialogue box, type the default ID and password and click [OK].
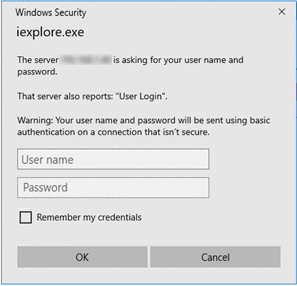
Default ID: "root" or "admin"
Default Password: The password located either on the bottom, inside or back of the printer and preceded by "Pwd".
For more information, see [IMPORTANT – Network Security Notice: Default Login Password Change] on the [Manuals] page. -
The print server page opens as below:
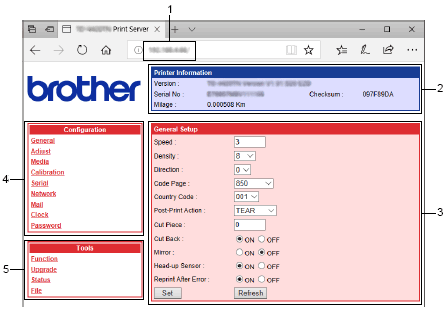
1. Address Bar
2. Printer information
3. Printer setup
4. Print server configuration
5. Print server tools Print server configuration:
Explore or change the printer settings.General Setup
The settings shown on this page are the printer's current settings. These settings can be changed by entering a new value in the text-box or by selecting a different value from the options and clicking the Set button to implement the settings. You can also click the Refresh button to retrieve the latest printer settings.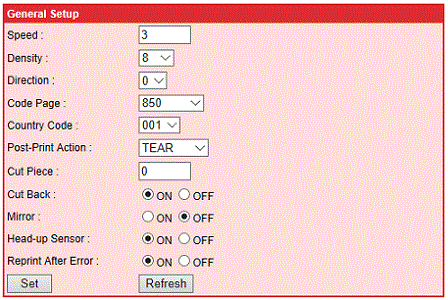
Adjust Setup
Enter the new value in the text-box and click the Set button to program the settings. Click the Refresh button to retrieve the updated printer settings.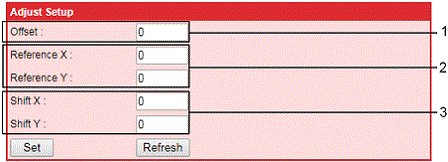
- This option is used to fine tune the media stop location.
- This option is used to set the origin of the printer coordinate system horizontally and vertically.
- This option is used to fine tune the print position.
Media Setup
This option is used to set the media size, select the media sensor type and the print method.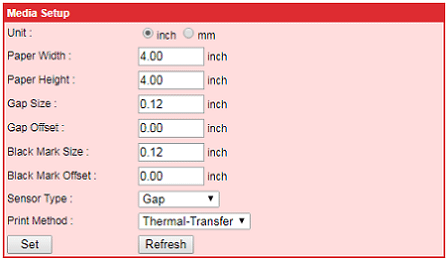
Calibration Setup
This option is used to explore the printer sensor intensity settings and set the sensor intensity.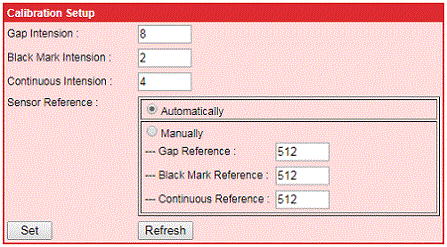
Serial Port Setup
This option is used to view/set the RS-232 interface baud rate, data bits, parity and stop bit.
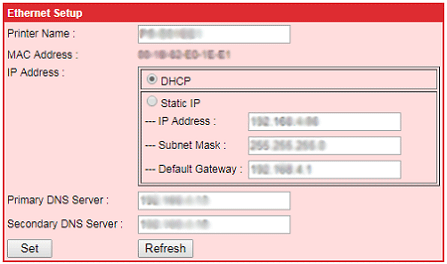
Network Port Setup
This option is used to explore/set the printer internal print server network settings.
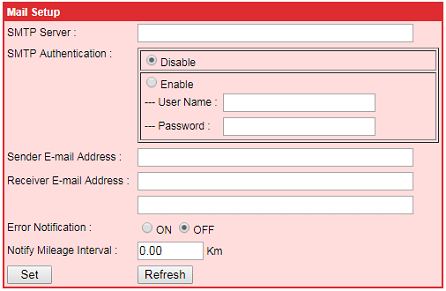
Email Setup
After setting this option, you will be able to receive notification of printer errors by Email.
Email Notification Errors - Carriage Open
- Over Heat
- Paper Jam
- Paper Empty
- Ribbon Error
- Cutter Error
Clock Setup
This option is used to configure the clock settings.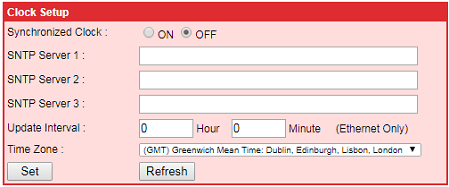
Password Setup
This option is used to set the password information.If required, type your ID and password. If you have not set your own password, use the following:
Default ID: admin
Default Password: The password located either on the bottom, inside or back of the printer and preceded by "Pwd". [Print server tools:
 Back To Top ]
Printer Function
In this option, you can reset the printer, restore the printer to factory defaults, print current printer configuration, ignore AUTO.BAS file, calibrate the sensor and send a file to the printer.
The Send File to Printer button is for sending the command to the printer.
Printer Firmware Upgrade
This option is used to upgrade the printer firmware. Use the Browse button to select the firmware location and then click the Upgrade button to update the firmware.
Please do not disconnect the printer power or interrupt the firmware update process. The printer may not boot properly.
Printer Status
Explore the printer status.Available Printer Status - Ready
- Printing
- Pause
- Out of Memory
- Carriage Open
- Over Heat
- Paper Jam
- Paper Empty
- Ribbon Error
- Cutter Error

Printer File
This option allows you to use the following functions:
Printer File Options - Upload a file to the DRAM or FLASH memory
- List out the files in the memory
- Run the downloaded files
- Delete the downloaded files
- Format the entire memory
 [
[ Back To Top ]
