RJ-2150
FAQs & Troubleshooting |
How do I insert/change the paper or label roll?
-
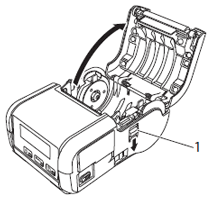
Pull the cover open lever in the direction shown to open the media roll compartment cover.

1 Cover open lever -
Inserting or removing the paper or label roll
-
Inserting the paper or label roll
-
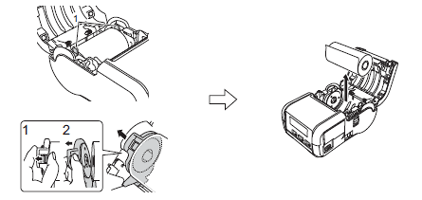
Open the roll guides by lifting the roll guide adjustment lever and pulling both roll guides outwards.
Insert the media roll into the media roll compartment with the roll feeding from the bottom as shown.

1 Roll guide adjustment lever
2 Roll guide
3 Print surface (faces outwards on the roll)Make sure that both roll guides are properly positioned to prevent the media roll from moving sideways.
The thermal sensitive side must be on the outside of the roll and installed as shown to print correctly. -
While lifting the roll guide adjustment lever, push in both roll guides to the roll width. Insert the media roll so that it is positioned straight in the media roll compartment.

-
Open the roll guides by lifting the roll guide adjustment lever and pulling both roll guides outwards.
-
Removing the paper or label roll
While pushing the roll release lever, tilt one of the roll guides slightly, and then remove the roll. The roll can be removed without changing the position of the roll guides.
Do not forcefully tilt the roll guides too far. Otherwise, the roll guides could break

1 Roll release lever
2 Roll guide
-
Inserting the paper or label roll
-
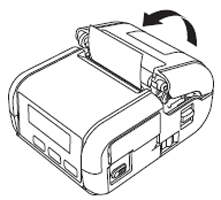
Close the media roll compartment by pressing down on the centre of the cover until it locks into place.

-
When using die-cut labels, press the
 (Feed) button after inserting the media roll.
The printer will adjust the label to the correct starting position. - Use genuine Brother media.
-
When using die-cut labels, press the
