RL425
FAQs & Troubleshooting |
Tangled thread on wrong side of fabric
Symptom
-
The thread becomes tangled on the wrong side of the fabric.
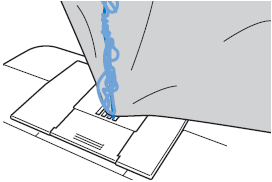
- After starting sewing, a rattling noise is made and sewing cannot continue.
-
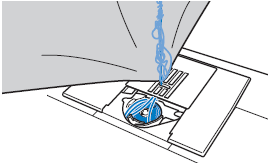
Looking under the fabric, there is tangled thread in the bobbin case.
Cause
Incorrect upper threading
If the upper thread is incorrectly threaded, the upper thread passed through the fabric cannot be firmly pulled up and the upper thread becomes tangled in the bobbin case, causing a rattling noise.
Remedy/check details
Remove the tangled thread, and then correct the upper threading.
Removing the tangled thread
-
Turn off the sewing machine.
-
Remove the tangled thread. If it cannot be removed, cut the thread with scissors.

For details, refer to "How do I clean the machine? (Cleaning the race)".
-
If the threads remain under the needle plate, remove the needle plate, and then remove the threads.
-
Raise the presser foot lever to raise the presser foot.
-
Remove the upper thread from the machine.
-
If the needle plate and the bobbin case were removed from the machine, correctly install the bobbin case and attach the needle plate.
For details, refer to "How do I clean the machine? (Cleaning the race)".
-
If the bobbin was removed from the bobbin case, correctly install the bobbin.
For details, refer to "How do I install the bobbin wound with thread?".
Threading the upper thread
[1] Preparing for threading
-
Turn off the sewing machine.
-
Raise the presser foot lever to raise the presser foot.
-
Raise the needle to its highest position by turning the handwheel toward you (counterclockwise).

(1) Turn toward you so that this mark points up to the highest position.Be sure that the presser foot is raise and the needle is correctly raised. If the operation is not performed properly, it may cause troubles during sewing and poor sewing results.
[2] Threading the upper thread
-
Correctly set the spool of thread to the spool pin.
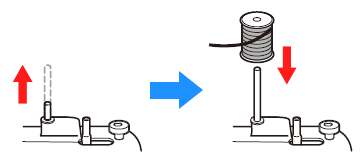
- If the spool of thread is in the wrong place, or is set incorrectly, the thread may tangle on the spool pin and cause the needle to break.
-
While holding the thread from the spool with your right hand, pass the thread toward you, in the groove on the thread guide.
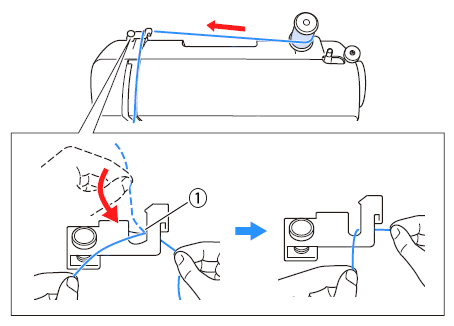
(1) Spring - Make sure that the spring in the groove catches the thread.
-
Feed the upper thread as shown in the following illustration.
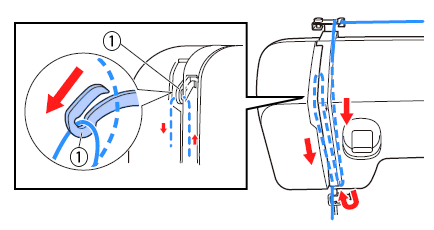
(1) Thread take-up lever -
Make sure you guide the thread through the thread take-up lever from right to left as shown in the illustration above.
-
Make sure you guide the thread through the thread take-up lever from right to left as shown in the illustration above.
-
Put the thread behind the guide above the needle.
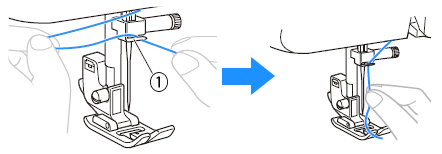
(1) Needle bar thread guide
[3] Threading the needle
-
Pass the thread through the eye of the needle from the front to the back.

[4] Drawing up the bobbin thread
-
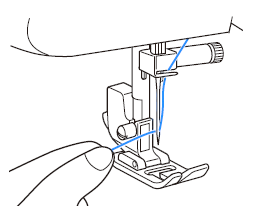
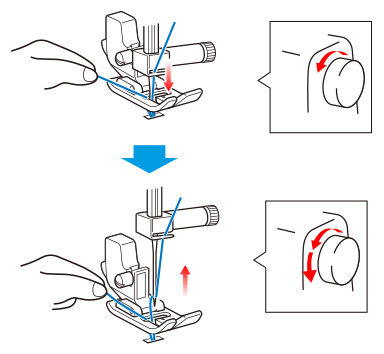
Lightly hold the end of the upper thread.
-
While lightly holding the end of the upper thread, slowly turn the handwheel toward you (counterclockwise) by hand to lower and then raise the needle.
-
Pull on the upper thread to draw up the lower thread.
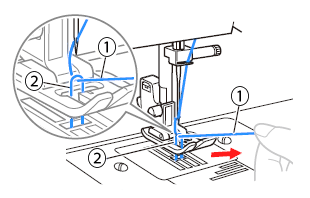
(1) Upper thread
(2) Lower thread -
Pull out about 10 cm (4 inches) of both threads and put them toward the back of the machine under the presser foot.
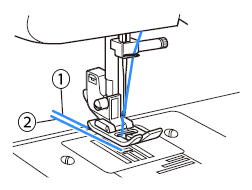
(1) Upper thread
(2) Lower thread
