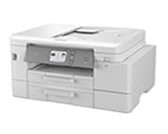
MFC-J4540DW(XL)
 |
FAQs & Troubleshooting |
Scan using Brother iPrint&Scan (Windows / Mac)
-
Load your document.
-
Start Brother iPrint&Scan.
-
Windows:
Double-click the  (Brother iPrint&Scan) icon on your computer's desktop.
-
Mac:
In the Finder menu bar, click Go > Applications, and then double-click the iPrint&Scan icon.
The Brother iPrint&Scan screen appears.
To download the latest application:
-
For Windows:
Go to your model's Downloads page, and then download and install Brother iPrint&Scan.
-
For Mac:
Download and install Brother iPrint&Scan from the Apple App Store.
-
If your Brother machine is not selected, click the Select your Machine button, and then select your model's name from the list. Click OK.
-
Click the Scan icon.
-
Configure the scan settings, and then click the Scan button to start scanning.
-
After all the documents have been scanned, select the option for saving and sharing scanned data.
-
Configure detailed settings, including the File Name and the File Type.
To combine multiple scans into a file, select PDF as a file type.
-
Complete the scanning process.
If your question was not answered, have you checked other FAQs?
Have you checked the manuals?
If you need further assistance, please contact Brother customer service:
Related Models
MFC-J4335DW(XL), MFC-J4340DW(E), MFC-J4535DWXL, MFC-J4540DW(XL)
Content Feedback
To help us improve our support, please provide your feedback below.
 (Brother iPrint&Scan) icon on your computer's desktop.