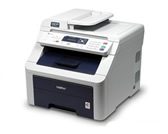
DCP-9010CN
FAQs & Troubleshooting |
Carry out calibration to improve the colour density
The output density for each colour may vary depending on the environment the machine is in, such as temperature and humidity. Calibration helps you to improve the colour density.
The instructions vary depending on the printer driver you are using:
- If you are using the standard printer driver, perform the calibration from the printer driver or using the status monitor.
- If you are using the BR-Script printer driver (PS driver), perform the calibration from the control panel of the machine.
1. Perform the calibration from the printer driver or using the status monitor
Follow the instructions for your printer driver and Operation System (OS).
The screens on your computer may vary depending on your OS.
Windows
- Open Printing Preferences. (Click here to see the details of how to open Printing Preferences.)
-
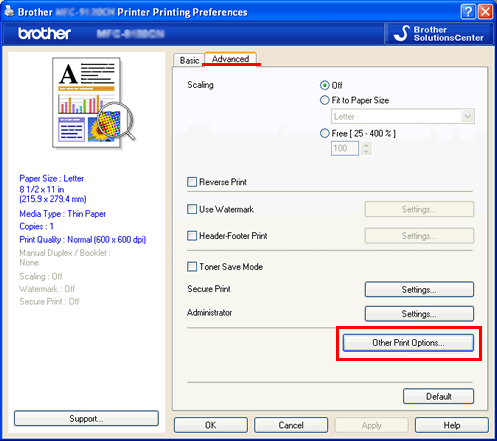
Open the Advanced tab and click the Other Print Options button.
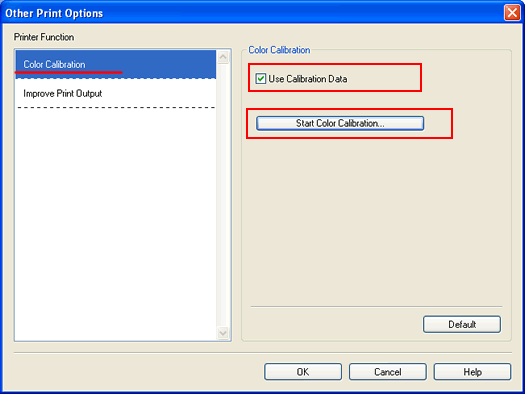
- Select Colour Calibration in the Printer Function list.
-
Click Start Colour Calibration in the Colour Calibration section.
The machine attempts to get the latest colour calibration data from your machine. - Make sure that the Use Calibration Data check box is selected.
-
Click OK. The latest colour calibration data is now set.
Macintosh
- Open System Preferences.
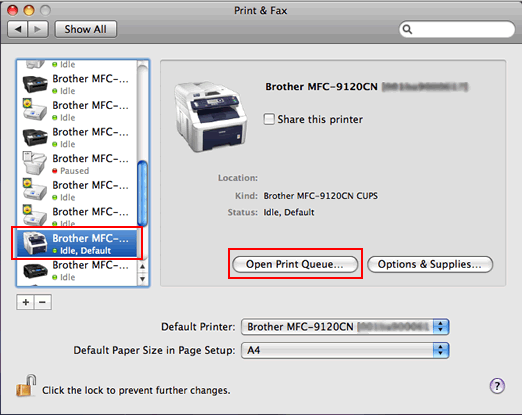
- Click the Print & Fax or Print & Scan icon.
- Select your machine's model name.
-
Click the Open Print Queue button.
-
Click the Utility icon in the menu bar.
(For example, for Mac OS X 10.6 or later, click Printer Setup, select the Utility tab, and click Open Printer Utility.)
-
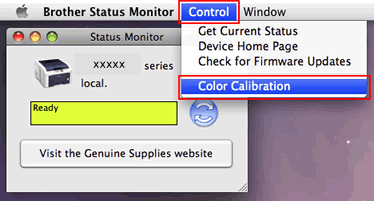
The Status Monitor is now active. Go to the menu bar and click Control > Color Calibration.
-
The Colour Calibration dialog box appears. Read the message and click OK.
The machine starts colour calibration and then the printer driver attempts to get the calibration data from the machine.
2. Perform the calibration from the control panel of the machine
- Press the Menu button.
- Press the Up or Down Arrow key to select Printer. Press OK.
- Press the Up or Down Arrow key to select Calibration. Press OK.
- Press the Up or Down Arrow key to select Calibrate. Press OK.
- Press the 1 key to select Yes.
To reset the colour calibration parameters back to the factory settings, do the following by using the control panel:
- Press the Menu button.
- Press the Up or Down Arrow key to select Printer. Press OK.
- Press the Up or Down Arrow key to select Calibration. Press OK.
- Press the Up or Down Arrow key to select Reset. Press OK.
- Press the 1 key to select Yes.
Content Feedback
To help us improve our support, please provide your feedback below.
