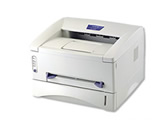
HL-1470N
FAQs & Troubleshooting |
How can I change the IP address?
Introduction
There are several different methods of assigning an IP address on your Brother printer:
-
Use the Printer front panel (if applicable)
-
Use the BRAdmin Professional Software
-
Use the ARP command
-
Use the an automatic IP address allocation method such as DHCP, BOOTP or RARP
Front Panel Method
-
Press the '+' button until 'NETWORK' is displayed on the printer LCD panel.
-
Press the 'Set' button to display 'TCP/IP'
-
Press the 'Set' button.
-
'TCP/IP ENABLE' is displayed.
-
Press the '+' button
-
IP ADDRESS is displayed.
-
Press the 'Set' button.
The current IP address of the printer is displayed and a flashing cursor will be at the first IP address setting.
The default IP address for a Brother printer is 192.0.0.192. To change this value use the '+' or '-' buttons to increase or decrease a value. When the value has changed, press the 'Set' button to accept the setting.
To change the Subnet mask do the following:
-
Press the '+' button until 'NETWORK' is displayed on the printer LCD panel.
-
Press the 'Set' button to display 'TCP/IP'.
-
Press the 'Set' button.
-
TCP/IP ENABLE is displayed.
-
Press the '+' button until 'SUBNET MASK =' is displayed.
-
Press the 'Set' button.
The current Subnet address of the printer is displayed and a flashing cursor will be at the first Subnet mask setting.
To change this value use the '+' or '-' keys to increase or decrease a value. When the value has changed, press the 'Set' button to accept the setting.
When the Subnet mask has been set, press the 'Go' button and power cycle the printer.
BRAdmin Professional Software
The BRAdmin Professional software can be used to change the IP address of a Brother printer. It can set the IP address if it has not already been set, or it can change the address if it has already been set.
IP address has not been set yet
- If the printer is set to its default factory settings, when you start the BRAdmin Professional software, the printer will appear as an unconfigured device. This means that the IP address needs to be set before you can communicate with it.
- If the printer appears as an unconfigured device, double click it and you will be able to enter a IP address, subnet mask and gateway address. Click 'OK' to accept the settings and the printer is now ready to print.
IP address has been set, but you want to change it
- To change the IP address information, double click the printer you wish to change and enter the print server password (refer to the print server userguide for information on passwords).
- Select the 'TCP/IP' tab and enter the new IP address information.
ARP Command
The ARP command can be used by most systems that use the TCP/IP protocol. For example Linux systems, Unix systems and Microsoft Windows systems that use the TCP/IP protocol are supplied with a series of utilities that include the ARP command.
Automatic IP address allocation using DHCP, BOOTP or RARP
- Brother print servers are configured to automatically search for an IP address during their power on cycle. This means that when a Brother printer is powered on, it will attempt to obtain an IP address for any automatic system that may be in the network. This means that if you have a network that uses the DHCP protocol, the printer, if it is able to communicate with the DHCP server, will automatically receive an IP address. There is no special configuration required.
- Equally, if the printer is connected to a network that uses the BOOTP or RARP protocols, the printer will automatically receive an IP address from either one of these systems providing your BOOTP and RARP servers are configured correctly.
- Please note that if you manually assign an IP address using the BRAdmin software, the printer front panel or via the ARP command, the printer will no longer search for a DHCP, BOOTP or RARP server.
