HL-L9200CDWT
FAQs & Troubleshooting |
Replace Drum
The Brother machine has separate consumables - the toner cartridges and the drum unit. Verify you replace only the drum unit and not the toner cartridges. If you want to know their difference, refer to "What is the difference between the toner cartridges and the drum unit?"
Replace the drum following the steps below:
Replacing the drum unit
- Make sure that the machine is turned on.
-
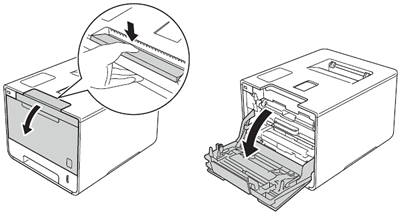
Press the front cover release button and then open the front cover.
-
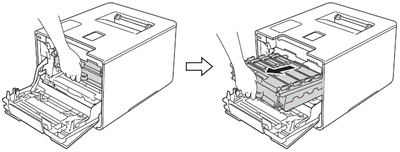
Hold the blue handle of the drum unit. Pull the drum unit out until it stops.
-
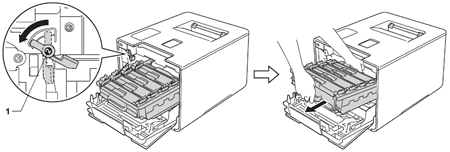
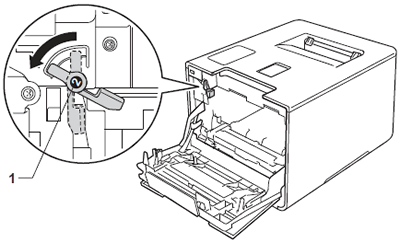
Turn the blue lock lever (1) at the left of the machine counterclockwise to the release position. Holding the blue handles of the drum unit, lift the front of the drum unit and remove it from the machine.
-
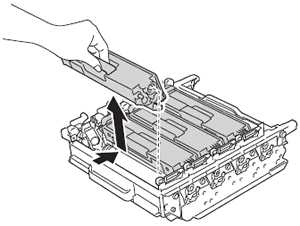
Hold the handle of the toner cartridge and gently push it forward to unlock it. Then pull it out of the drum unit. Repeat this for all the toner cartridges.
-
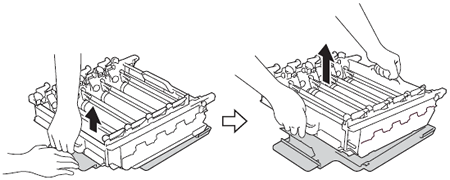
Unpack the new drum unit and remove the protective cover.
-
Hold the handle of the toner cartridge and slide it into the appropriate coloured section of the drum unit until you hear it click into place.
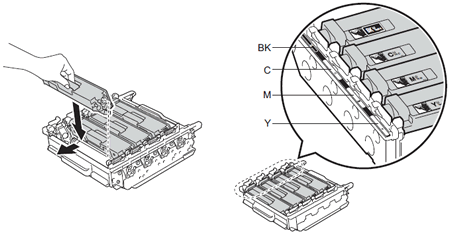
BK-Black C-Cyan M-Magenta Y-Yellow
-
Make sure the blue lock lever (1) is in the release position as shown in the illustration.
-
Gently slide the drum unit into the machine until it stops at the blue lock lever.
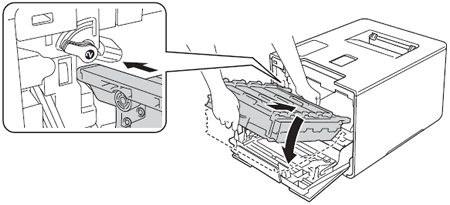
-
Turn the blue lock lever (1) clockwise to the lock position.
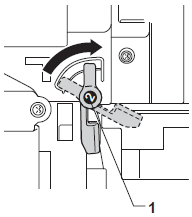
-
Push the drum unit in until it stops.
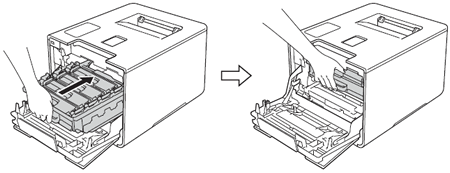
- Close the front cover of the machine.
Reset the drum counter
When you replace the drum unit with a new one, you need to reset the drum counter by completing the following steps:
-
Press
 to interrupt the error displayed on the Touchscreen.
 -
Press
 .
. - Press Machine Information > Parts Life.
-
Press
 until the Touchscreen message changes.
 - Press Drum.
- Press Yes.
-
Press
 .
.
Content Feedback
To help us improve our support, please provide your feedback below.
