MFC-7460DN
FAQs & Troubleshooting |
Print on envelopes, labels, or thick paper from the manual feed slot.
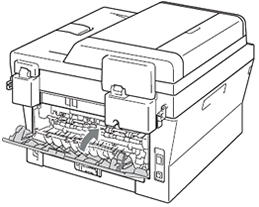
The machine is equipped with a manual feed slot where envelopes, labels, and thick paper can be manually fed one at a time. The paper tray is for plain paper, recycled paper, and thin paper only. When printing with the back cover open, the machine has a straight paper path from the manual feed slot through to the back of the machine.
Envelopes, labels and thick paper can be fed from the manual feed slot only. Do not use the paper tray.
Click here for more information about the recommended types of paper, envelopes, and labels.
Paper Weight
- Plain paper: 20-28lbs (75-105g/㎡)
- Thin paper : 16-20lbs (60-75g/㎡)
- Thick paper: 28-43lbs (105-163g/㎡)
Follow the steps below to print on envelopes, labels, or thick paper.
NOTE: Illustrations shown below are from a representative product and may differ from your Brother machine.
-
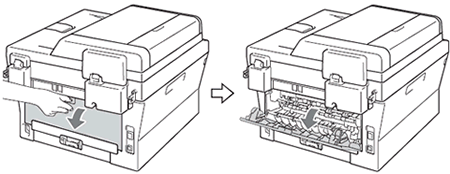
Open the back cover.
-
Do one of the following.
- If you print on labels or thick paper, go to STEP 4.
-
If you print on envelopes, go to STEP 3.
-
For printing on envelopes only:
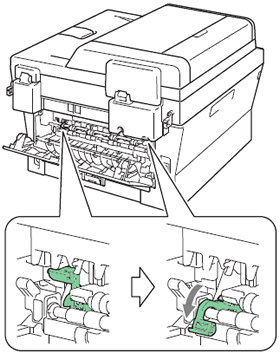
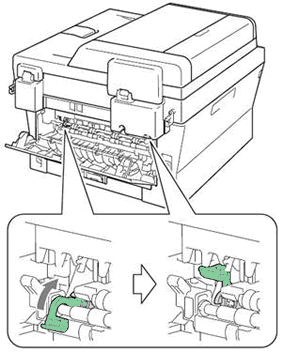
Pull down the two green levers, one on the left-hand side and one on the right-hand side.
-
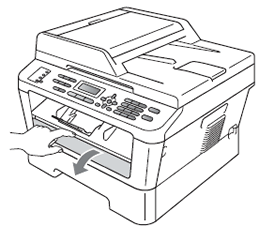
Open the manual feed slot cover at the front of the machine.
-
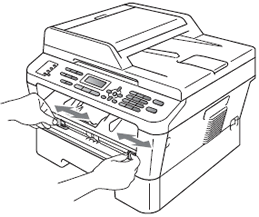
Using both hands, slide the manual feed slot paper guides to the width of the paper, envelope, or label sheet that you are going to use.
-
Using both hands, put one sheet of paper, one envelope, or one full sheet of labels in the manual feed slot until the front edge touches the paper feed roller.
DO NOT insert labels that have previously been used or that have some labels missing from the sheet. It may cause serious jams and damage to your Brother machine.
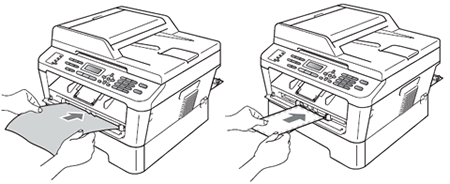
Once the machine has grasped the paper, envelope, or label sheet, let go. The machine will hold the media in place until the print data is sent to the machine.

- Put the side to be printed on face up.
- Make sure the paper, envelope, or label sheet is straight and in the correct position in the manual feed slot. If it is not, it may not feed correctly resulting in a skewed printout or a paper jam.
- Do not put more than one sheet of paper, one envelope, or one label sheet in the manual feed slot at a time, as it may cause a jam.
- If you put a sheet of paper, an envelope, or a label sheet in the manual feed slot before the machine is in the Ready mode, it may be ejected without being printed on.
-
Choose the appropriate Paper Size and Media Type for the paper, envelope, or label sheet in the printer driver.
- Remove each sheet of paper, envelope, or label sheet as soon as it has been printed. Stacking them may cause a jam or curl.
- If envelopes are smudged during printing, set the Media Type to Thick Paper or Thicker Paper to increase the fixing temperature.
-
Send the print data to the machine.
-
After the paper, envelope, or label sheet exits from the machine, remove it. If you are printing more than one sheet, put the next sheet of paper, envelope, or full label sheet in to the manual feed slot.
-
When you have finished printing, do one of the following.
- If you printed on labels or thick paper, go to STEP 12.
-
If you printed on envelopes, go to STEP 11.
-
For printing on envelopes only:
Reset the two green levers that were pulled down in STEP 2 back to their original position.
-
Close the back cover.
