NC-7100w
FAQs & Troubleshooting |
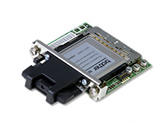
Installing the Print Server
- Turn off the printer power switch, and unplug the printer if connected.
- Disconnect the interface cable from the printer.
- Slide and remove the side cover of the printer.
- Open the interface access cover.
- Loosen the two screws, and then remove the network cover plate.

- Put the NC-7100w print server connector firmly into the connector of the main controller board by aligning the two screws to the groove of the printer, and then secure it with the two screws.
- Close the interface access cover.
- Put the side cover back on.
- Plug the printer back in and then turn on the power switch.
- Make sure that the POWER LED of the printserver is on.
- Print a Network Configuration Page and make sure that the IP address has been set to 169.254.x.x (where x.x are numbers between 1 and 254). If the IP address has not yet initialized, wait for up to 5 minutes and then print another Network Configuration Page.
Content Feedback
To help us improve our support, please provide your feedback below.