MFC-J870DW
FAQs & Troubleshooting |
Print an image from my Windows computer onto a printable disc.
Your Brother machine can print directly onto printable disc media, including CD-R/RW, DVD-R/RW, or Blu-ray Disc™.
Brother offers an easy-to-use application for printing onto printable discs. The NewSoft CD Labeler application offers templates for creating disc labels and matching jackets. You can also use this application to create your own custom disc labels.
Only use the Brother-supplied disc-printing software to print onto a CD-R/RW, DVD-R/RW, or Blu-ray Disc™. Printing from other applications can stain the inside of your Brother machine.
Before you can print from a Windows computer, you must have installed the NewSoft CD Labeler software and created a disc label.
- To install the NewSoft CD Labeler software, see the Related FAQ's at the end of the page,
- If you have already installed the NewSoft CD Labeler software but have not created a disc label, click here to see how to use the NewSoft CD Labeler software on a Windows computer.
- If you have already installed the NewSoft CD Labeler software and created a disc label, go to next Step1.
-
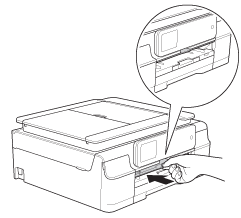
If the machine's Disc Guide is open, push it in to close it.
-
After you create your disc label in the NewSoft CD Labeler software, click Print
 .
.
-
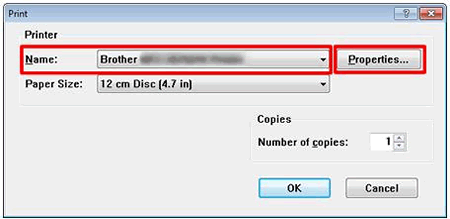
Select your model, and then click the printing properties or preferences button.
The printer driver window appears.
-
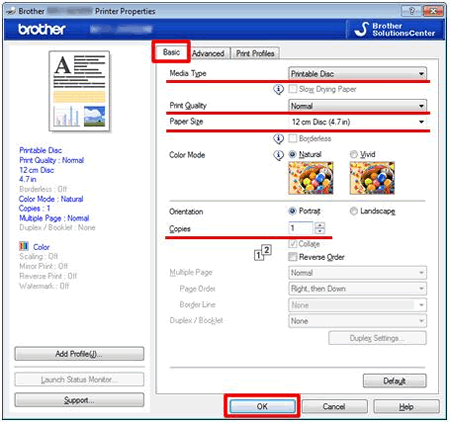
Select your settings for the following options on the Basic tab.
- Media Type: Select Printable Disc
- Print Quality: Select Normal or Slow Drying
- Paper Size: Select 12 cm Disc (4.7 in)
- Copies: Select the number of copies you want to make
If you cannot select 12 cm Disc (4.7 in) from the Paper Size drop-down list, go to Downloads section of this website and download Full Driver & Software Package. The installation instructions are available on the download page. -
Change other settings as desired.
-
Click OK.
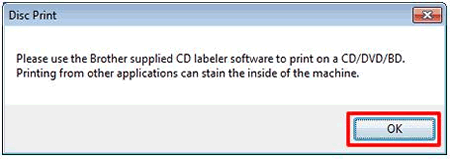
- A dialog box asks you to use the Brother-supplied CD labeled software to print on printable disc media. -
Click OK.
- A screen showing your machine's model number, the paper size you selected, and the number of copies you want to make will appear. -
Click OK.

- A dialog box asks you to make sure there is at least four inches of space behind the machine. -
Click OK.
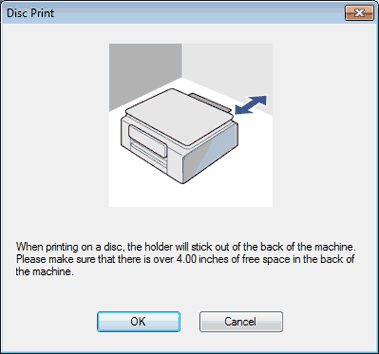
- The machine will prompt you to make sure there is at least four inches of space behind the machine. -
Make sure there is more than 4 in.(10cm) of free space behind machine.
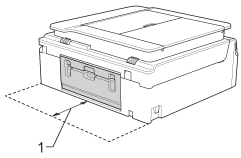
- 4 in. (10 cm)
-
Press the RIGHT ARROW key on the LCD of the Brother machine.
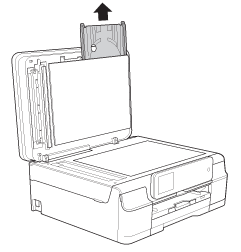
The LCD asks you to remove the Disc Tray from the scanner cover. -
Open the scanner cover and remove the Disc Tray.
-
Close the scanner cover.
-
Press OK.
-
Push and pull down the Disc Guide to open it.
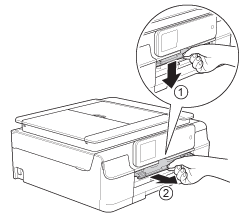
-
Firmly place a printable disc on the Disc Tray.
- Make sure to place the disc printed surface face up on the Disc Tray.
- Make sure there is no dirt on the Disc Tray.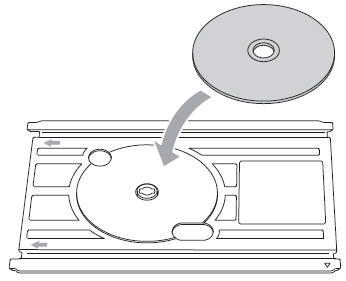
-
Insert the Disc Tray into the Disc Guide.
- Make sure to line up the triangular mark on the Disc Tray with the one on the Disc Guide.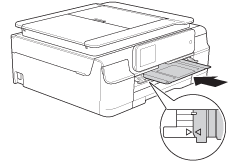
Do not push the Disc Tray all the way into the Disc Guide. If you push the Disc Tray past the point where the triangular marks are aligned, it will get stuck inside the machine.
-
Press OK.
-
Press Start.
- The machine starts printing on the disc.
-
Do one of the following:
- If you are printing only one disc, the LCD will display a message telling you that printing is finished. Go to STEP22.
- If you are printing more than one disc, follow these steps:
-
Remove the Disc Tray from the Disc Guide.
-
Remove the printed disc from the Disc Tray.
-
Put a new disc on the Disc Tray.
-
Press OK.
-
Press Start.
The machine starts printing the next disc.
Repeat STEP a thorough e for each additional disc you want to print.
When you are finished printing, go to next Step22.
If the printed image runs off the edge of the disc, you may need to adjust the disc print position. Click here to see the information for it.
-
Remove the Disc Tray from the Disc Guide.
-
Remove the Disc Tray from the Disc Guide.
-
Remove the disc from the Disc Tray.
-
Close the Disc Guide.
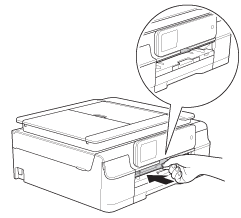
- Replace the Disc Tray in the scanner cover.
