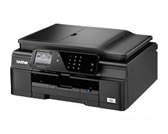
MFC-J650DW
FAQs & Troubleshooting |
Install the ink cartridges
Follow the steps below to install the ink cartridges:
NOTE: Illustrations shown below are from a representative product, and may differ from your Brother machine.
Make sure you install the Starter Ink Cartridges or Introductory Ink Cartridges included with your machine first.
- Make sure that the power is turned on. The machine's display (hereinafter called Touchscreen) will display No Ink Cartridge.
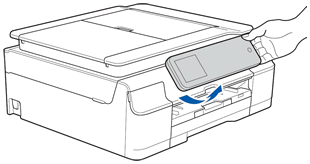
You can adjust the control panel angle to read the Touchscreen more easily. Hold the edge of the control panel to avoid accidentally pressing any of the Touchscreen options.
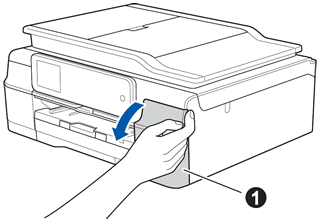
- Open the ink cartridge cover (1).
- Remove the orange protective part (1).
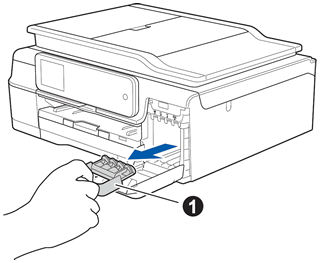
Do not throw away the orange protective part. You will need it if you transport the machine.
- Unpack the ink cartridge.
Turn the green release lever on the orange protective packing (1) counterclockwise until it clicks to release the vacuum seal. Then remove the orange protective packing (1) as shown.
- DO NOT shake the ink cartridges. If ink stains your skin or clothing, wash with soap or detergent at once.
- DO NOT touch the cartridge in the area indicated (2), as this can cause the machine not to function with the cartridge.
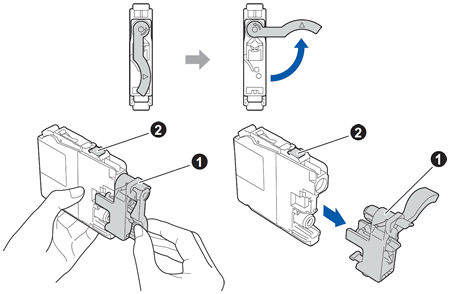
- DO NOT shake the ink cartridges. If ink stains your skin or clothing, wash with soap or detergent at once.
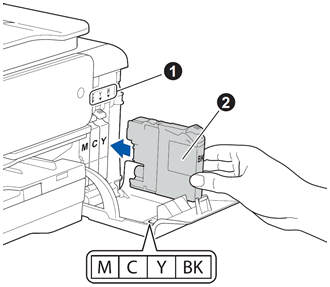
- Take care to match the sticker color (1) with the cartridge color (2) as shown in the diagram below.
Install each ink cartridge in the direction of the arrow on the label.
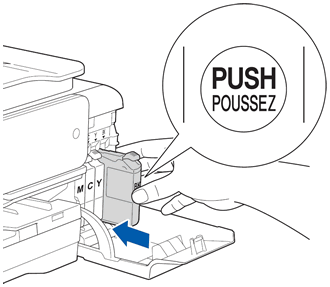
- Gently push the back of the ink cartridge marked "PUSH" until it latches. After all the ink cartridges are installed, close the ink cartridge cover.
The machine will prepare the ink tube system for printing. This process will take approximately four minutes. Do not turn off the machine.
- When the preparation process has finished, the Touchscreen displays Load paper and press [OK]. Press OK.
- Check the quality of the four color blocks on the sheet. (black/yellow/cyan/magenta)
- If all lines are clear and visible, press Yes to finish the quality check.
OK
If lines are missing, press No and follow the steps on the Touchscreen.
Poor
Content Feedback
To help us improve our support, please provide your feedback below.
