Innov-is M340ED
FAQs & Troubleshooting |
How do I restart embroidering if the thread breaks or the bobbin runs out of thread during embroidering?
When the bobbin thread is almost empty
When the bobbin begins to run out of thread during embroidering, the machine will stop and the message "The bobbin thread is almost empty." will appear. If very little sewing remains, you can embroider approximately 10 final stitches without rethreading the machine by pressing "Start/Stop" button. The machine will stop after sewing approximately 10 stitches and the message will appear again. To continue embroidering, press "OK" key to close the message screen and follow the directions below to replace the bobbin thread.
-
Press
 (Thread cutter button) to cut threads.
-
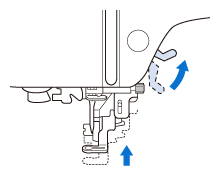
Raise the presser foot lever to raise the presser foot.
-
Press
 (Presser foot/Needle exchange key) on the operation panel. The screen changes, and all keys and operation buttons are locked (except
  ).
).

-
Remove the embroidery frame under the presser foot while raising the presser foot lever even further.
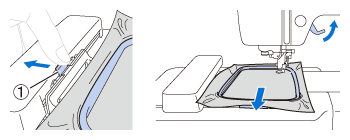
(1) Lever
Be careful not to bump the embroidery unit carriage or the presser foot when removing the embroidery frame. Otherwise, the pattern will not embroider correctly.
-
Remove the empty bobbin, and then, insert a wound bobbin into the machine.
-
Attach the embroidery frame.

(1) Embroidery frame guide tabs
(2) Embroidery carriage frame holder slotsBe careful not to bump the embroidery unit carriage or the presser foot when attaching the embroidery frame. Otherwise, the pattern will not embroider correctly.
-
Press
 (Presser foot/Needle exchange key) on the operation panel to unlock all keys and operation buttons.
-
Press
 (Forward/Backward stitch key) on the screen.
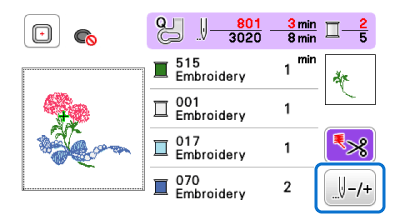
-
Press
 to move the needle back about 2 or 3 stitches from the position where the embroidery was stopeed.
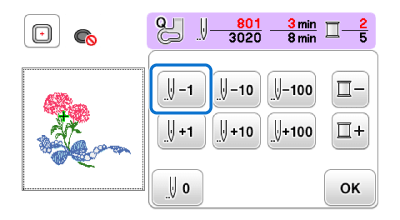
- It is recommended to stitch over the top of the last two or three stitches for completely coverage.
- Be careful when going back or forward through the stitching since the embroidery frame moves at the same time.
-
Press "OK" key to close the settings screen after moving the needle back.
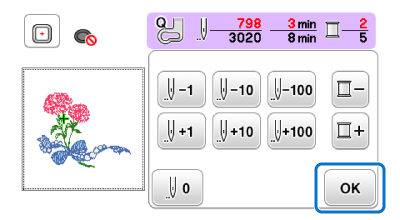
-
Lower the presser foot lever.
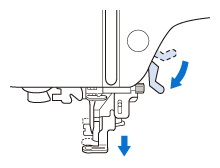
-
Press
 (Start/Stop button) to continue embroidering.
When the thread breaks
If you are interrupted the embroidery on the way by trouble such as thread breakage or tangled thread, follow the procedure described below to rethread the thread to the machine. Go the needle back to the position where the stitches have already been sewn, and then, restart the embroidery.
-
Press
 (Start/Stop button) to stop the machine if the machine continues embroidering.
If the sewing machine stopped with the message "Check and rethread the upper thread.", press the "OK" key on the screen. -
If the machine stopped with the needle lowered (in the fabric), press
 (Needle position button) to raise the needle.
-
Raise the presser foot lever to raise the presser foot.
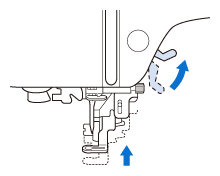
- Remove the tangled thread or the stitches emoboirered with only the upper thread.
1. To reset the bobbin thread
-
Press
 (Presser foot/Needle exchange key) on the operation panel. The screen changes, and all keys and operation buttons are locked (except
  ).
).

-
Remove the embroidery frame under the presser foot while raising the presser foot lever even further.
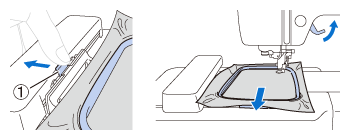
(1) Lever
Be careful not to bump the embroidery unit carriage or the presser foot when removing the embroidery frame. Otherwise, the pattern will not embroider correctly.
-
Cut the thread that is not sewn. If the thread becomes tangled on the wrong side of the fabric, remove them.
-
Remove the bobbin once from the bobbin case, and then, reset the bobbin thread correctly.
-
Attach the embroidery frame.

(1) Embroidery frame guide tabs
(2) Embroidery carriage frame holder slotsBe careful not to bump the embroidery unit carriage or the presser foot when attaching the embroidery frame. Otherwise, the pattern will not embroider correctly.
-
Press
 (Presser foot/Needle exchange key) on the operation panel to unlock all keys and operation buttons.
2. To rethread the upper thread
-
If the upper thread is tangled or breaks, remove the upper thread once from the machine.
-
Rethread the upper thread to the machine correctly.
3. To restart embroidering after going the needle back to the area where the thread broke
-
Press
 (Forward/Backward stitch key) on the screen.
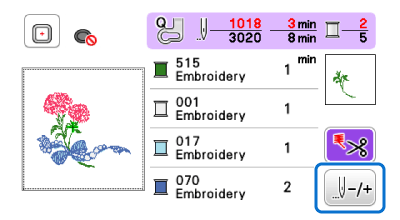
-
Press
 ,
,  or
or  to move the needle back about 2 or 3 stitches from the position where the thread has broken.
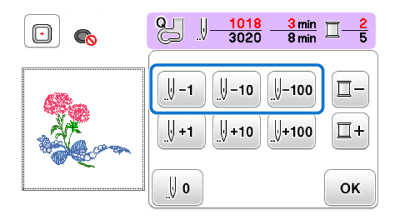
- It is recommended to stitch over the top of the last two or three stitches for completely coverage.
- Be careful when going back or forward through the stitching since the embroidery frame moves at the same time.
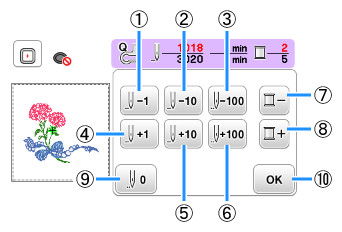
(1) Each touch of this key moves one stitch back through the stitching. (2) Each touch of this key moves ten stitches back through the stitching. (3) Each touch of this key moves one hundred stitches back through the stitching. (4); Each touch of this key moves one stitch forward through the stitching. (5) Each touch of this key moves ten stitches forward through the stitching. (6) Each touch of this key moves one hundred stitches forward through the stitching. (7) Touch this key once to return to the beginning of the stitching for the color being sewn. Afterward, each touch of this key returns to the beginning of embroidering for the previous thread color. (8) Each touch of this key advances to the beginning of embroidering the next thread color. (9) Touch this key to return to the beginning of the first color. (10) Touch this key to close this screen. -
If the needle is moved back too far through the stitching, touch
 or
or  to go forward through the stitching.
-
If you want to restart embroidering from the beginning of the stitching for the color being sewn, press
 .
.
-
If you want to restart embroidering from the beginning of the first color, press
 .
.
-
Press "OK" key to close the settings screen after moving the needle back.
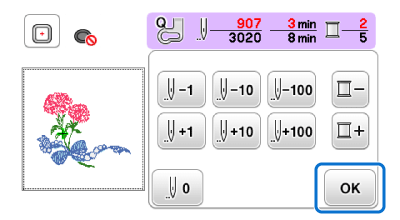
-
Lower the presser foot lever.
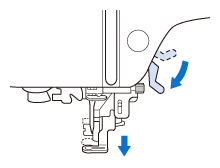
-
Press
 (Start/Stop button) to continue embroidering.
