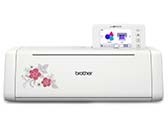
SDX1250
FAQs & Troubleshooting |
Settings for Specific Functions
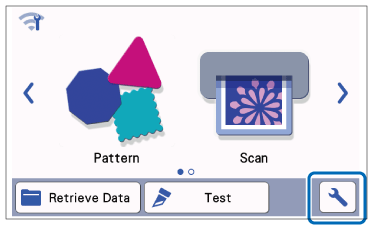
From the LCD panel, touch ![]() to select and adjust the settings for each function.
to select and adjust the settings for each function.
This section contains descriptions of the machine settings which will appear when ![]() is selected on the home screen.
is selected on the home screen.
Group 1
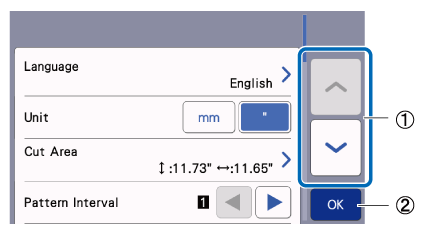 |
(1)
(2) |
Touch to display the previous or next item.
Touch to finish specifying settings. |
Language
Select the display language. Touch this button, select the desired display language, and then touch the OK key.
Unit
Select either millimeters or inches as the displayed measurement units.
Cut Area
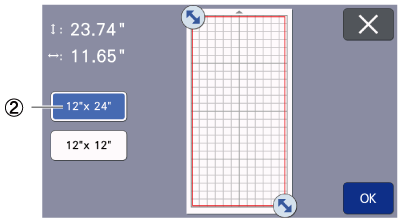
Specify the area for cutting/drawing according to the size of material to be used. Touch this button, and then touch and drag the area resizing keys to specify the area. When using a 12" × 24" (305 mm × 610 mm) mat, touch ![]() to select a larger mat size, and then specify the area size. When using a 12" × 12" (305 mm × 305 mm) mat, touch
to select a larger mat size, and then specify the area size. When using a 12" × 12" (305 mm × 305 mm) mat, touch ![]()
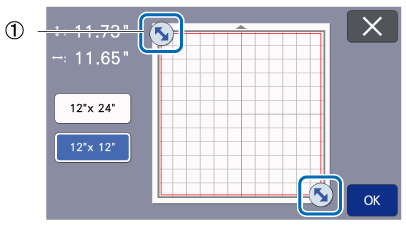 |
(1)
|
Area resizing key (Using the touch pen (stylus), touch the key, and then drag it around the screen to specify the area.) |
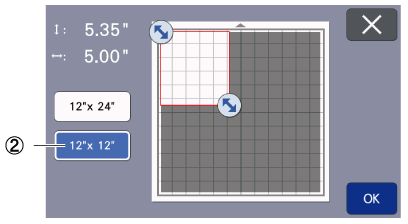 |
(2) | Mat size key |
 |
Touch the OK key to apply the settings.
Touch ![]() to return to the previous screen without applying the settings.
to return to the previous screen without applying the settings.
Pattern Interval
Specify the spacing between patterns as well as white space around the edges of cutting area when patterns on the mat layout screen are automatically arranged. The larger the number setting, the further spacing between patterns.
Set the pattern interval to “3” or higher when lightweight fabric is attached to the mat with a high tack adhesive fabric support sheet.
Background
Adjust the contrast of a background image scanned with the background scanning function.
Group 2
Cut Speed
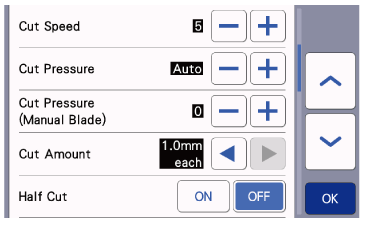
Adjust the cutting speed.
Cut Pressure
Adjust the cutting pressure.
Cut Pressure (Manual Blade)
Specify the cutting pressure when the optional manual blade is used.
Manual blade is an optional accessory.
For details on how to use manual blades, refer to How to use Standard Cut Blade Holder and Deep Cut Blade Holder
Cut Amount
Specify the cutting depth. Adjust the blade cut amount when a pattern with a sharp corner is cut from soft, thick material.
Half Cut
Select whether or not to make half-cuts. For details, refer to Half Cut (Kiss Cut) Settings.
Cut Pressure (Half Cut)
Specify the cutting pressure for half-cuts.
Blade Adjustment Area
Select from 1/4, 1/2, 3/4 or whole cutting area to be used for blade adjustment. Before cutting out a pattern, this machine performs an automatic blade adjustment, which adjusts the direction of the blade outside of the adhesive area of the mat.
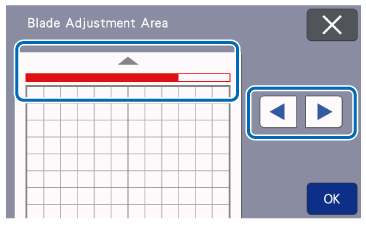
With each press of the left or right arrow key, the size of the blade adjustment area changes by 1/4.
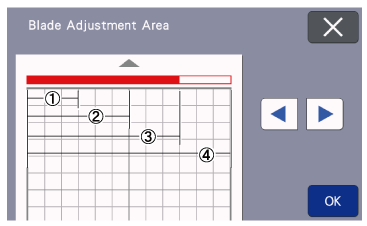 |
(1) 1/4 (2) 2/4 (3) 3/4 (4) Entire area |
Draw Speed
Adjust the drawing speed.
Draw Pressure
Adjust the drawing pressure. Adjustments to the drawing pressure will affect the finished product. Use the same material that the pattern will be drawn on to make the adjustments in advance. If the pressure is too high, the pen tip may be damaged. Adjust the pressure appropriately.
Group 3
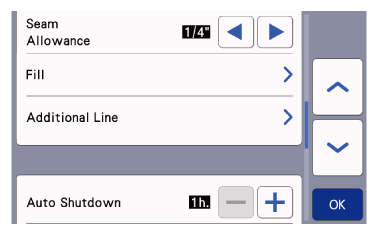
Seam Allowance
Specify the seam allowance. This is applied when drawing on fabric, then cutting it, for example, when making quilt pieces.
For details, refer to How do I Cut Around Drawings?
- When multiple patterns are cut at the same time, the setting specified in this screen is applied to all patterns.
- If cutting line data saved with a different seam allowance is imported and used, the setting specified in this screen will have priority over the saved setting.
Fill
Select the design that will be used to fill patterns.
Additional Line
With Number of Additional Line, specify the number of lines to be added. With Additional Line Spacing, specify the spacing of the lines to be added.
Group 4
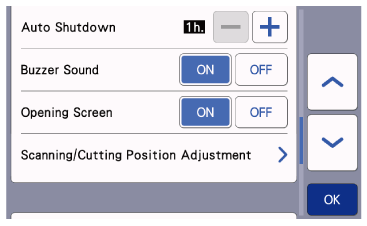
Auto Shutdown
Specify the length of time for the auto shutdown function. The setting can be specified in 1-hour increments.
Buzzer Sound
Select whether or not an operation sound is produced, for example, when a key is touched.
Opening Screen
Select whether the opening slide show is displayed after the machine is turned on. If the slide show is displayed, touch the screen to display the home screen.
Scanning/Cutting Position Adjustment
Group 5
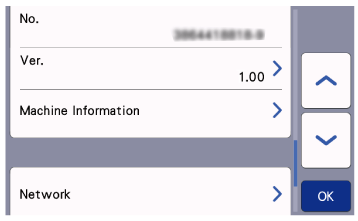
No.
Displays the serial number specific for this machine.
Ver.
Displays the version information for this software. Touch this button to update the machine’s software using a USB flash drive.
For details on updating the software, refer to Downloads.
Machine Information
Touch this button, this page displays machine information.
Group 6
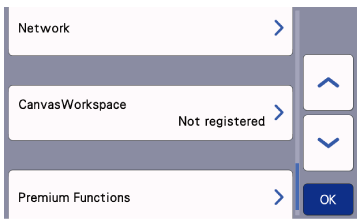
Network
Touch this button to set up a wireless network.
The wireless network connection can also be set up by touching ![]() in the home screen.
in the home screen.
Group 7
CanvasWorkspace
Touch this button to specify settings for registering the machine with CanvasWorkspace. These settings are necessary in order to transfer patterns via a wireless network connection.
For details on setting a wireless network, refer to How to connect my machine to a wireless network using the Setup Wizard.
For details on registering the machine with CanvasWorkspace, refer to How to register Your Machine with CanvasWorkspace.
For details on creating and transferring the data in CanvasWorkspace, Instructions for sending patterns created in CanvasWorkspace to the cutting machine for cutting or drawing.
Group 8
Premium Functions
Activate optional accessories and specify settings for their functions.
