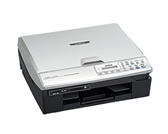
DCP-117C
FAQs & Troubleshooting |
"Near Empty [Color]" is appearing on my Brother machine's LCD? What does it mean and how do I clear it?
"Near Empty [Color]" is a notification that a particular color(s) of ink is running low. To clear a "Near Empty" message from the display, you need to replace the ink cartridge(s) that is near empty. However, if you do not want to replace the cartridge until it is empty, you can continue to use the machine with "Near Empty" on the LCD.You are not required to change the cartridge until the message "Ink Empty" appears. If you want to replace the near empty cartridge, follow the instructions below:
- Open the Scanner Cover by lifting from the right-hand side of the Brother machine until it locks securely into position.
- Locate the white plastic hook that is locked over the ink cartridge you want to change. Pull this hook toward you and remove the ink cartridge for the color indicated on the LCD.
Brother machines are designed to work with ink of a particular specification and work to a level of optimum performance when used with genuine Brother ink cartridges. Brother cannot guarantee this optimum performance if ink or ink cartridges of other specifications are used. Therefore, Brother does not recommend the use of cartridges other than genuine Brother cartridges with this machine or the refilling of empty cartridges with ink from other sources. If damage is caused to the print head or other parts of this machine as a result of the use of ink or ink cartridges other than genuine Brother products due to the incompatibility or lack of suitability of those products with this machine, any repairs required as a result will NOT be covered by the warranty.
- Open the new ink cartridge and remove it from its bag.
- Remove the yellow plastic cover from the bottom of the ink cartridge. Carefully remove the cover in the direction away from you.
- Take care when removing this cover to prevent spilling ink and staining your hands and clothing.
- If the cartridge cover comes off when you open the bag, the cartridge will not be damaged.
- IMPORTANT: Reinstall the ink cartridge(s) in the order that the Brother machine's LCD prompts you to.
Press down firmly on the ink cartridge until it is fully seated. Push the hook towards the cartridge to verify it is securely latched over the cartridge's top edge. If additional cartridges were removed, follow this procedure again for the next color indicated by the Brother machine's LCD.
- After installing the ink cartridge(s), lift the Scanner Cover slightly to release the lock.
- Gently push the Scanner Cover Support down and close the Scanner Cover.
- For each color cartridge that you changed, the Brother machine's LCD will prompt you:
"Did you change [color]?"
If you replaced the color that the LCD is asking you about, be sure to select "YES" by pressing 1 on the dial pad (for MFC users) or the up arrow key (for DCP users).
If you do not select "YES" for each of the cartridges that you replaced, then the "Near Empty" message will appear again.
- After you have confirmed which ink cartridges you changed, the Brother machine will begin a cleaning cycle that lasts approximately 3 minutes for each cartridge you replaced. During the cleaning process, the LCD alternately shows "Cleaning" and "Please Wait."
- Once this cleaning cycle is complete, your Brother machine's LCD should display the date and time.
If the message "Near Empty" continues to appear on the display, please contact Brother Customer Service from "Contact Us".
