HL-5250DN
FAQs & Troubleshooting |
How do I print on thick paper, labels and envelopes from the MP tray in Windows applications?
MP Tray mode is automatically turned on when paper is put in the multi-purpose tray.
Use the following steps for printing on thick paper, labels and envelopes.
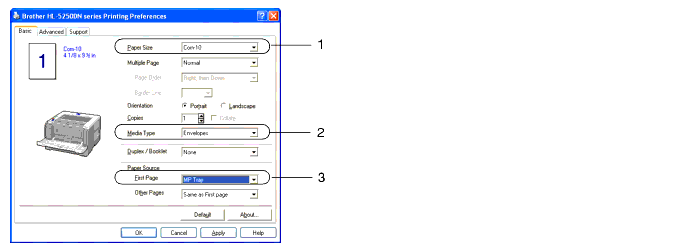
- Choose the following from the printer driver:
(1) Paper Size
(2) Media Type
(3) Paper Source
and any other settings.
[PCL printer driver]
[BR-Script printer driver]
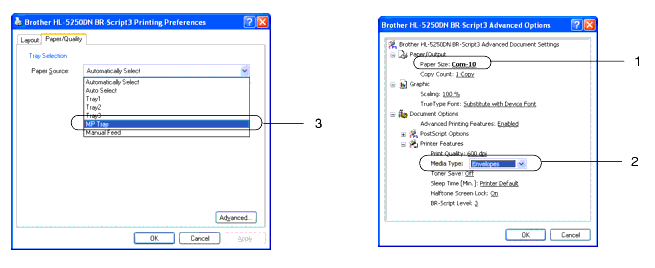
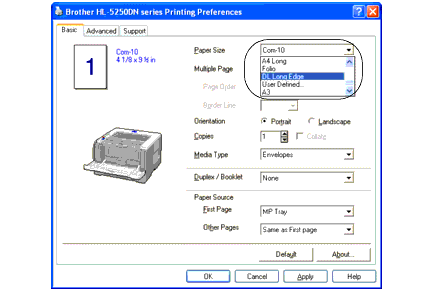
- When you use Envelope #10, choose Com-10 in Paper Size.
- For other envelopes which are not listed in the printer driver, such as Envelope #9 or Envelope C6, choose User Defined...
- Open the MP tray and lower it gently.
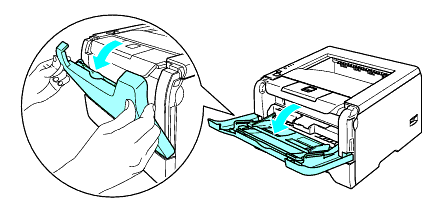
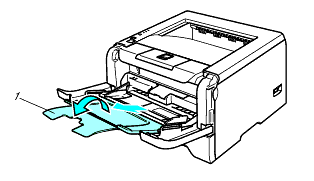
- Pull out the MP tray support flap (1).
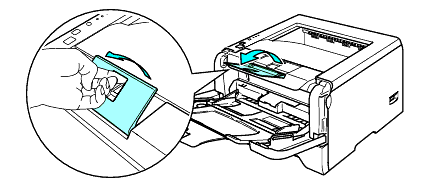
- Lift up the support flap to prevent paper from sliding off the face-down output tray, or remove each page as soon as it comes out of the printer.
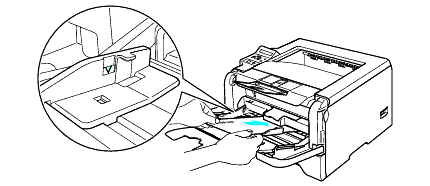
- Put paper in the MP tray. Make sure that the paper stays under the maximum paper mark on both sides of the tray.
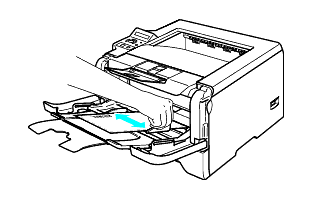
- While pressing the paper-guide release lever, slide the paper guide to fit the paper size.
- Send the print data to the printer.
- Remove each sheet or envelope at once after printing. Stacking the sheets or envelopes may cause the paper to jam or curl.
- If envelopes get smudged during printing set the Media Type to Thick Paper or Thicker Paper to increase the fixing temperature.
- When you put paper in the MP tray, remember the following:
- Put the leading edge (top of the paper) in first and push it gently into the tray.
- Make sure that the paper is straight and in the proper position in the MP tray. If it is not, the paper may not be fed properly, resulting in a skewed printout or a paper jam.
- If the DL size double flap envelope is creased after printing, choose DL Long Edge in Paper Size, from the Basic tab. Put a new DL size double-flap envelope in the MP tray with the longest edge of the envelope in first, then print again.
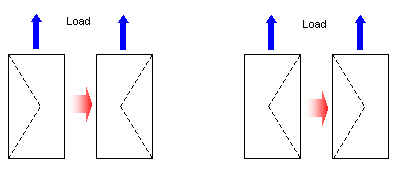
If the printed envelopes have wrinkles, please try to change the direction of the flap when loading.
Content Feedback
To help us improve our support, please provide your feedback below.
