Innov-is A50
FAQ & Fehlerbehebung |
Tips for sewing an even seam allowance
To sew an even seam, start sewing so that the seam allowance is to the right of the presser foot, and the edge of the fabric is aligned with either the right edge of the presser foot or a marking on the needle plate.
Changing the needle position
The needle position used as the baseline is different for the straight stitch (left needle position) and the straight stitch (middle (center) needle position).
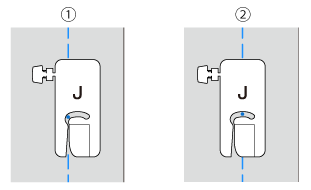 |
(1) Straight stitch
(2) Straight stitch |
When the stitch width of the straight stitch (left needle position) is set to its standard setting (0.0 mm), the distance from the needle position to the right side of the presser foot is 12 mm (1/2 inch). If the stitch width is changed (between 0 and 7.0 mm (1/4 inch)), the needle position will also change. By changing the stitch width and sewing with the right side of the presser foot aligned with the edge of the fabric, a seam allowance can be sewn with a fixed width. For details, refer to "How do I adjust a stitch width or length?".
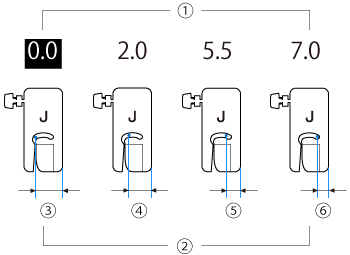 |
(1) Stitch width setting (2) Distance from the needle position to the right side of the presser foot (3) 12.0 mm (1/2 inch) (4) 10.0 mm (3/8 inch) (5) 6.5 mm (1/4 inch) (6) 5.0 mm (3/16 inch) |
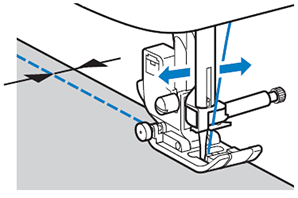
Aligning the fabric with a needle plate marking
The markings on the needle plate show the distance from the needle position of a seam sewn with the straight stitch (left needle position). Sew while keeping the edge of the fabric aligned with a marking on the needle plate. The distance between the markings in the upper scale is 1/8 inch (3 mm) and the distance between the markings in the grid is 5 mm (3/16 inch).
For stitches with a left needle position (Stitch width: 0.0 mm)
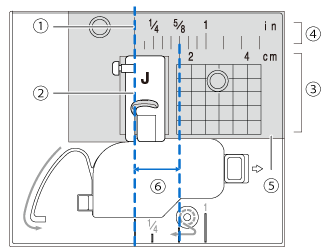 |
(1) Seam (2) Presser foot (3) Centimeters (4) Inches (5) Needle plate (6) 1.6 cm (5/8 inch) |
Aligning the fabric with zigzag foot “J”
The marking on zigzag foot “J” can be used to sew about 5 mm (3/16 inch) from the edge of the fabric. When using this feature, select a straight stitch, and set the stitch width to 2.0 mm.
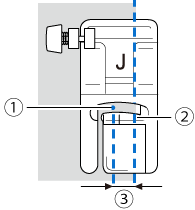 |
(1) Stitch width 2.0 mm (2) Marking (3) 5 mm (3/16 inch) |
