Innov-is NV870SE
FAQ & Fehlerbehebung |
How do I change the needle ?
Sewing with a bent needle is extremely dangerous since the needle may break while the machine is being operated.
Before using the needle, place the flat side of the needle on a flat surface and check that the distance between the needle and the flat surface is even.
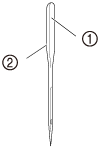 |
(1) Flat side
(2) Needle type marking |
If the distance between the needle and the flat surface is not even, the needle is bent.
Do not use a bent needle.
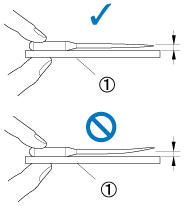 |
(1) Flat surface |
-
Press
 (Needle position button) once or twice to raise the needle.
-
Place fabric or paper under the presser foot to cover the hole in the needle plate.
Before replacing the needle, cover the hole in the needle plate with fabric or paper to prevent the needle from falling into the machine.
-
Press
 .
.
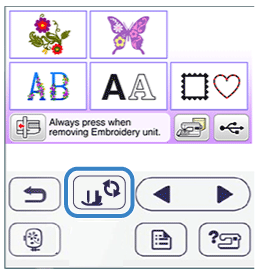
- When the message “OK to automatically lower the presser foot? ” appears on the LCD screen, press "OK" to continue.
-
The screen changes, and all keys and operation buttons are locked (except
 ).
).
-
Hold the needle with your left hand, and then use a screwdriver to turn the needle clamp screw toward you (counterclockwise) to remove the needle.
The needle clamp screw can also be loosened or tightened with the L-shaped (or disc-shaped) screwdriver.
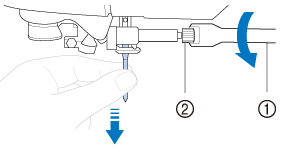
(1) Screwdriver (2) Needle clamp screw
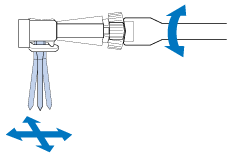
Do not apply a strong force when loosening or tightening the needle clamp screw, otherwise certain parts of the machine may be damaged.
-
With the flat side of the needle toward the rear of the machine, insert the needle until it touches the needle stopper.
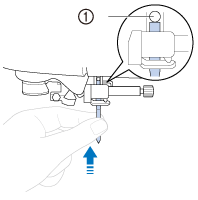
(1) Needle stopper -
While holding the needle with your left hand, use the screwdriver to tighten the needle clamp screw by turning it clockwise.
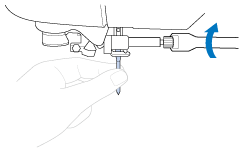
Be sure to insert the needle until it touches the needle stopper and securely tighten the needle clamp screw with the screwdriver, otherwise the needle may break or damage may result.
-
Press
 to unlock all keys and buttons.
