PR670E / PR670EC
FAQs & Troubleshooting |
How do I restart embroidering when the thread breaks or the bobbin thread runs out while embroidering?
If the thread breaks or the bobbin thread runs out while embroidering, the machine will automatically stop. Since some stitches may be sewn with only one thread, go back through the stitching to a point where stitches have already been sewn before continuing embroidering.
- If the thread sensor is turned off, the machine does not stop until embroidering is finished. Normally, the thread sensor should be turned on.
- Be careful when going back or forward through the stitching since the embroidery frame moves at the same time.
If the upper thread breaks
-
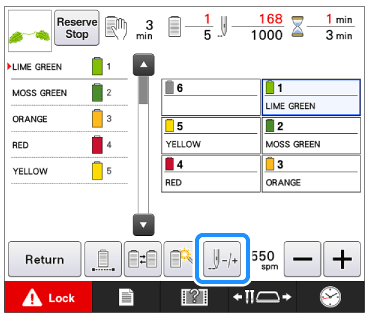
Touch
 and
and  to go back through the stitching to a point where stitches have already been sewn.
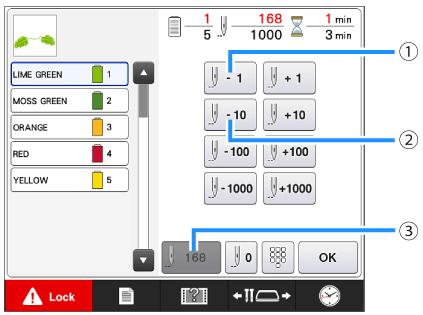
(1) Each touch of this key moves one stitch back through the stitching.
(2) Each touch of this key moves ten stitches back through the stitching.
(3) Touch this key to return to the point in the stitching before the changes.
It is recommended to stitch over the last two or three stitches for complete coverage.
You can also touch the specific point of the embroidery progress bar to move the stitch count to the desired point. If the needle bar is moved back too far through the stitching, touch or
or  to go forward through the stitching.
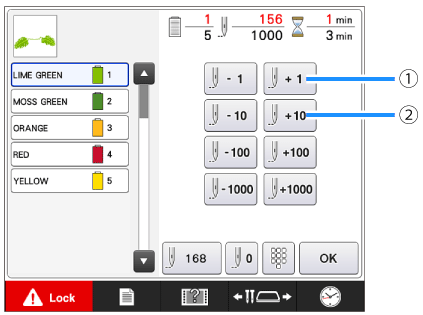
(1) Each touch of this key moves one stitch forward through the stitching.
(2) Each touch of this key moves ten stitches forward through the stitching.
-
Touch OK .
>> The embroidering screen appears again.
-
Touch
 , and then press the start/stop button to continue embroidering.
Specifying a stitch number
-
In step 3 of "If the upper thread breaks", touch
 .
.
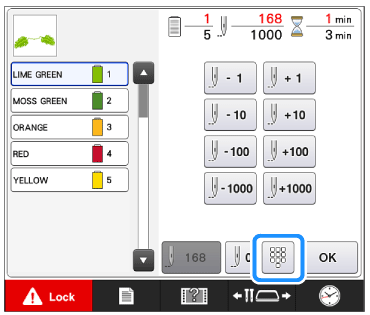
-
Use the number keys to enter the desired stitch number, and then touch
 .
.
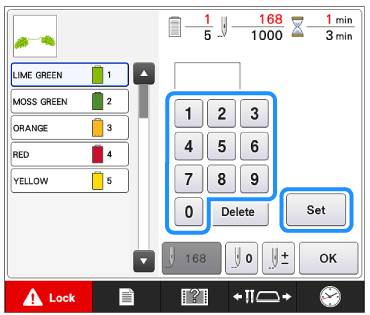
>> The embroidery frame moves to the specified stitch.
-
Touch
 to return to the previous screen, and then continue with step 4 of "If the upper thread breaks" .
-
Touch
 to reset the stitch number and embroider from the first stitch.
 -
To specify the last stitch number, select the last thread color, and then touch
 .
.
-
Touch
If the bobbin thread breaks or runs out
-
Touch
 , and then press the thread trimming button.
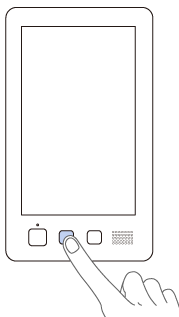
>> The upper thread is trimmed.If the bobbin thread breaks or runs out, also trim the upper thread.
-
Remove the stitches sewn only with the upper thread.
Pull the trim end of the upper thread.
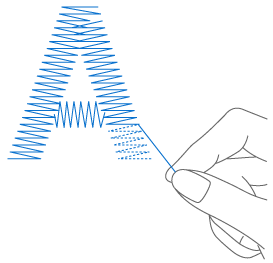
If the stitches cannot be cleanly removed, trim the thread with scissors.
-
If the bobbin thread ran out, replace the bobbin with a bobbin wound with bobbin thread.
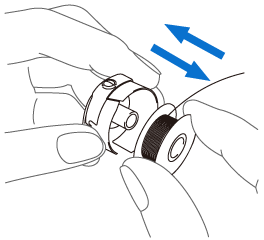
- If the hook cover can be opened, replace the bobbin without removing the embroidery frame from the machine.
- If the machine bed is hidden, for example, with a bagshaped piece of fabric, or if the hook cover cannot be opened, temporarily remove the embroidery frame. After replacing the bobbin, reattach the embroidery frame.
If the embroidery frame is removed before embroidering of the pattern is finished, take caution, otherwise the pattern may become misaligned.
- Do not apply extreme pressure to the framed fabric and cause it to become loose.
- When removing and re-attaching the embroidery frame, do not allow the frame to hit the carriage or the presser foot. If the carriage is hit and moves, turn the machine off, then on again. The correct frame position at the time that the machine was stopped is stored in the machine’s memory, and the embroidery frame is returned to the correct position.
- When the embroidery frame is re-attached, make sure that the pins on the left and right arms of the embroidery frame holder securely fit into the holes in the handles on the embroidery frame.
- Go back through the stitching in the same way as that described in step 2 of “If the upper thread breaks”, and then continue embroidering.
