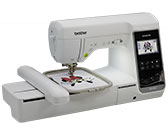
Innov-is NS2750D
FAQs & Troubleshooting |
Basic procedure to sew stitches
-
While the machine is in operation, pay special attention to the needle location.
In addition, keep your hands away from all moving parts such as the needle and handwheel, otherwise injuries may occur. - Do not pull or push the fabric too hard while sewing, otherwise injuries may occur or the needle may break.
- Never use bent needles. Bent needles can easily break, possibly resulting in injuries.
- Make sure that the needle does not strike basting pins, otherwise the needle may break or bend.
First, perform a trial sewing, using a piece of fabric and thread that are the same as those used for your project.
-
Prepare the appropriate needle and thread for the type of fabric.
For details, refer to "Combination of fabric, thread and needle".
If necessary, replace the needle.
For details, refer to "How do I change the needle?".For safety and best sewing results, use thread and needle appropriate for the fabric that you wish to sew.
If the combination of the fabric, thread and needle is not correct, it may cause sewing problems or result in a poor finish to your sewing project.
-
Wind thread onto a bobbin, and then install it into the machine.
For details, refer to "How do I wind the bobbin?" , "How do I set the bobbin?".
-
Thread the upper thread.
For details, refer to "How do I thread the machine (Threading the upper thread)?".
-
Press
 ;on the operation panel and select the stitch type.
-
Select a stitch.
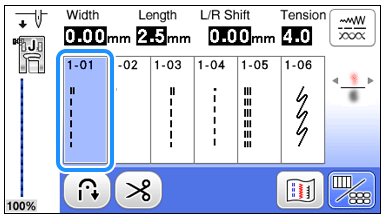
-
 displays the previous screen, and
  displays the next screen.
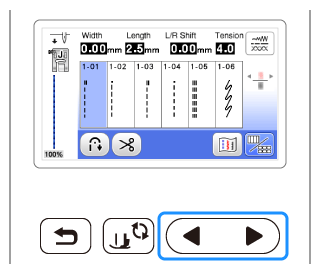
- For details on the key functions, refer to "Outline of viewing and functions for keys on the utility stitch screen and the decorative stitch screen".
-
If necessary, change to the desired stitch width or stitch length.
For details, refer to "How do I adjust a stitch width or length?".
-
-
Check which presser foot is indicated in the upper-left corner of the screen, and then attach it.
Attach zigzag foot "J" in this procedure. (It is on the machine when purchased.)
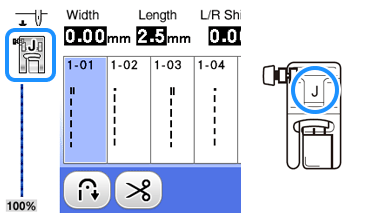
For details on changing the presser foot, refer to "How do I remove or attach the presser foot ?".
Always use the correct presser foot. If the wrong presser foot is used, the needle may strike the presser foot and bend or break, possibly resulting in injury.
Refer to "Stitch Chart" for presser foot recommendations.
-
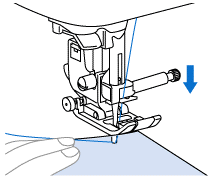
Set the fabric under the presser foot. Hold the fabric and thread with your left hand, and rotate the handwheel counterclockwise or press
 (Needle position button) to set the needle in the sewing start position.
-
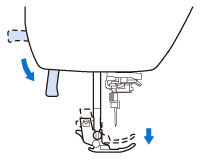
Lower the presser foot.
-
Adjust the sewing speed with the sewing speed controller.
(when using utility stitches)
You can use this controller to adjust sewing speed during sewing.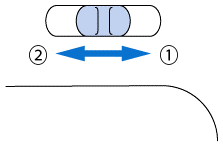
(1) Fast
(2) Slow
-
Press the "Start/Stop" button to start sewing.
(When the foot controller is plugged in, slowly press down on the foot controller.)
Guide the fabric lightly by hand.
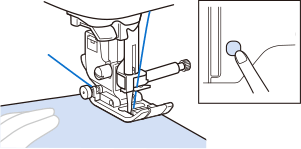 When the foot controller is being used, you cannot start sewing by pressing the "Start/Stop" button.
-
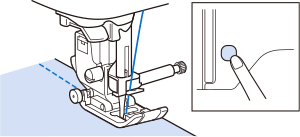
Press the "Start/Stop" button again to stop sewing.
(When the foot controller is plugged in, remove your foot from the foot controller.)
-
Press
 (Thread cutter button) to trim the upper and bobbin threads.
>> The needle will return to the up position automatically.
-
Do not press
 (Thread cutter button) after the threads have been cut. Doing so could tangle the thread or break the needle and damage the machine.
 -
Do not press
 (Thread cutter button) when there is no fabric set in the machine. The thread may tangle, possibly resulting in damage.
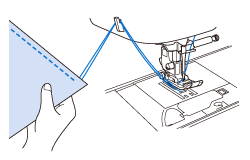
When cutting thread such as nylon monofilament thread, or other decorative threads, use the thread cutter on the left side of the machine.
-
Do not press
-
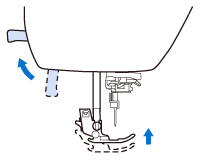
Raise the presser foot and remove the fabric.
-
Check the sewing finish. If necessary, adjust the thread tension.
For details, refer to "How to adjust the thread tension".
Related FAQs
- Combination of fabric, thread and needle
- How do I wind the bobbin?
- How do I thread the machine (Threading the upper thread)?
- How do I set the bobbin ?
- How do I remove or attach the presser foot ?
- How do I change the needle ?
- How do I adjust a stitch width or length?
- How to adjust the thread tension
- Outline of viewing and functions for keys on the utility stitch screen and the decorative stitch screen
