CM100DM
FAQs & Troubleshooting |
About Blade Extension, Cutting Pressure and Mat
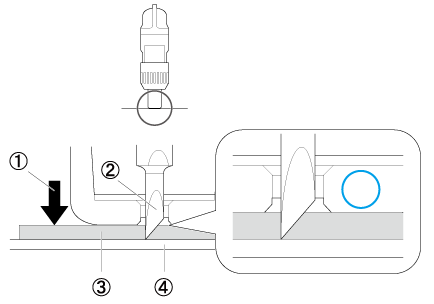
This machine makes cuts by pressing a blade against the material through pressure applied to the end of the holder.
|
|
(1) Pressure (2) Blade (3) Material (4) Mat |
This image may differ from the actual parts and shapes.
Blade Extension and Cutting Pressure
The blade extension of Standard cut blade changes 0.1mm length by a marking on the holder. Deep cut blade changes 0.13mm.
Depending on the material, set the blade extension and cutting pressure appropriately.
For more information about the approximations of the blade extension and cutting pressure for the material, refer to “Mat and Cutting Blade Combinations"
Before cutting, perform trial cutting with the same material to be used in your project, and make sure that the material is cut cleanly.
| Guide for the appropriate setting | Hint | image | ||
| Blade Extension | If there is a faint trace of the cut in the mat surface after peeling off material that has been cut, the blade extension is correct. |
When cutting flexible material, the material is crushed when pressure is applied. Adjust the blade, so it does not extend too much.
|
Blade extension too large: |
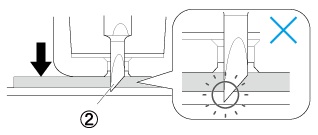 |
|
Blade extension too small: |
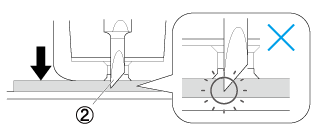 |
|||
| Cutting Pressure | Pressure too light: Since the blade does not extend into the material, the cut is not clean. |
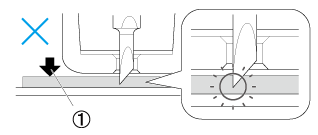 |
||
| Pressure too strong: When the blade is strongly pressed against the material, the material may lift off the mat. |
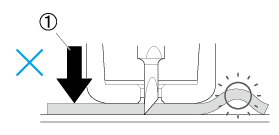 |
|||
(1) Cutting Pressure (2) Blade
If part of the material is not cut, click here.
If the entire pattern is not cut, click here.
Blade
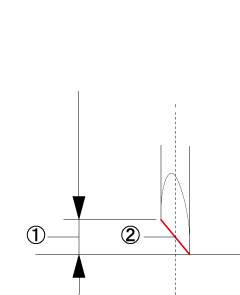
The holder that can be used in the ScanNCut machine is 2 types of the blade, which is the Standard cut blade (turquoise) and another is the Deep cut blade (purple).
Use the Deep cut blade (purple) when cutting a thick material like felt or denim.
When cutting the material other than a thick material, use the Standard cut blade (turquoise).
<<Enlarged illustration>>
Standard cut blade (turquoise)  |
Deep cut blade (purple) |
|
 |
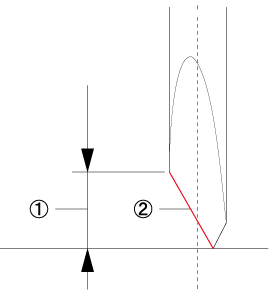 |
(1) Thickness of the material that can be cut (2) Blade |
This image may differ from the actual parts and shapes.
Mat
The cutting mats used by this machine have been redeveloped with a different design, type, function, etc.
For details, refer to Important information about Mat.
Use a mat appropriate for the material.
| Mat | |
Standard mat (purple and turquoise) |
This is a mat with a high adhesive strength. Use this mat when cutting fabric or paper which tears easily. |
Middle tack adhesive mat (pink and turquoise) |
This is a mat with a medium adhesive strength. Use this mat when cutting tear proof paper. |
Low tack adhesive mat (turquoise) |
This is a mat with a low adhesive strength. This mat is suitable for copy paper and smooth paper. |
Use the low tack adhesive mat with copy paper and smooth paper.
Since the standard mat has a high adhesive strength, materials may remain stuck to the mat, causing the mat to become unusable.
When cutting fabric, use a between an Iron-on fabric appliqué contact sheet and High tack adhesive fabric support sheet
| Sheet for fabric cutting | |
| Iron-on fabric appliqués contact sheet |
|
| High tack adhesive fabric support sheet |
|
