DC200
FAQs & Troubleshooting |
How do I perform trial cutting? (Test Cut)
Adjust the blade extension according to the material, and then use the same material to be used in your project to perform trial cutting.
-
Turn on the machine.
-
Adjust the blade extension.
For details on the blade extension appropriate for the material, see Adjusting the Blade Extension.
(1) Turn to the left to decrease the blade extension.
(2) Turn to the right to increase the blade extension.
-
Install the cutting blade holder appropriate for the material into the carriage of the machine.
For details, see How to install and uninstall the holder.
-
Attach the material that will be cut to the mat.
For details on attaching material to the mat, see How to attach the material to the mat.

-
While holding the mat level and lightly inserting it into the feed slot, press
 in the operation panel.
Lightly insert the mat so that it aligns with the guides on the left and right sides of the feed slot and is tucked under the feed rollers.
(1) Guides
(2) Feed rollers


The mat is fed in to complete the preparations for cutting.
-
The pattern preview window appears when the data is transferred to the machine.
For details, How do I transfer the pattern (to cut, draw, line emboss, etc.) using a Wireless LAN connection? (Computer Instructions) , How do I transfer the pattern (to cut, draw, line emboss, etc.) using a USB cable? (Windows only). or How do I transfer the pattern (to cut, draw, line emboss, etc.) using a Wireless LAN connection? (Mobile Device Instructions).

-
Set Test Cut to ON, and then click Test cut settings.
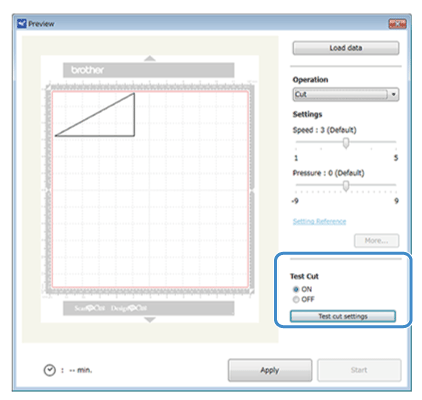
A window for specifying detailed settings appears.
With the mobile device version: Preview window→Test Cut.
-
Select the desired shape under Pattern, and then select settings for Size and Position.
Refer to the grid references on the mat, and select the location of the trial cutting shape from the drop-down lists.
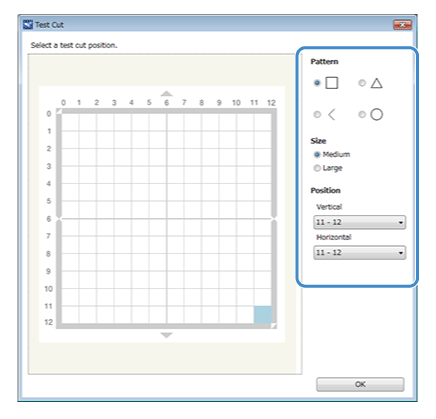
Example: Settings when positioned in the lower-left corner of the mat
Vertical: 11-12
Horizontal: 0-1
The trial cutting shape can also be positioned by clicking a cell (block) in the mat shown in the test cut setting window.
-
Click OK, and then position the trial cutting shape.
Make sure that the location for the trial cutting shape does not overlap the location for the pattern and does not extend from the material.
(1) Trial cutting shape at the location specified in step 8
-
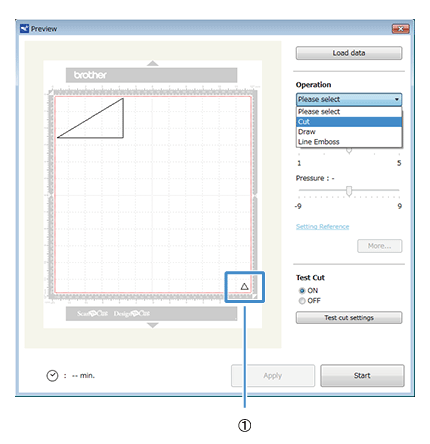
In DesignNCut Manager, select Cut from the Operation drop-down list.

With the mobile device version: Preview window→Operation→Cut
-
With the sliders, specify settings for Speed and Pressure for cutting.
With the mobile device version: Preview window→Settings→Speed / Pressure
