Innov-is XV8500D
FAQs & Troubleshooting |
How do I calibrate the sensor pen?
Before using the sensor pen for the first time, be sure to personalize it using "Sensor Function Calibration" in the settings screen. Doing so allows the machine to learn the position in which you usually hold the pen.
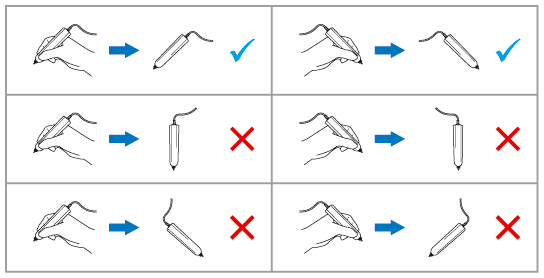
Hold the sensor pen at a comfortable angle and then calibrate the machine according to the procedure below.
Be sure to keep the sensor pen at the same angle while calibrating the first and second points.
-
Press
 .
.
The settings screen appears. -
Press
 .
.
-
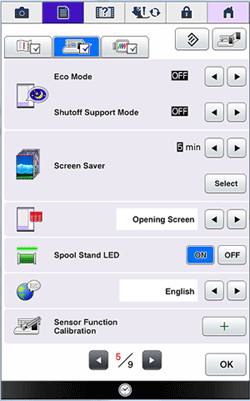
Display page 5 of the General settings screen.
-
Press
 after connecting the sensor pen to the machine.

-
Touch the first point of green dot marking using the sensor pen.
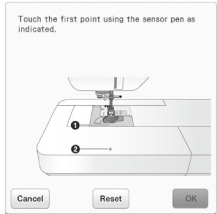
* Touch on the needle plate cover.
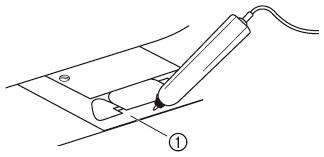
(1) Needle plate cover -
Touch the second point of center of cross-hair using the sensor pen.
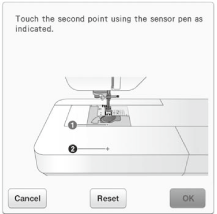
* Touch on the point in the illustrations.
[For sewing] [For embroidering] 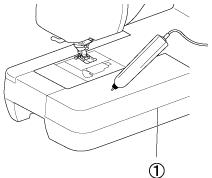
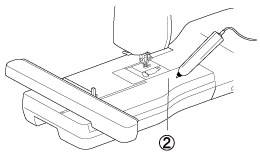
(1) Flat bed attachment (2) Embroidery unit
-
Press "OK" to finish the calibration.
To repeat the calibration touch the first point again using the sensor pen, and continue with step 6.
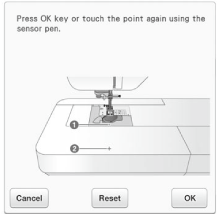
* Press "Cancel" to return to the original screen without finishing the calibration.
* Press "Reset" to reset the calibration.
Content Feedback
To help us improve our support, please provide your feedback below.