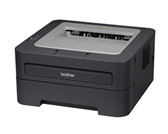
HL-2230
FAQs & Troubleshooting |
Clean the Drum Unit.
Please follow the steps below to clean the drum unit:
- DO NOT use cleaning materials that contain ammonia, alcohol, any type of spray, or any type of flammable substance to clean the outside or inside of the machine.

- Be careful not to inhale toner.
- Prepare blank A4 or Letter size paper.
- Make sure the machine is in the Ready mode.
- Open the front cover and the back cover (face-up output tray).
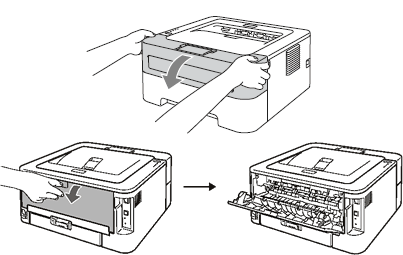
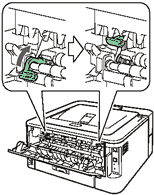
Make sure that the two green envelope levers on the left and right hand sides are in the up position.
- Press the Go button five times.
- Close the front cover. The machine will prepare the Drum Cleaning process. When the machine is ready for the Drum Cleaning process, the Ready LED turns on.
- Open the manual feed slot cover.
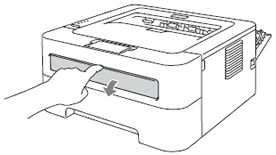
- Using both hands, slide the manual feed paper guides to the width of the paper that you are going to use.
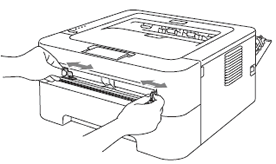
- Using both hands, put one piece of A4 or Letter size paper in the manual feed slot until the top edge of the paper touches the paper feed roller. When you feel the machine pull in the paper, let go. The machine will start the Drum Cleaning process. The Ready LED flashes during the Drum Cleaning process.
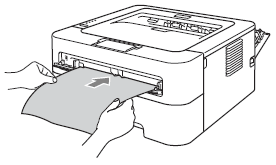
- The machine makes a mechanical noise during the Drum Cleaning process because the machine rotates the OPC drum in reverse. This noise is not due to a malfunction of the machine.
- DO NOT put more than one sheet of paper in the manual feed slot at any one time, as it may cause a jam.
- If the paper in the manual feed slot is other than A4 or Letter size, the machine will stop the Drum Cleaning process and eject the paper.
- Make sure that the paper is straight and in the proper position on the manual feed slot. If it is not, it may not be fed properly, resulting in a skewed printout or a paper jam.
- DO NOT close the back cover (face-up output tray) during the Drum Cleaning process. The machine will stop the Drum Cleaning process and eject the paper. It may cause a jam.
- If the machine receives a print job before you put one sheet of paper in the manual feed slot, the machine will stop the Drum Cleaning process and print the print job.
- When the machine has finished cleaning it returns to the Ready mode.
- Repeat steps 3 to 9 two more times using a new blank sheet of paper each time. Upon completion please discard the used paper.
- Close the back cover.
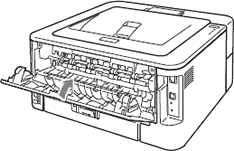
If the problem is not solved yet, please go to the next steps below.
- Turn off the machine's power switch. Disconnect all the cables, and then unplug the power cord from the
AC power outlet. Leave the machine turned off for at least 10 minutes to cool down. - Open the front cover.
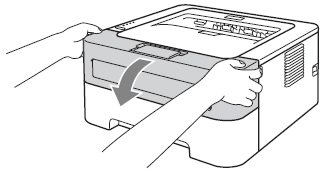
- Take out the drum unit and toner cartridge assembly.
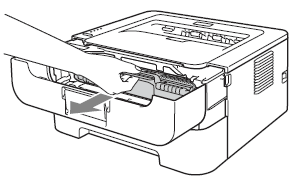
- We recommend that you place the drum unit and toner cartridge assembly on a clean, flat surface with a piece of disposable paper underneath it in case you accidentally spill or scatter toner.
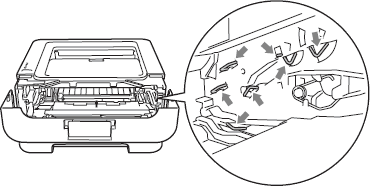
- To prevent damage to the machine from static electricity, DO NOT touch the electrodes shown in the illustration.
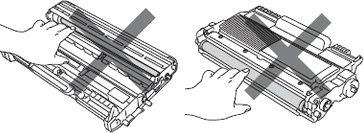
- To avoid print quality problems, DO NOT touch the shaded parts shown in the illustrations.
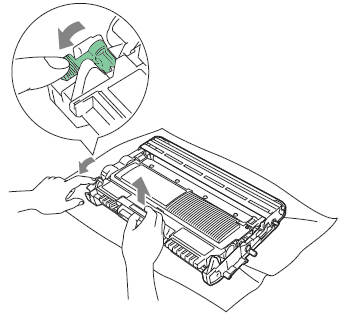
- Push down the green lock lever and take the toner cartridge out of the drum unit.
- Put the print sample in front of the drum unit, and find the exact position of the poor print.
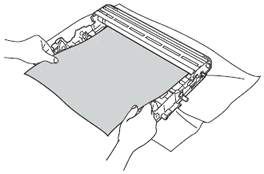
- Turn the drum unit gear by hand while looking at the surface of the OPC drum (1).
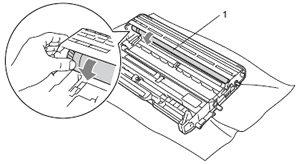
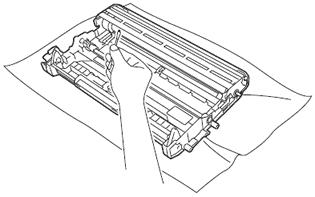
- When you have found the mark on the drum that matches the print sample, wipe the surface of the OPC drum with a dry cotton swab until the dust or glue on the surface comes off.
DO NOT clean the surface of the photosensitive drum with a sharp object.
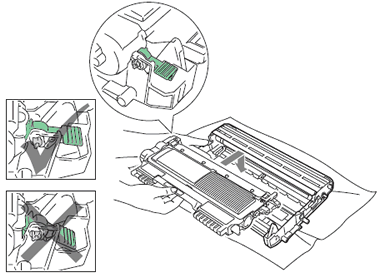
- Put the toner cartridge back into the drum unit until you hear it lock into place. If you put the cartridge in properly, the green lock lever will lift automatically.
- Open the front cover. Put the drum unit and toner cartridge assembly back into the machine.
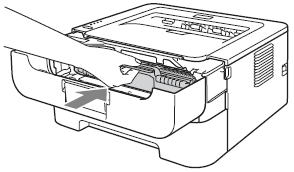
- Put the paper tray firmly back in the machine.
- Close the front cover.
- Plug the machine's power cord back into the AC power outlet first, and then reconnect all cables. Turn on the machine's power switch.
Content Feedback
To help us improve our support, please provide your feedback below.
