MFC-9130CW
FAQs & Troubleshooting |
Replace Belt
Follow the steps below to replace the belt unit.
For the order number (Order No.) of the belt unit, click here to see the Consumables & Options page.
- Make sure that the machine is turned on.
- Open the top cover until it locks in the open position.
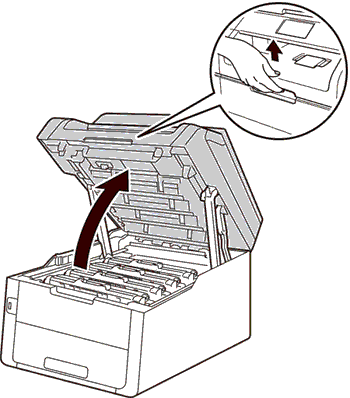
- Take out all of the toner cartridge and drum unit assemblies.
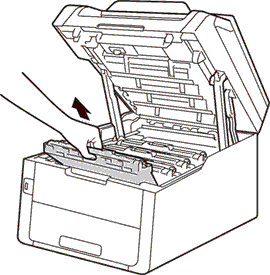
- Hold the green handle of the belt unit and lift the belt unit up, and then pull it out.
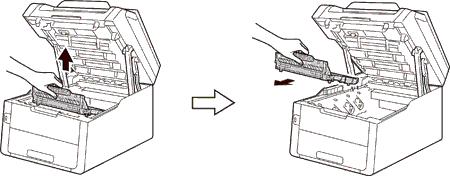
- Unpack the new belt unit and install the new belt unit in the machine.
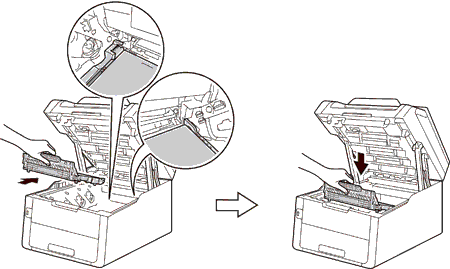
- Slide each toner cartridge and drum unit assembly into the machine. Make sure that you match the toner cartridge color to the same color label on the machine. Repeat this step for each of the toner cartridge and drum unit assemblies.
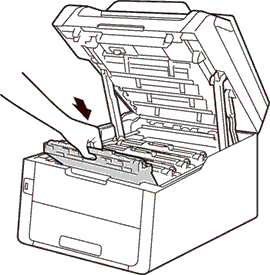
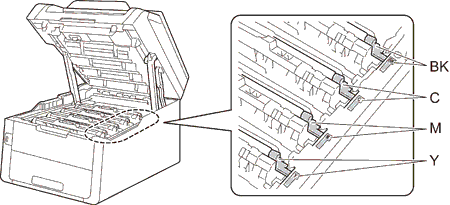
- Close the top cover of the machine.
When you replace the belt unit with a new one, you must reset the belt unit counter by completing the following steps:
- Press
 (Cancel) to interrupt the error.
- Press
 (Settings).
- Press All Settings.
- Press the Up or Down arrow key to display Machine Info..
- Press Machine Info..
- Press Parts Life.
- Touch the dial pad area to light up the LEDs.
- Press # until the machine's display message changes.
- Press Belt Unit.
- Press Yes.
- Press
 (Home).
Content Feedback
To help us improve our support, please provide your feedback below.
