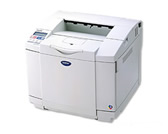
HL-2700CN
FAQs & Troubleshooting |
How do I install the Optional Lower Tray Unit?
- This printer is heavy and weighs approximately 31.5 kg (69.4 lb). To prevent injuries, use at least two people to lift the printer.
- When you lift the printer make sure you use the handholds at the bottom four corners of the printer.
- When placing the printer on top of the lower tray unit, be careful not to catch your fingers between them.
- Do not carry the printer when the lower tray unit and/or the duplex unit are attached.
- When moving or lifting this printer, keep the printer flat. To avoid spills, you must first remove the toner cartridges and waste toner pack.
-
Turn off the printer power switch and unplug the printer.
-
Place the lower tray unit on a flat table, and then remove the protective parts.
-
Remove the paper tray from the lower tray unit.
-
Remove the protective parts and then put the paper tray back in the lower tray unit.
-
Check the two alignment pins on the lower tray unit. Use two people to lift the printer and place it on top of the lower tray unit. Make sure you use the handholds at the bottom four corners of the printer. Check that the pins are properly inserted into the printer. Check that the connector is inserted.
-
Fit the two stopper fittings on the right and left hand sides of the lower tray unit.
-
Cover the gap on the right hand side with the right-hand side cover by first inserting the hook at the back. Cover the gap on the left hand side with the left-hand side cover by first inserting the hook at the back.
Close both of the side covers by putting the notch over the hook of the lower tray unit.
-
To level the printer, adjust the feet of the lower tray unit at the front and back on the right-hand side. Turn the feet to move them up or down until they touch the work surface and the tray unit is level.
Turn the lock screw on each foot to secure it.
Do not put transparencies, labels or envelopes in the paper tray of the optional lower tray unit. This might cause paper jams.
