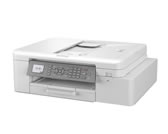
MFC-J4340DW(E)
Veelgestelde vragen en probleemoplossing |
Set the Date and Time
The LCD displays the date and time. If they are not current, re-enter them. You can add the date and time to each fax you send by setting your Station ID.
MFC-J4340DW
- Press Settings.
- Press
 or
or  to make your selections:
 - Select [Initial Setup]. Press OK.
- Select [Date & Time]. Press OK.
- Select [Date]. Press OK.
- Enter the last two digits of the year using the dial pad, and then press OK.
- Enter the two digits for the month using the dial pad, and then press OK.
- Enter the two digits for the day using the dial pad, and then press OK.
- Press
 or
or  to select [Time], and then press OK.
 - Enter the time (in 24-hour format) using the dial pad, and then press OK.
- Press Stop/Exit.
MFC-J4440DW/MFC-J4540DW
- Press
 [Settings].
 - Press
 [Date & Time].
 - Press [Date].
- Enter the last two digits of the year on the touchscreen, and then press [OK].
- Enter two digits for the month on the touchscreen, and then press [OK].
- Enter two digits for the day on the touchscreen, and then press [OK].
- Press [Time].
- Enter the time (in 24-hour format) using the touchscreen.Press [OK].
(For example, enter 19:45 for 7:45 PM.)
- Press
 .
.
Feedback
Geef hieronder uw feedback. Aan de hand daarvan kunnen wij onze ondersteuning verder verbeteren.
