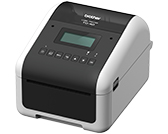
TD-4550DNWB
FAQs & Troubleshooting |
How do I connect the printer to my mobile device via Wi-Fi®?
> Connect the printer to your mobile device using Infrastructure Mode
> Connect the printer to your mobile device using Wireless Direct
-
When using a mobile device, change any necessary settings using the application before printing.
The settings vary by application. -
To print wirelessly using Apple device (iPad, iPhone, iPod touch, etc.), you must use AirPrint.
AirPrint (compatible with Apple device) can print the picture, PDF file, etc.
Connect the printer to your mobile device using Infrastructure Mode
Connect the printer to your mobile device using the wireless access point/router.
Before you begin, confirm the SSID (Network Name) and the password (Network Key) of your wireless router/access point.
-
Connect the printer to the wireless router/access point.
- Turn on the printer.
- Press Menu.
-
Press
 or
or  to select [WLAN]. Press OK.
 -
Select [Infra Manual Setup]. Press OK.
The machine displays a list of available SSIDs. -
Press
 or
or  to select the SSID. Press OK.
 - Enter the password. Press OK.
-
Confirm the password you entered on the LCD. Press OK.
[Connecting...] appears on the LCD. If the printer is connected successfully, [Connected!] appears on the LCD.
When the connection between the printer and the wireless router/access point is established, the Wi-Fi® icon ( ) appears on the LCD.
-
Connect your mobile device to the wireless router/access point.
- Tap [Settings] - [Wi-Fi] on the mobile device, and slide the toggle button to activate Wi-Fi.
-
Select the SSID (Network Name) of the wireless router/access point that you connected to in step 1, and then enter the password.
The connection between your mobile device and the wireless router/access point will be established.
Connect the printer to your mobile device using Wireless Direct
Using this method, the printer serves as a wireless network access point.
-
Set the printer to Wireless Direct mode using the LCD menu.
- Press Menu.
-
Press
 or
or  to select [WLAN]. Press OK.
 -
Press
 or
or  to select [WLAN (On/Off)]. Press OK.
 -
Press
 or
or  to select [On]. Press OK.
 -
Press
 or
or  to select [WLAN]. Press OK.
 -
Press
 or
or  to select [Network Mode]. Press OK.
 -
Press
 or
or  to select [Direct Mode]. Press OK.
The Wireless Direct icon ( ) appears on the LCD.
-
In your mobile device's Wi-Fi settings screen, select your printer's SSID, and then enter the password.When the printer is connected successfully, the Wireless Direct icon (
-
The default SSID and password are as follows:
SSID: "DIRECT-*****_TD-4550DNWB" where ***** is the last five digits of the product serial number.
The password: 455***** where ***** is the last five digits of the product serial number. - It may take several minutes until the connection is finished.
- To find the product serial number, see the FAQ: "Where can I find my Brother printer's serial number?".
 ) changes to (
  ).
). -
The default SSID and password are as follows:
Content Feedback
To help us improve our support, please provide your feedback below.
