PR1050X
FAQs & Troubleshooting |
There is looseness in the mounting jig when the fabric is placed in the cap frame/cylinder frame.
If there is looseness, follow the procedure described below to place the enclosed pad between the clamping pad of the thumb screw and the mounting surface.
-
Position the mounting bracket onto the mounting surface (worktable, desk, etc.).
Place the pad between the clamping pad of the thumb screw and the mounting surface (worktable, desk, etc.), and then firmly tighten the thumb screw.
 Mounting bracket
 Mounting surface (worktable, desk, etc.)
 Pad
Pad
 Thumb screw
When using an object other than the enclosed pad, use the following types of material.

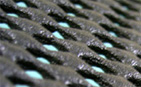
Rubber pad Non-slip sheet -
Check that there is no looseness. If the mounting jig is still loose, remove it, and then install it again.
- Be sure that the mounting bracket is securely clamped onto the mounting surface and that the thumb screw is firmly tightened.
- Do not attach the mounting jig to an unstable surface (flexible, bent or warped).
- Be careful that the mounting jig does not fall when it is removed.
Content Feedback
To help us improve our support, please provide your feedback below.