PR1050X
FAQs & Troubleshooting |
Changing the embroidering position and Adjusting the angle
When the embroidery machine is purchased, it was adjusted so that the beginning of the stitching was from the center of the pattern. Therefore, move the frame and adjust the embroidering position so that the center of the pattern aligns with the needle drop point at the sewing position. If you need to align the embroidering position to the specific point, follow the procedure described in "Displaying the fabric on the LCD when aligning the embroidering position", "Aligning the embroidering position using the built-in camera" or "Aligning the embroidering position using the embroidery positioning sticker". In addition, the angle of the entire pattern can be adjusted if the fabric cannot be hooped evenly within the embroidery frame and the pattern is positioned at an angle on the fabric.
Changing the embroidering position
-
Touch
 ,
,  or
or  in the embroidering settings screen to select the speed.
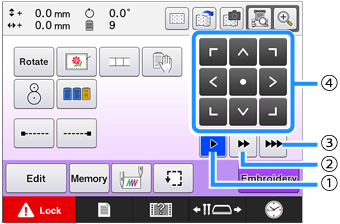
(1) Touch to move the frame by 0.1 mm.
(2) Touch to move the frame by 0.5 mm.
(3) Keep touching to move the frame at maximum speed. While using the built-in camera, the frame moves by 2.0 mm using the move key.
(4) Move key -
Touch
 ,
,  ,
,  ,
,  ,
,  ,
,  ,
,  and
and  in the embroidering settings screen.
Move the embroidery frame so that the needle drop point is at the center of the area where you wish to embroider.
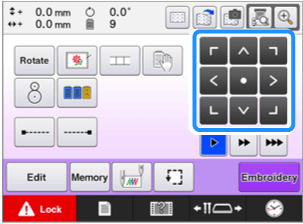
→ The embroidery frame moves in the opposite direction of the arrow.
→ The pattern in the pattern display area moves in the same direction of the arrow.
(1) Shows the vertical distance moved from center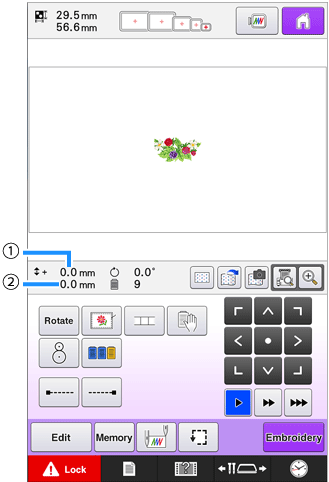

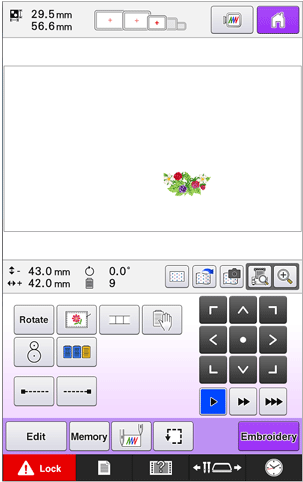
(2) Shows the horizontal distance moved from center
-
Touch
 to move the embroidery frame back to its original position (where the center of the embroidery frame is aligned with the needle drop point at the sewing position).
The pattern can also be moved by dragging it. If a USB mouse is connected, move the mouse to position the pointer on the desired pattern, and then while holding in the left mouse button, drag the pattern. The pattern can also be dragged by selecting it directly in the screen with your finger or the touch pen.

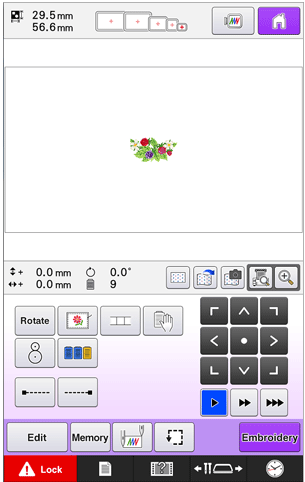
Finding the embroidering position easily
Finding the embroidering position by locking the needle bar
By locking the needle bar (securing the needle and presser foot in the down position), the needle drop point can easily be seen.
-
As shown in the illustration, insert the Allen screwdriver into the hole in the needle clamp to slowly lower the needle bar down till needle bar stops then clicks into the lock position.
Make sure that the needle is not lowered beyond the positioning click into the fabric.
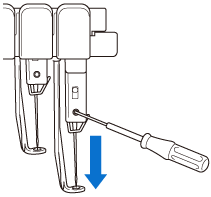
→ The needle and presser foot are locked in the down position. - Touch the arrow keys in the embroidering settings screen to move the embroidery frame so that the needle drop point is at the center of the area where you wish to embroider.
- With a USB mouse, your finger or the touch pen, drag the pattern to move it.
-
When specifying the starting of stitching, align the needle drop point with the point specified as the starting of stitching. For details,refer to "How do I specify the starting position or the ending position of embroidering?"
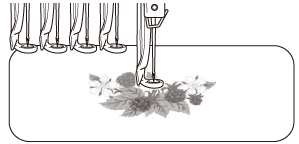
Unlocking the needle bar
-
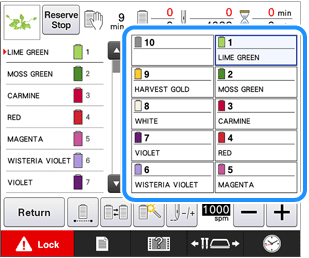
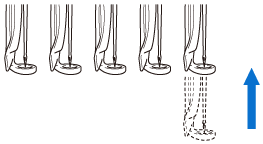
Display the embroidering screen, and then touch the key for any needle bar other than the one that is locked.
→ The needle bar is unlocked and will return to original position.
Adjusting the angle of the pattern
Depending on the type of fabric being embroidered, it may not be possible to stretch the fabric in the embroidery frame at the desired angle. In this case, adjust the angle of the pattern so that it is correctly positioned on the fabric.
-
Touch
 .
.
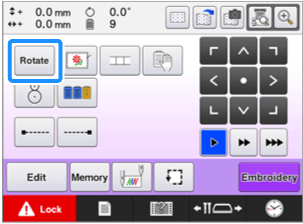
The following screen appears.

Example: Original angle 

Rotates 90 degrees to the right 

Rotates 10 degrees to the right 

Rotates 1 degree to the right 

Rotates 0.1 degree to the right 

Rotates 90 degrees to the left 

Rotates 10 degrees to the left 

Rotates 1 degree to the left 

Rotates 0.1 degree to the left 

Moves the pattern in the direction of the arrow on the key. 
Moves the frame by 0.1 mm. 
Moves the frame by 0.5 mm. 
Moves at maximum speed when a key is held down. 
Touch this key to return the pattern to its original angle. 
Touch this key to close this screen.
-
Touch the keys to adjust the pattern to the desired angle.
Each touch of a key rotates the pattern.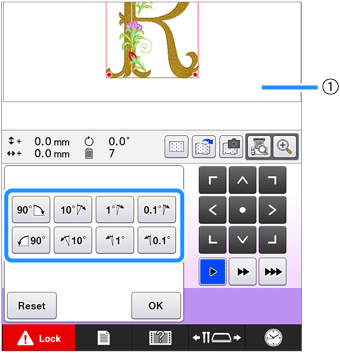
(1) Shows the angle of the pattern after a key is touched to change it.
The pattern can also be rotated by holding down anddragging a red point around the pattern.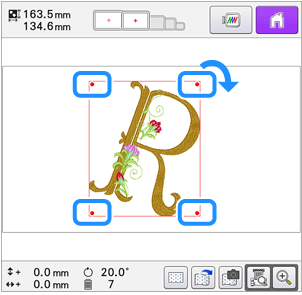
-
To return the pattern to its original angle, touch
 .
.
-
If necessary, touch the arrow keys to adjust the position of the pattern.
For more details, refer to "Changing the embroidering position".
-
After making the desired changes, touch "OK" .
The embroidering settings screen appears again.-
With this operation, fine adjustments can be made to the angle; also, this operation is particularly useful when embroidering items, such as bags and tubular items, that have limitations to being hooped in the embroidery frame.
Example: When embroidering a pillowcase
Rotate the pattern 90 degrees to the left before embroidering.

Example: When embroidering a T-shirt
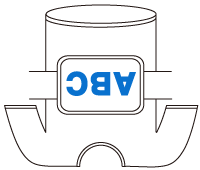
Rotate the pattern 180 degrees. Pass the machine bed through from the waist of the T-shirt, not from the neck, and attach the embroidery frame to the machine. This will prevent the neck of the shirt from being stretched when the embroidery frame is moving.
-
While rotating the pattern, the embroidering position can be checked with the camera functions
 ,
,  and
and  .
.
For using the camera, refer to "Displaying the fabric on the LCD when aligning the embroidering position" and "Aligning the embroidering position using the built-in camera".
-
With this operation, fine adjustments can be made to the angle; also, this operation is particularly useful when embroidering items, such as bags and tubular items, that have limitations to being hooped in the embroidery frame.
