PR1050X
FAQs & Troubleshooting |
Displaying the fabric on the LCD when aligning the embroidering position
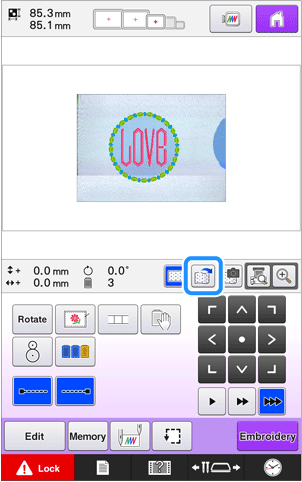
The fabric hooped in the embroidery frame can be displayed on the LCD so that the embroidery position can be aligned.
This feature can be used from the pattern editing screen and embroidering settings screen.
- When installing the optional embroidery frame holder D, embroidery holder E, Cap frame, or Cylinder frame, the built-in camera cannot be used to align the embroidering position.
- For details on using fabric thicker than 2mm, refer to "Positioning the pattern on thick fabric".
- Hoop the fabric in the embroidery frame, and then attach the frame to the embroidery machine.
-
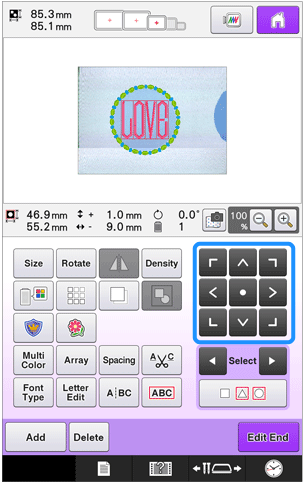
Select the pattern.
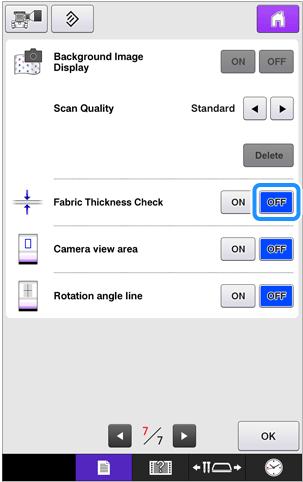
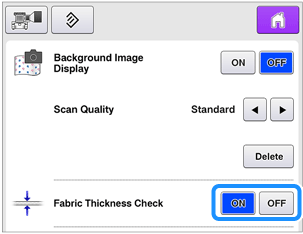
Check page 7 of settings screen to make sure the “Fabric Thickness Check” is set to “OFF” when using light to medium weight fabrics.
-
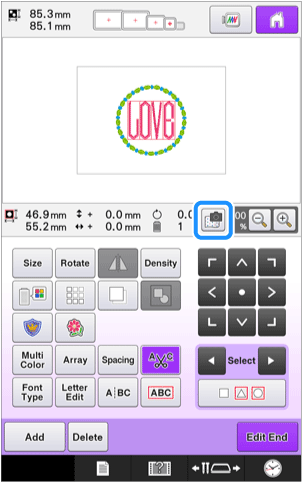
Press
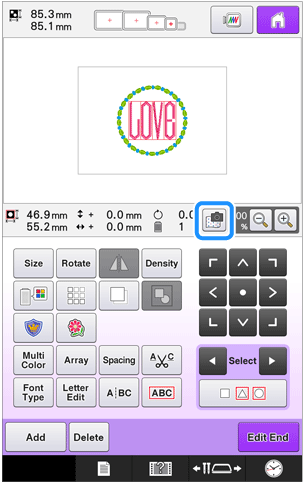
 in the pattern editing screen.
-
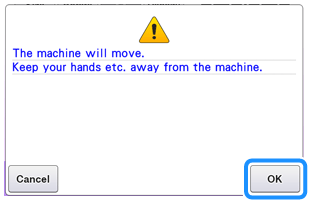
When the following message appears, touch "OK" .
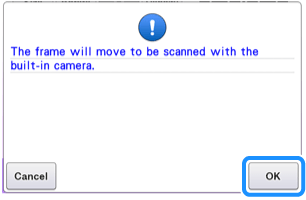
→ The embroidery frame moves so the fabric can be scanned. -
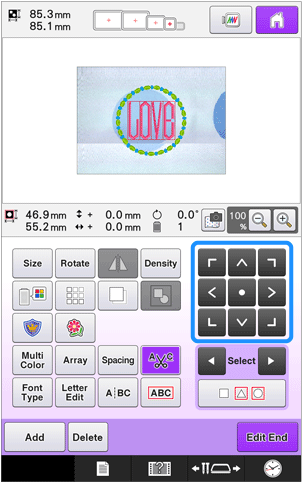
When the fabric appears as a background for the pattern, the pattern can be edited if it is necessary.

-
Use
 to align the pattern with the desired embroidery position.
The pattern can be moved to the desired position by using your finger or the touch pen to drag the pattern displayed on the screen.
-
If necessary, touch to
 display a preview in order to check the pattern position.
 -
The background can be displayed or hiddeby touching
 in the embroidering settings screen.
-
If necessary, touch to
-
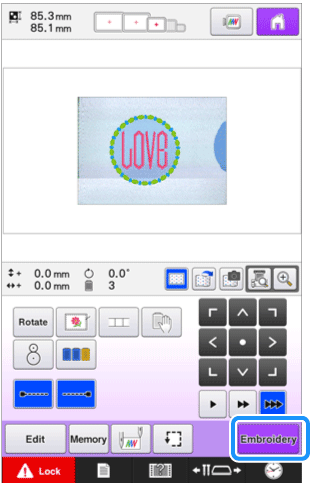
Press
 to display the embroidering settings screen.
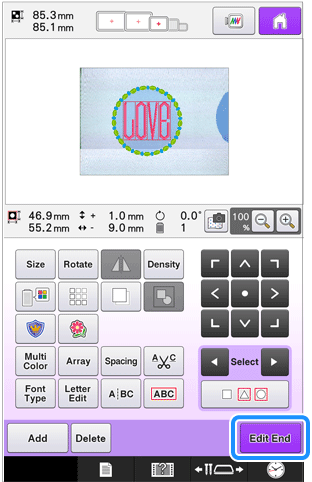
The pattern can also be aligned from the embroidering settings screen.
-
Press
 .
.
-
Press
 , and then press the start/stop button to start embroidering.
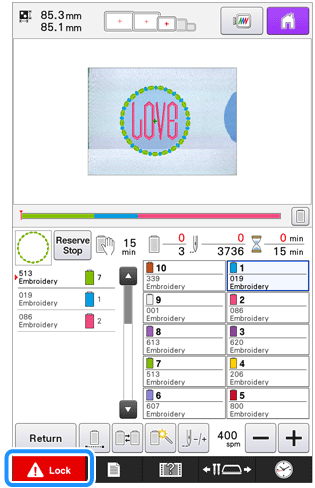
→ When embroidery is finished, the fabric displayed in the background disappears.
Information for Background Image Display in the settings screen
Whether or not the fabric is displayed in the background can be specified from page 7 of the settings screen. In addition, “Standard” or “Fine” can be selected for the quality of the background image.
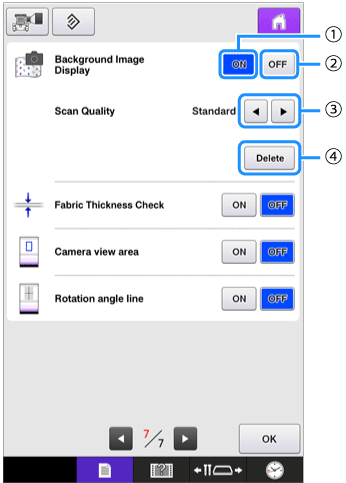 |
(1) Set to “ON” to leave the fabric displayed |
If the embroidery is not sewn, the fabric background will remain on the screen. On page 7 of the settings screen, touch ![]() to erase the background image.
to erase the background image.
Saving the background image to USB media
You can save the background image to your USB media.
-
Press
 .
.
-
Insert the USB media into the USB port.
-
Press
 or
or  key for the USB port you inserted the USB media.
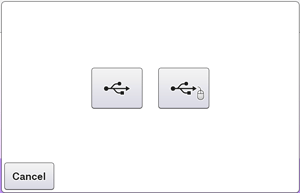
→ The background image is saved to the USB media.
Positioning the pattern on thick fabric
When positioning the pattern on the fabric thicker than 2 mm, the fabric may not be detected correctly.
In order for the fabric to be correctly detected, its thickness must first be measured.
-
Hoop the fabric in the embroidery frame, and then attach the frame to the machine.
-
Select the pattern, and then display the embroidering settings screen.
-
Display page 7 of the settings screen, and then set “Fabric Thickness Check” to “ON”.
- Press "OK" .
-
Press
 .
.
-
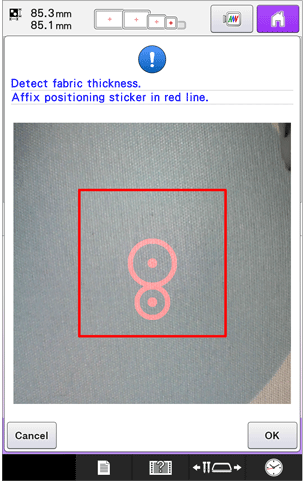
When the following message appears, touch "OK" .
→ The embroidery frame moves so the fabric can be scanned. -
Affix the embroidery positioning sticker to the fabric within the area indicated by the red frame in the LCD, and then touch "OK" .

-
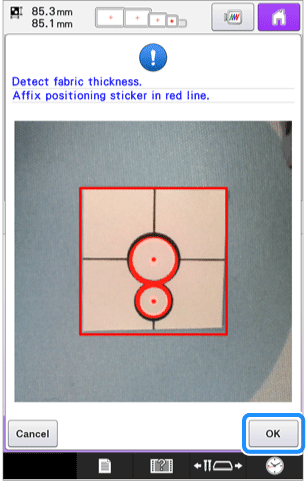
When the following message appears, remove the embroidery positioning sticker, and then touch "OK" .
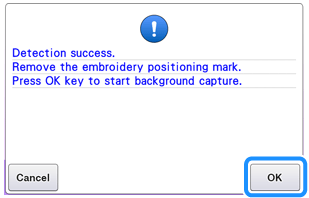
→ The embroidery positioning sticker affixed to the fabric is detected, and then the embroidery frame will be moved.
-
Align the pattern with the desired embroidery position using
 .
.
Use fabrics with a thickness of less than 3 mm (approx. 1/8 inch). Using fabrics thicker than 3 mm (approx. 1/8 inch) may cause the needle to break.