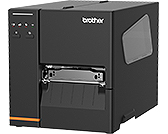
TJ-4020TN
FAQs & Troubleshooting |
How to install the Windows driver via Wi-Fi®/ wired network
For Wi-Fi connection, make sure both your wireless access point/router and your printer's network settings are correctly set up. For more information, see the documentation provided with your wireless access point/router, or contact the router manufacturer, your system administrator, or Internet service provider.
-
For Wi-Fi connection
Confirm the SSID and password of your WLAN access point/router beforehand, and then configure the network settings using the BPM (Brother Printer Management Tool) or LCD.
For wired network connection
Connect both the printer and the computer to your access point/router using LAN cables. The printer automatically receives a default IP address and displays it on the LCD.
Go to Step 2 and install the driver via wired network.
Using the BPM- You can download the BPM from the [Downloads] section of this website.
- You can use the BPM even if the driver is not installed.
- Connect your printer to the computer using a USB cable.
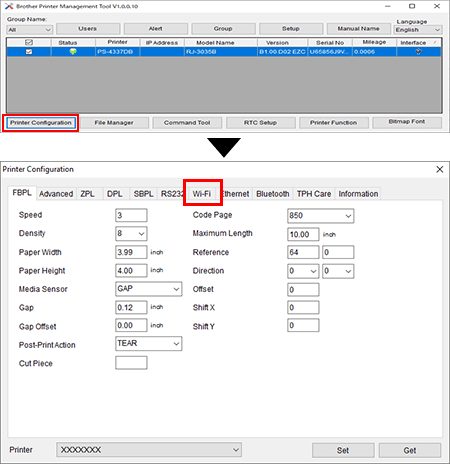
- Start the BPM.
-
Click Printer Configuration > Wi-Fi.
-
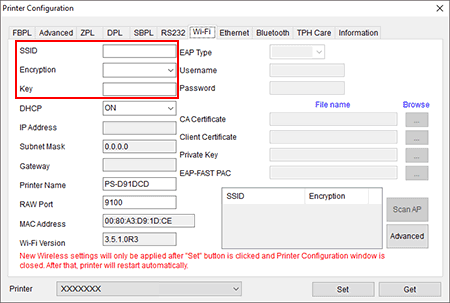
Specify SSID, Encryption and Key (Network Password), and then click Set.
-
Click Get and confirm that the printer's IP address is correct.
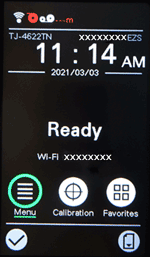
-
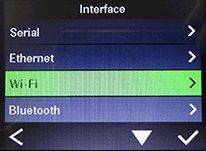
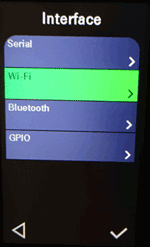
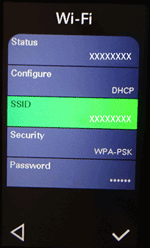
Select Interface > Wi-Fi.
-
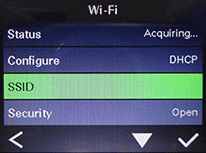
Specify SSID, Security and Password.
-
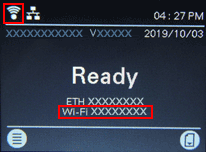
When finished, the Wi-Fi icon and the printer's IP address appear on the LCD.


- Download the latest version of the printer driver from the [Downloads] section of this website.
-
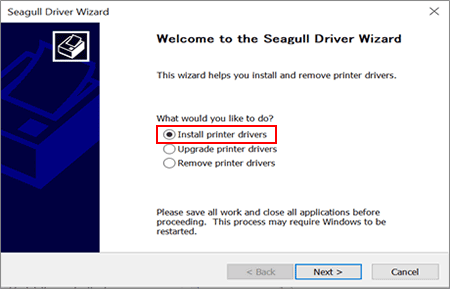
Run the Seagull Driver Wizard application and select Install printer drivers, and then click Next.
-
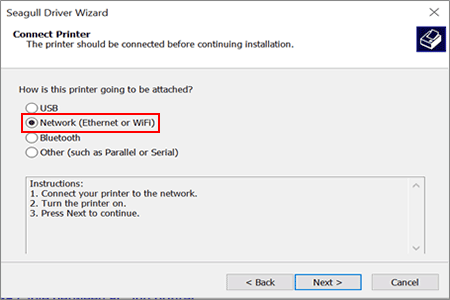
Select Network (Ethernet or WiFi) and then click Next.
-
Select your printer, and then click Next.
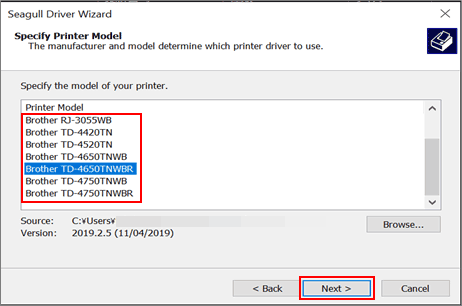
The model name is located on the back of the printer.
-
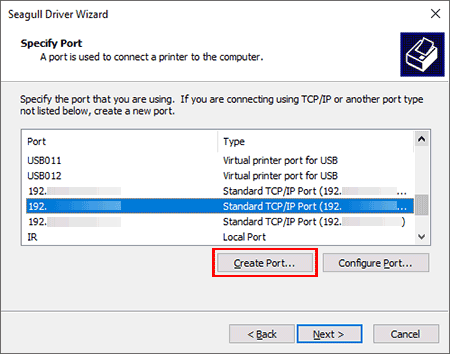
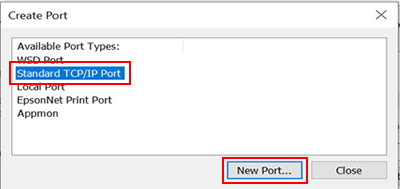
If your TCP/IP Port does not appear in the list, click Create Port and select Standard TCP/IP Port > New Port.
-
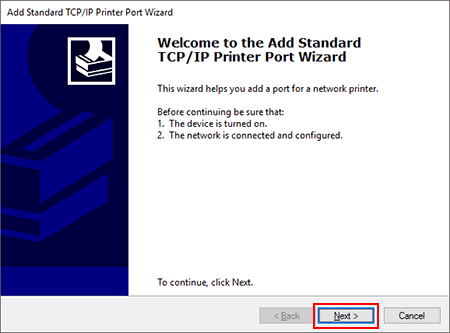
Click Next.
-
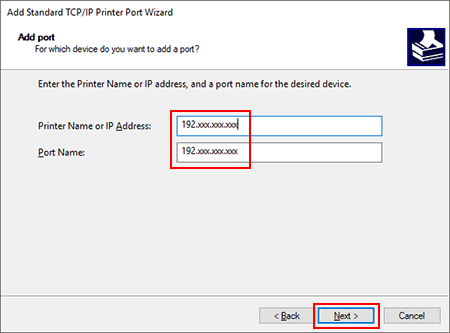
Type your printer’s IP address and port name, and then click Next.
-
Make sure that you entered the correct IP address and port name in Step 8, and then click Next.
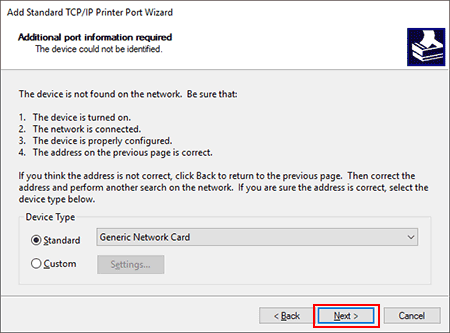
-
Click Finish.
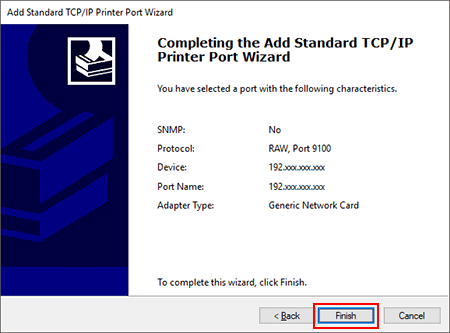
-
Return to the Specify Port window and select the port you created, and then click Next.
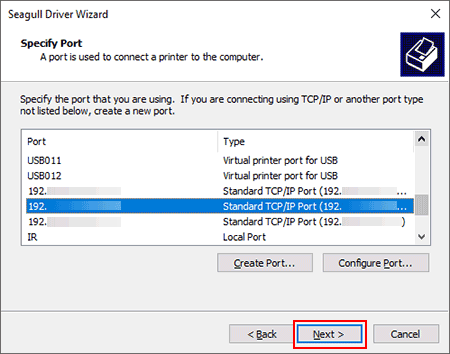
-
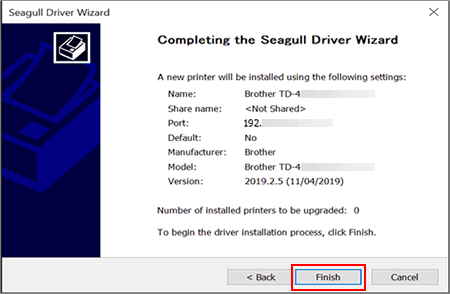
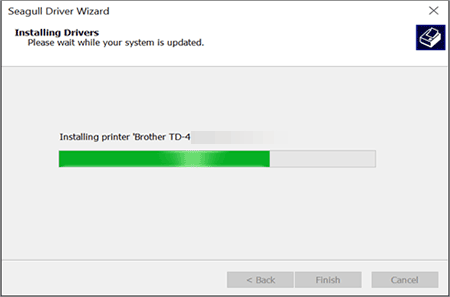
Follow the on-screen instructions.
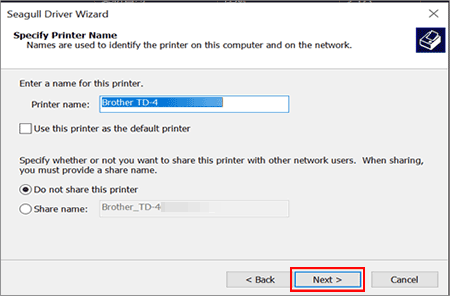
-
After the installation is completed, click Finish.
If you cannot install the printer driver properly, remove the printer driver or reset the printer settings, and then reinstall the printer driver.
For more information, see the FAQ: "I cannot install the Windows driver.".
Content Feedback
To help us improve our support, please provide your feedback below.
