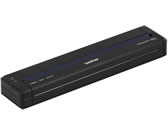
PJ-722
 |
FAQs & Troubleshooting |
How to install the rechargeable Li-ion battery (optional)
Installing the rechargeable Li-ion battery
-
Move the Battery Latch 1 to the unlock position.
-
While holding the Battery Latch 2 in the unlock position, remove the Battery Cavity Mounting Block.
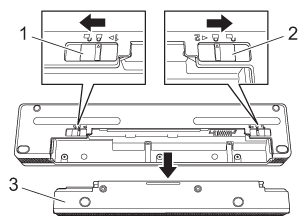 |
1. Battery Latch 1
2. Battery Latch 2
3. Battery Cavity Mounting Block |
-
Release the Battery Latch 2.
The Battery latch 2 moves back to the lock position.
-
Insert the battery into the battery cavity until it locks into place.
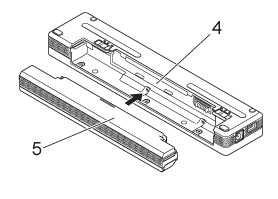 |
4. Battery cavity
5. Rechargeable Li-ion battery |
-
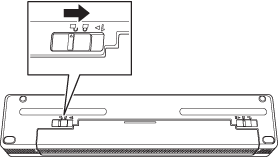
Move the Battery Latch 1 to the lock position.
-
The voltage supplied by the rechargeable Li-ion battery may vary. The printing speed may also vary depending on the voltage.
-
When the battery is being used, the battery cavity mounting block is not needed. Keep it in a safe place to avoid losing it.
Removing the rechargeable Li-ion battery
-
Move the Battery Latches to the unlock position, and then remove the battery.
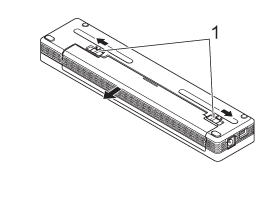 |
1. Battery latches |
-
Insert the Battery Cavity Mounting Block into the battery cavity until it locks into place.
-
Move the Battery Latch 1 to the lock position.
If your question was not answered, have you checked other FAQs?
Have you checked manuals?
If you need further assistance, please contact Brother customer service:
Related Models
PJ-722, PJ-723, PJ-762, PJ-763, PJ-763MFi, PJ-773
Content Feedback
To help us improve our support, please provide your feedback below.


