DC200
FAQs & Troubleshooting |
Not all of the material to be cut is cut. Some areas remain uncut.
Possible Causes (or Results)
Solutions
Case 1
Use a blade appropriate for the material being cut.
>> For details, see Mat and Material Combinations.
Case 2
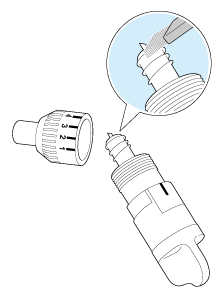
Remove the holder from the carriage, and then adjust the blade extension.
>> For details, see Adjusting the Blade Extension.
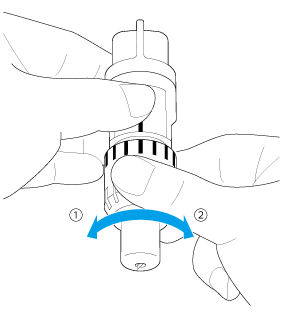 |
(1) Turn to the left to decrease the blade extension.
|
Case 3
Replace the blade with a new one.
For details, see Replacing the Blade. and Replacement Criteria.
Case 4
Replace the ma with a new one.
>> For details, see Replacement Criteria.
Case 5
Replace the blade with a new one.
For details, see Replacing the Blade. and Replacement Criteria.
Case 6
Replace the material with one compatible with this machine.
>> For details, see Mat and Material Combinations.
Case 7
Adjust the setting for “Cut Pressure” in the pattern preview window of DesignNCut Manager.
For the computer users using a Wireless LAN connection, click here.
For the computer users using a USB cable, click here.
For the mobile device users, click here.

or
Adjust the setting for “Cut Pressure” in the settings of DesignNCut Manager.
For details, see About DesignNCut Manager.

Case 8
Clean the holder.
>> For details, see “Cleaning the Holder.
Case 9
Rearrange the patterns to slightly separate them.
Case 10
Attach a high tack adhesive fabric support sheet to a mat or affix an iron-on fabric Wireless contact sheet to a fabric before cutting it.
>> For details, see How to attach the material to the mat.
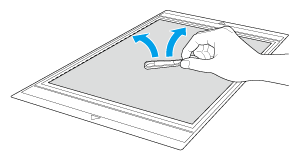
Case 11
Firmly attach the fabric to the mat pressing the handle of the included spatula across the surface of the fabric.
Case 12
Iron the entire contact sheet to affix it firmly to the wrong side of the fabric.
>> For details, see How to attach the material to the mat.
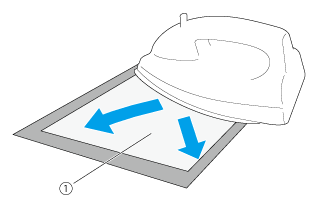 |
(1) Backing |
