DCP-J562DW
FAQs & Troubleshooting |
Scan multiple pages into one file instead of each scan being saved as a separate file.
- TIFF Multi-Page (*.tif)
- PDF (*pdf)
- High Compression PDF (*.pdf) *1
- Secure PDF (*.pdf)
- Searchable PDF (*.pdf)
- XML Paper Specification (*.xps) *2
- Microsoft Office Word (*.docx) *3
- Microsoft Office PowerPoint (*.pptx) *3
*1: In order to save the document as a High Compression PDF, you must set the Resolution to 300 x 300 dpi and Scan Type to True Grey or 24 bit Color.
*2: Available for Windows Vista or later, or when using applications which support XML Paper Specification files.
*3: Only available for certain models.
Not available for Scan to Image feature for Advanced Mode of ControlCenter4 for Windows.
Not available for Scan to Image feature for ControlCenter2 for Macintosh.
Not available for Scan to Image feature for ControlCenter2 for Macintosh.
Click the link below for your case to see more details:
- Home Mode of ControlCenter4 for Windows
- Advanced Mode of ControlCenter4 for Windows
- ControlCenter2 for Macintosh
NOTE: Illustrations shown below are from a representative product and operating system and may differ from your Brother machine and operating system.
How to scan from Home Mode of ControlCenter4 for Windows
-
Lift the document cover.
-
Place the document face down on the scanner glass, and then close the document cover.
-
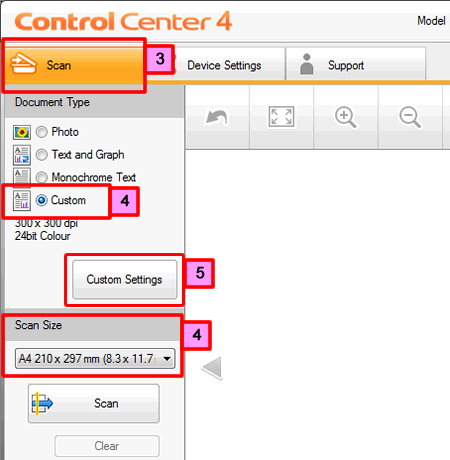
Click the Scan tab.
-
Select Custom for the Document Type, and then select the Scan Size.
-
Click Custom Settings.
-
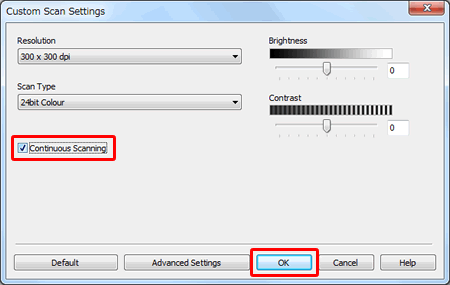
The Custom Scan Settings dialog appears. Check the Continuous Scanning box, and then click OK.
-
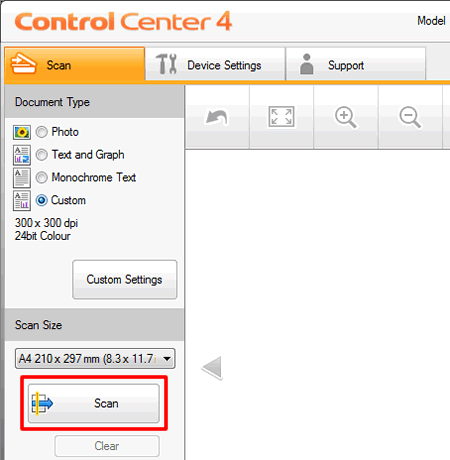
Click Scan. The machine starts scanning.
-
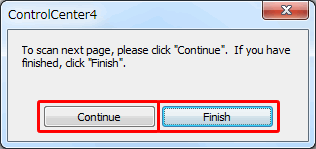
When scanning is finished, it will ask if you wish to scan more pages. If you want to scan more pages, place the next document on the scanner glass and click Continue. When you have finished scanning all your documents, click Finish.
-
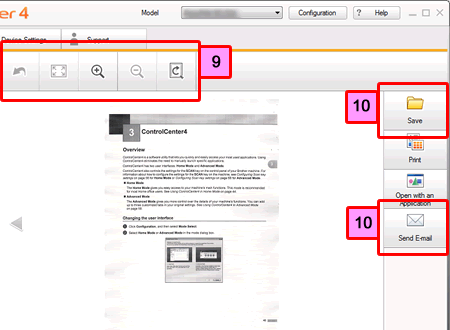
The scanned image appears in the image viewer. Confirm and edit (if necessary) the scanned image.
-
Click Save or Send E-mail.
-
The settings dialog appears. Select the file type supporting multi-page documents from the File Type drop-down list and then click OK. (Click here to see the file types supporting multi-page documents.)
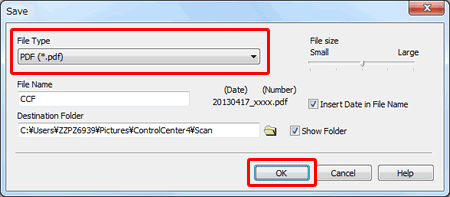
* The dialog may differ depending on your choice in Step 10.
How to scan from Advanced Mode of ControlCenter4 for Windows
-
Lift the document cover.
-
Place the document face down on the scanner glass, and then close the document cover.
-
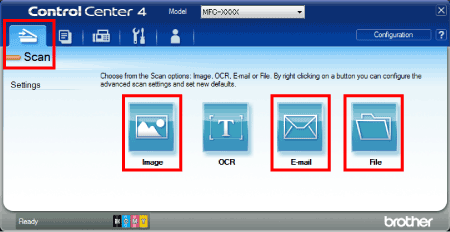
Click the Scan tab, and then click the type of scan you require (Image, E-mail, or File).
-
The scan settings dialog appears.
-
Select the file type supporting multi-page documents from the File Type drop-down list. (Click here to see the file types supporting multi-page documents.)
-
Check the Continuous Scanning box.
-
Click Scan. The machine starts scanning.
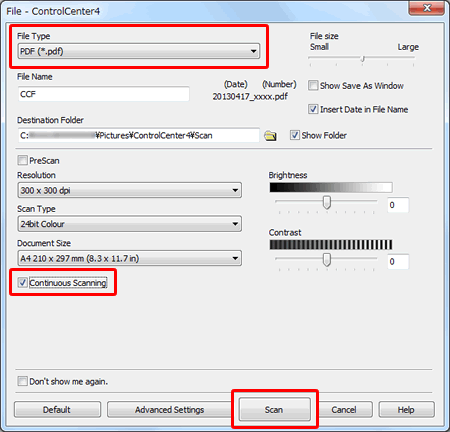
* The dialog may differ depending on your choice in Step 3.
-
Select the file type supporting multi-page documents from the File Type drop-down list. (Click here to see the file types supporting multi-page documents.)
-
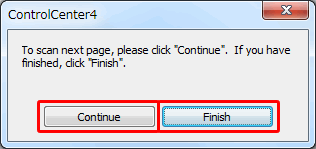
When scanning is finished, it will ask if you wish to scan more pages. If you want to scan more pages, place the next document on the scanner glass and click Continue. When you have finished scanning all your documents, click Finish.
How to scan from ControlCenter2 for Macintosh
-
Lift the document cover.
-
Place the document face down on the scanner glass, and then close the document cover.
-
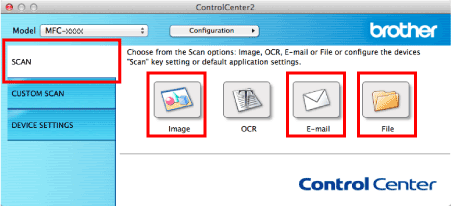
Click the SCAN tab, and then select the type of scan you require (Image, E-mail, or File).
-
The scan settings dialog appears.
-
Select the file type supporting multi-page documents from the File Type drop-down list. (Click here to see the file types supporting multi-page documents.)
-
Check the Continuous Scanning box.
-
Click the Start Scanning. The machine starts scanning.
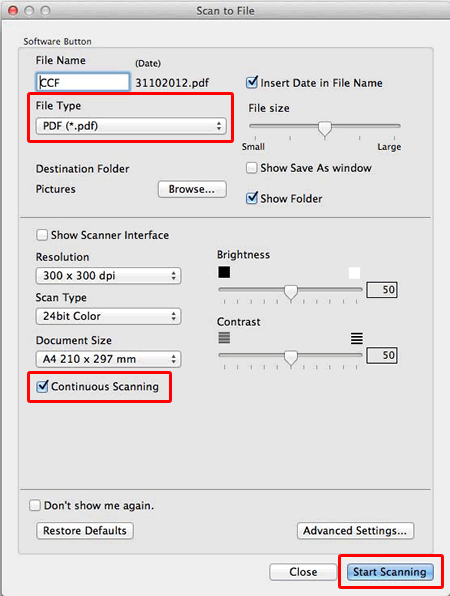
* The dialog may differ depending on your choice in Step 3.
-
Select the file type supporting multi-page documents from the File Type drop-down list. (Click here to see the file types supporting multi-page documents.)
-
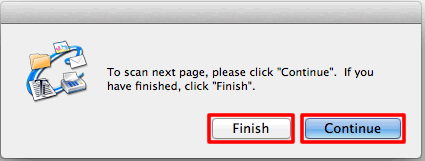
When scanning is finished, it will ask if you wish to scan more pages. If you want to scan more pages, place the next document on the scanner glass and click Continue. When you have finished scanning all your documents, click Finish.
Content Feedback
To help us improve our support, please provide your feedback below.
