HL-4050CDN
FAQs & Troubleshooting |
How do I install additional memory?
Follow the procedure below to install additional memory.
-
Turn off the printer power switch, and then unplug the printer. Disconnect the interface cable from the printer.
Always turn off the printer power switch before installing or removing the DIMM.
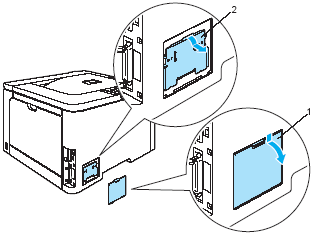
- Remove the two DIMM covers (both the plastic one (1) and the metal one (2)).

-
Unpack the DIMM and hold it by its edges.
To prevent damage to the printer from static electricity, DO NOT touch the memory chips or the board surface.
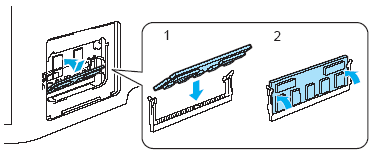
- Hold the DIMM by the edges and align the notches in the DIMM with the protrusions in the slot. Insert the DIMM diagonally (1), then tilt it toward the interface board until it clicks into place (2).

-
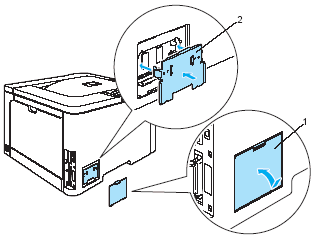
Put the two DIMM covers back on (both the plastic one (1) and the metal one (2)).

-
Reconnect the interface cable to your printer. Plug the printer back in, and then turn on the power switch.
To make sure that you have installed the DIMM properly, you can print the printer settings page that shows the current memory size. To see how to print the printer settings, click here.
