CM350
FAQs & Troubleshooting |
How to use a Universal Pen Holder
This accessory is sold separately.
To purchase parts, contact the retailer who sold you this machine or the nearest authorized service center.
Precautions
- We recommend pens with the cylindrical shape shown below.
-
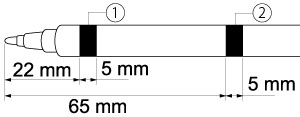
Can install a pen with a length of 70 mm or more and a diameter of 9.6 mm - 11.4 mm.
Pen with a maximum diameter greater than 11.4 mm can not be inserted into a penholder. - When using a pen thinner than 9.6 mm in diameter, please refer to "What should I do if lines not in the pattern are being drawn when using the universal pen holder?" .
-
Use pens that are smooth and have an even thickness in the areas 22 to 27 mm from the tip (1) and 65 to 70 mm from the tip (2).
* Areas 1 and 2 do not need to have the same thickness. - Pens with a projecting part, such as a clip, may not fit into the pen holder.
- We recommend using felt-tip pens.
- Do not use crayons, pencils or fountain pens.
- Pen tips made of hard plastic may not draw evenly.
- When using ball-point pens, your project may become stained if ink is allowed to accumulate on the tip.
- Be sure to use the stand to adjust the height of the pen.
- For details on using the drawing functions, refer to the Operation Manual included with the machine.
-
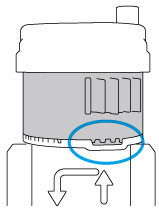
Make sure that the dial on the pen holder is at the initial position.
-
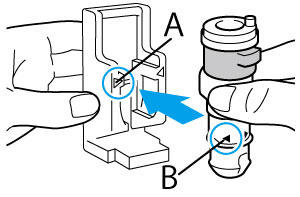
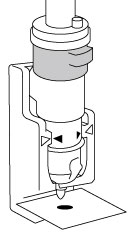
Place the pen holder in the stand so that
 on the front of the stand aligns with
  on the holder.
-
Place a scrap of the material to be drawn on at the bottom of the stand.

-
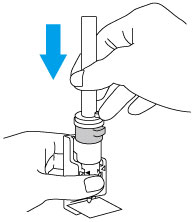
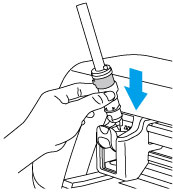
Place the stand on a level surface, vertically hold the pen with the cap removed, and then insert the pen into the pen holder until the tip contacts the scrap material.
-
Adjust the height until the tip of the pen sticks to the material placed on the stand.
-
While holding down the stand, pull up the dial in the direction of the arrow from the initial position, slowly turn the dial to the eft until the pen is firmly secured, and then lower the dial so that the teeth are engaged.

-
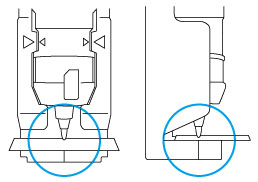
Look at the front and side to check that the pen tip is aligned with the notch on the front of the stand base and the indentation at the side.
-
Pull the pen holder toward you straight out of the stand holder to remove the pen holder from the stand.
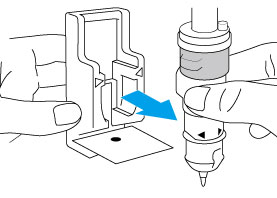

Please do not pull or push the pen after adjustment.
-
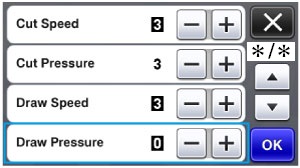
Set draw pressure to "0" and you choose a design wanting to do draw and do draw.
-
After use, be sure to return the dial to the initial position and remove the pen.
- We recommend performing trial drawing with the pattern to be drawn on the material to be used.
- Drawing with a strong pressure may crush the pen tip.
-
If blurring occurs, adjust the drawing pressure in increments of +1.
Content Feedback
To help us improve our support, please provide your feedback below.
