ADS-2100e
FAQs & Troubleshooting |
Configuring frequently-used scan settings on your computer.
In ControlCenter, you can assign frequently-used scan settings to the scan buttons for easier scanning, and scan files by clicking your configured button without displaying the scan settings dialog box.
To configure the scan settings, follow the steps below.
NOTE: The screens may differ depending on operating system being used and your Brother machine.
-Macintosh (macOS 10.14 or earlier)
Windows
Configure frequently-used scan settings
-
Open ControlCenter4.
-
Brother Utilities supported models
-
Open Brother Utilities.
-
Windows 7 / 10 / 11
Click or
or  (Start) > (All Programs or All apps >) Brother > Brother Utilities.
 -
Windows 8
On the Start screen, click .
.
If is not on the Start screen, right-click somewhere on an empty spot, and then click, All Apps from the bar.
Click Brother Utilities.
-
Windows 7 / 10 / 11
- Select Scan.
- Click ControlCenter4.
-
Open Brother Utilities.
-
Brother Utilities unsupported models
Click (Start) > All Programs > Brother > [model name] > ControlCenter4.
-
Brother Utilities supported models
-
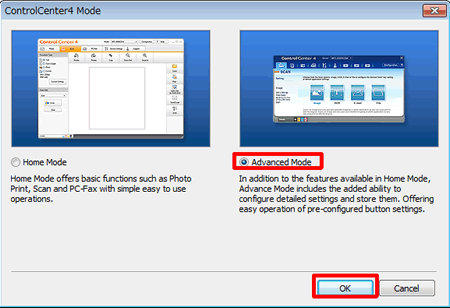
Check the current mode when the ControlCenter4 window appears.
Home Mode Advanced Mode 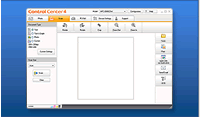
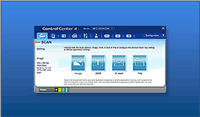
You must use the Advanced Mode to configure the scan settings in ControlCenter4.
To select the Advanced Mode, click Configuration > Mode Select, and select the Advanced Mode, and then click OK.
-
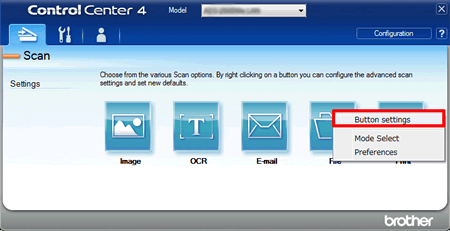
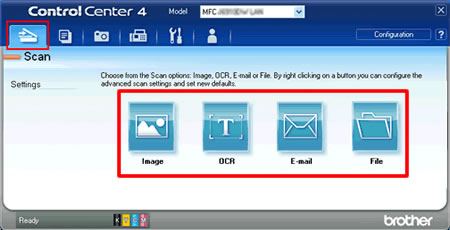
Click the Scan tab.
Right-click the button you want to configure and click Button settings.
The settings dialog box appears.
-
Change the settings as needed.
If you uncheck the Show settings dialog before scan. check box, the setting dialog box will not appear every time you click the scan button.
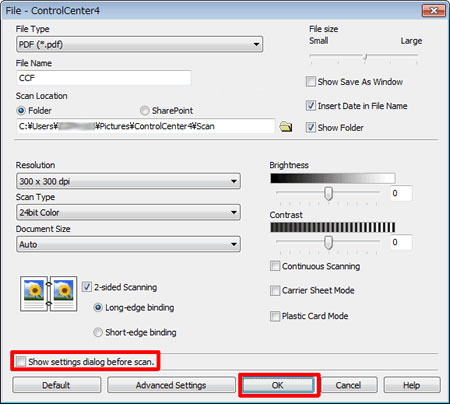
All the button settings windows use the same Show settings dialog before scan. setting; uncheck the check box for one button also applies the setting to the other buttons. -
The scan settings are now configured.
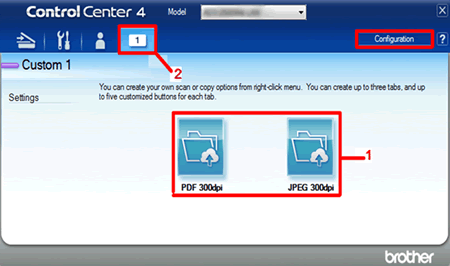
You can also assign frequently-used scan settings to a custom button (1) in a custom tab (2) by clicking the Configuration button (see the example below).
Start scanning
-
Open ControlCenter4.
-
Brother Utilities supported models
-
Open Brother Utilities.
-
Windows 7 / 10 / 11
Click or
or  (Start) > (All Programs or All apps >) Brother > Brother Utilities.
 -
Windows 8
On the Start screen, click .
.
If is not on the Start screen, right-click somewhere on an empty spot, and then click, All Apps from the bar.
Click Brother Utilities.
-
Windows 7 / 10 / 11
- Select Scan.
- Click ControlCenter4.
-
Open Brother Utilities.
-
Brother Utilities unsupported models
Click (Start) > All Programs > Brother > [model name] > ControlCenter4.
-
Brother Utilities supported models
-
Click the Scan tab, and then click the button you want to use, such as Image, OCR, E-mail or File to start scanning.
The scanning starts without displaying the scan setting dialog box.
Macintosh (macOS 10.14 or earlier)
Configure the frequently-used scan settings for easy can
-
Open the ControlCenter2.
To open the ControlCenter2 application, click Go from the Finder bar, Applications > Brother > ControlCenter. Double click the ControlCenter.
The ControlCenter will open and an icon will be placed in the dock. -
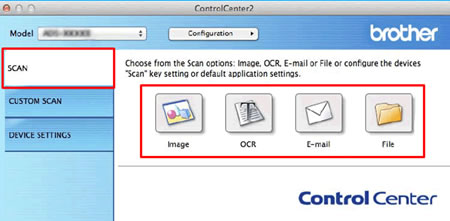
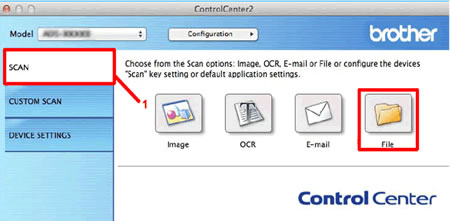
Click the SCAN tab (1).
Press and hold the Control key and click the button you want to configure. The configuration window appears.
-
Change the settings as needed.
If you uncheck the Show settings dialog before scan. check box, the dialog box will not appear every time you click the scan button.
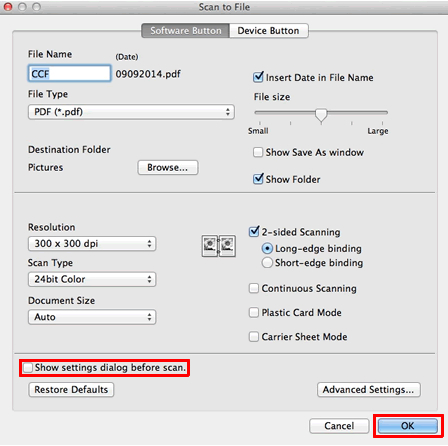
All the button settings windows use the same Show settings dialog before scan. setting; uncheck the check box for one button also applies the setting to the other buttons. -
The scan settings are now configured.
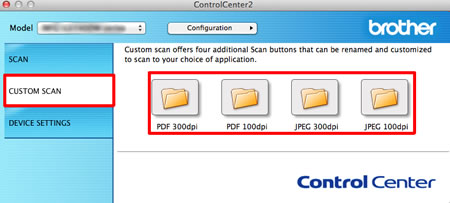
You can also customize the scan settings you want to use.
In the CUSTOM SCAN tab, press and hold down the Control key and then click the button you want to customize.
The configuration window appears (see the example below).
Start Scanning
-
Open the ControlCenter2.
To open the ControlCenter2 application, click Go from the Finder bar, Applications > Brother > ControlCenter. Double click the ControlCenter.
The ControlCenter will open and an icon will be placed in the dock. -
Click the SCAN tab, and then click the button you want to use , such as Image, OCR, E-mail or File to start scanning.
The scanning starts without displaying the scan setting dialog box.
