SDX1250
FAQs & Troubleshooting |
Instructions for Creating Roll Feeder Data with CanvasWorkspace and Sending It to the Cutting Machine
This FAQ is described how to create the data for the roll feeder with CanvasWorkspace and send it to the cutting machine.
You must activate the roll feeder function before using it. For details on activating the accessory kit, refer to How to Activate an Accessory Kit* (Rhinestone, Emboss Kit, etc.) for the Cutting Machine.
Creating the Data
-
Startup CanvasWorkspace on your computer.
The data for the roll feeder cannot be created on CanvasWorkspace(Web).
Create the data on CanvasWorkspace.
If the CanvasWorkspace isn’t installed on your computer, click here to download the application.
-
Click
 (Artboard) in the right side of the screen.
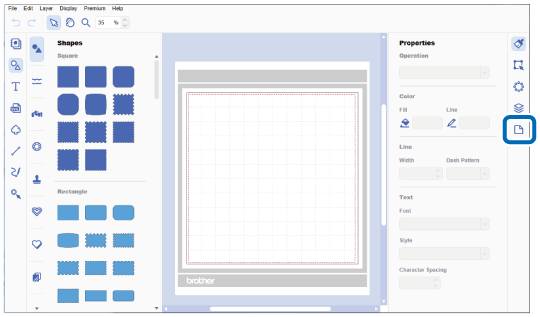
>> The Artboard Panel appears in the Control Panel.
-
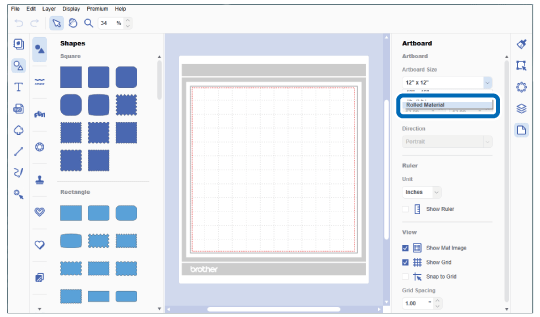
Select Rolled Material under Artboard Size.
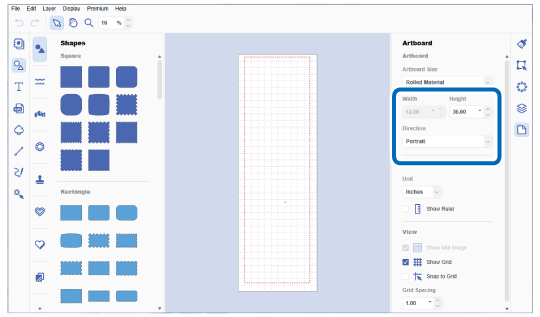
If necessary, change the height and orientation of the artboard.
-
Create the data for the roll feeder.
Adjust the size or position of the pattern so that it fits within the red box.
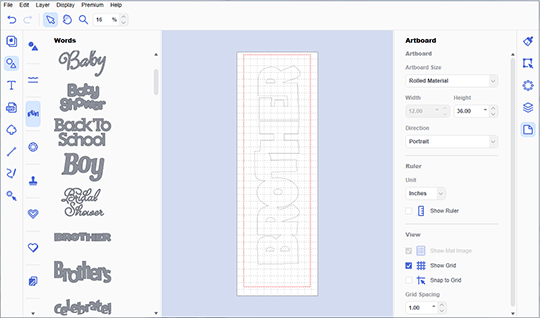 You can select the sample pattern by selecting
 in the object panel.
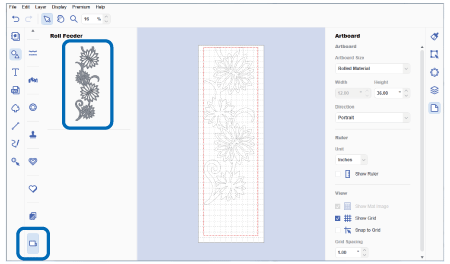
- When the data is completed, send it to the cutting machine.
Send the Data to the Cutting Machine
A pattern can be sent to a cutting machine using the following three methods.
- Internet connection required when sending the data via a wireless network connection.
- Sending the data via a USB cable is compatible only with Windows 64 bit.
- The USB flash drive and USB cable are sold separately.
Sending via a Wireless Network Connection
Before using this method, the following setup operations must be performed.
-
A computer and the cutting machine must be connected via a wireless network connection.
For details on setting up the wireless network connection, refer to How to connect my machine to a wireless network using the Setup Wizard. -
Machine must be registered with CanvasWorkspace.
For details on registering with CanvasWorkspace for your machine, refer to How to register Your Machine with CanvasWorkspace.
-
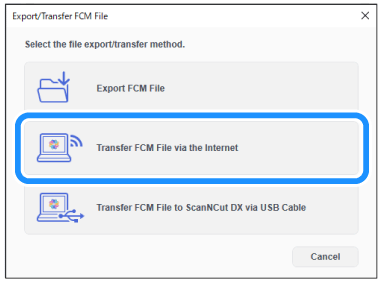
Select [Export / Transfer FCM File] from the [File] menu.

-
Select the file [Transfer FCM File via the internet] .
-
The following screen appears when the data was transferred to the cutting machine completely. Click [OK] .
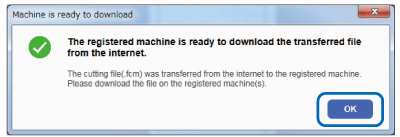
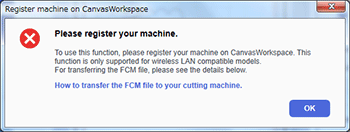
If the following screen appears, register your machine. For details, refer to How to register Your Machine with CanvasWorkspace.
Then, install the roll feeder onto the machine.
For details, refer to How to Install the Roll Feeder.
Sending a File Using a USB Flash Drive
-
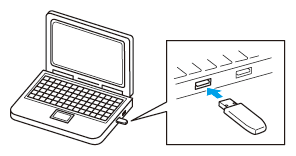
Plug the USB flash drive into the computer.
Open the Computer (My Computer) folder on the computer, and then select Removable Disk. Save the pattern data to Removable Disk.
-
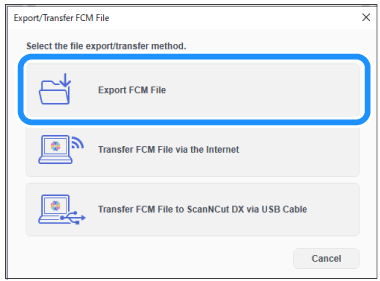
Select [Export / Transfer FCM File] from the [File] menu.

-
Select the file [Export FCM File] .
-
The pattern data is converted to cutting data and saved as an FCM file.
-
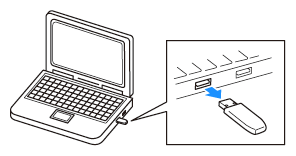
Unplug the USB flash drive from the computer, then plug it into the cutting machine.

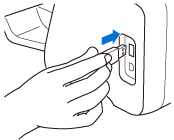
Then, install the roll feeder onto the machine.
For details, refer to How to Install the Roll Feeder.
Sending a File Using a USB Cable
-
Make sure that the home screen or home screen of Roll feeder is displayed on the LCD touchscreen display.
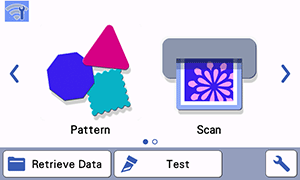
or 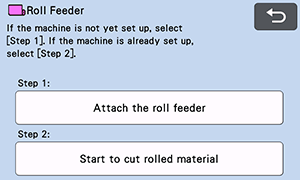
-
Connect the computer and cutting machine with a USB cable.
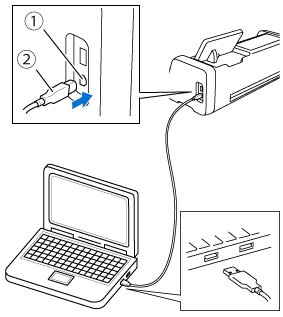
(1) USB port for computer
(2) USB cable connectorPatterns can be transferred via a USB cable to only one cutting machine at a time. If multiple cutting machines are connected to the computer, disconnect all but one.
-
Select [Export / Transfer FCM File] from the [File] menu.

-
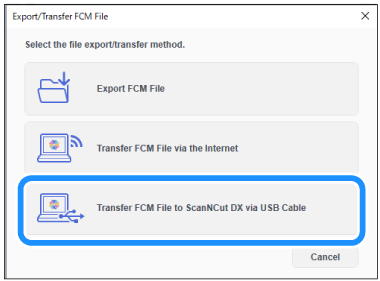
Select the file [Transfer FCM File to ScanNCut DX via USB Cable] .
-
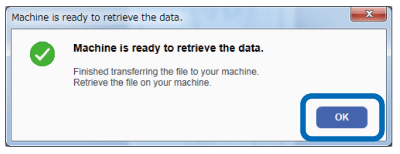
The following screen appears when the machine is ready to retrieve the data.
Click [OK] .
Then, install the roll feeder onto the machine.
For details, refer to How to Install the Roll Feeder.
