MFC-9880
FAQs & Troubleshooting |
I cannot print with Windows Vista 64bit.
We have discovered a problem when trying to print with the Windows Vista 64bit "built-in" driver. However, at this point, the vendor has no plan of action to fix the problem. Therefore we will provide a Brother original driver that is equivalent to Windows Vista "built-in" driver.
Please follow the instructions below to switch from Windows Vista "built-in" driver to the Brother original driver.
Section 1: Download the Brother original driver for Windows Vista
- Make a temporary directory on your HDD to save the downloaded self-extracting file, e.g. C:\bront
- Please click here to download the Brother original driver. (38 KB)
- The Brother End-User License Agreement will appear. If you agree to the terms, click I ACCEPT.
- "File Download" will appear. Click SAVE.
- "Save as" will appear. From the "SAVE IN" drop down, specify the directory you created in the step1. Then, click SAVE to save the driver in the directory. This will begin the download of the driver.
-
Once the download is complete, "Download complete" may appear.
If it does appear, click OPEN. If it does not appear, go to the directory you created in Step1 and double click the downloaded file "xxxxxx.exe" (ZIP is on the icon and .exe may appear at the end of the name). - "ZIP Self Decompression" appears. Click DECOMPRESS.
- A message that the process was successful will appear. Click OK.
Section 2: Install the Brother original driver for Windows Vista
The following instruction is based on FAX-4100 with USB connection.
-
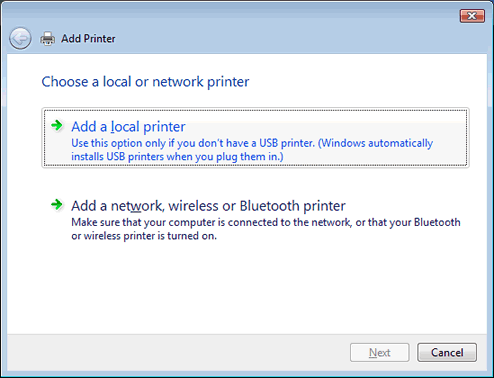
Click on START-->Control Panel-->Printers, and click [Add a printer] on the following window.

-
Click [Add a local printer] to continue.
-
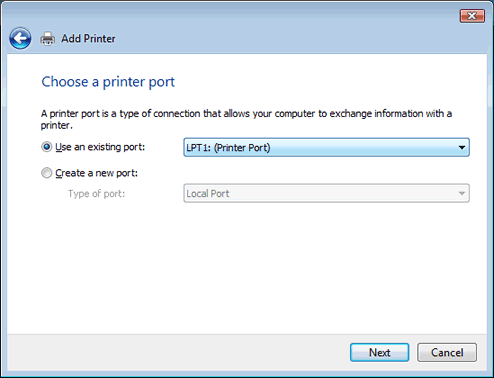
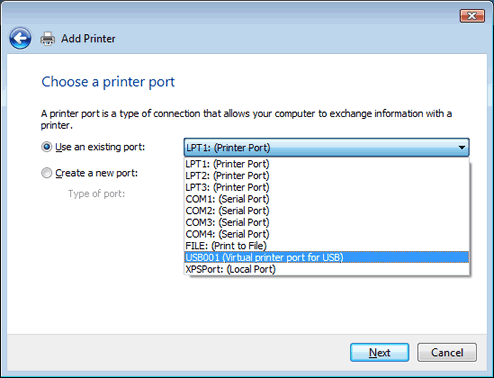
"Choose a printer port" window will appear.
-
When you have already installed OS standard driver, reselect the port name "USB001 (Virtual printer port for USB)", and click [Next].
-
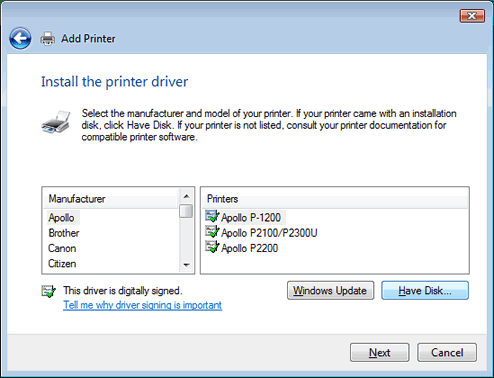
On the following window, click [Have Disk...].
-
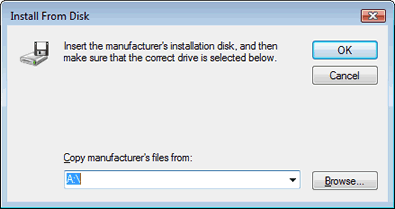
"Install From Disk" window will appear.
-
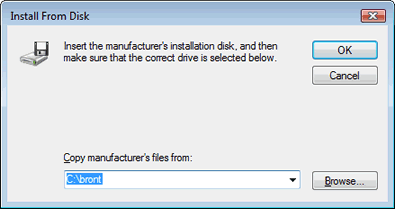
Specify the path of downloaded driver files and click [OK].
-
The list of names like "Brother xxxxxxx v.2" is displayed. Select your printer name, and click [Next].
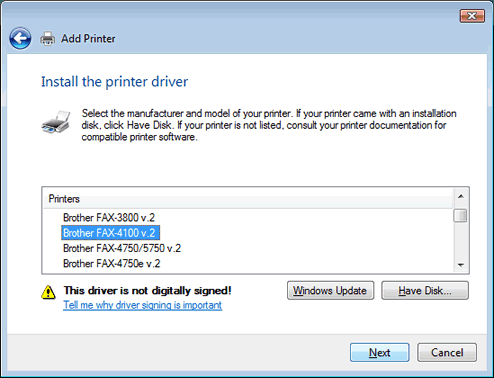
-
On the following window, just click [Next].
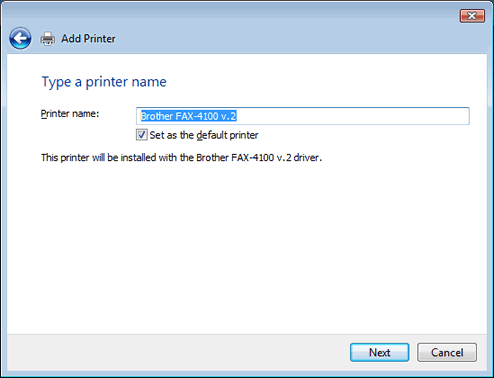
-
When the following Attention window "User Account Control" appears, click [Continue].
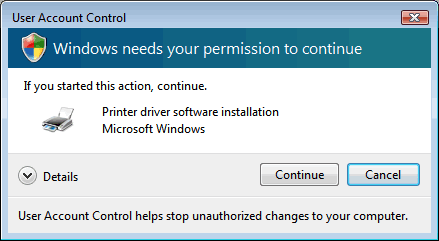
-
When the following Warning window "Windows Security" appears, click [Install this driver software anyway] to start installing.
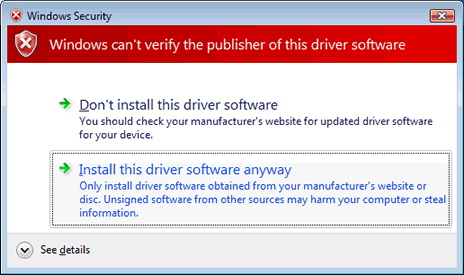
-
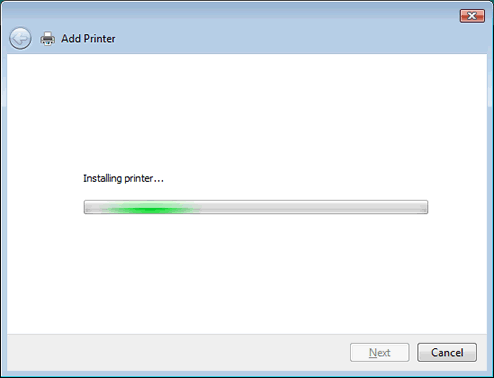
Wait until the installing is completed.
-
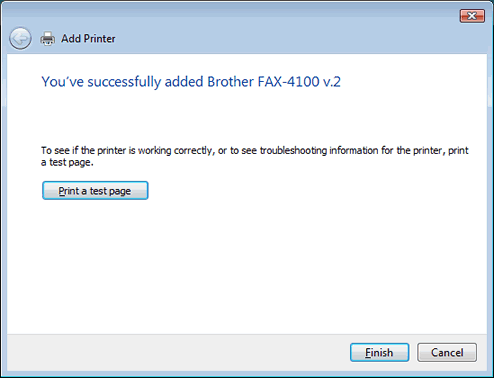
Click [Finish] to complete.
Attention!
When the printer that this Brother original driver sets up is shared with another OS (Windows 2000/XP or Windows Server™ 2003), another kind of printer driver needs to be installed. Please go to the next section to continue.
Section 3: Download the Brother original driver for Windows 2000/XP or Windows Server™ 2003
- Make a temporary directory on your HDD to save the downloaded self-extracting file, e.g. C:\bront
- Please click here to download the Brother original driver. (35 KB)
- The Brother End-User License Agreement will appear. If you agree to the terms, click I ACCEPT.
- "File Download" will appear. Click SAVE.
- "Save as" will appear. From the "SAVE IN" drop down, specify the directory you created in the step1. Then, click SAVE to save the driver in the directory. This will begin the download of the driver.
-
Once the download is complete, "Download complete" may appear.
If it does appear, click OPEN. If it does not appear, go to the directory you created in Step1 and double click the downloaded file "xxxxxx.exe" (ZIP is on the icon and .exe may appear at the end of the name). - "ZIP Self Decompression" appears. Click DECOMPRESS.
- A message that the process was successful will appear. Click OK.
Section 4: Install the Brother original driver for Windows 2000/XP or Windows Server™ 2003
The following instruction is based on sharing the printer that is set up with Windows Vista, on a Windows XP PC.
-
Open "My Network Places" and select PC with which the shared printer is connected.

-
It may ask for authentication to access the PC with Windows Vista. Input the administrator account information registered for the Windows Vista PC.

-
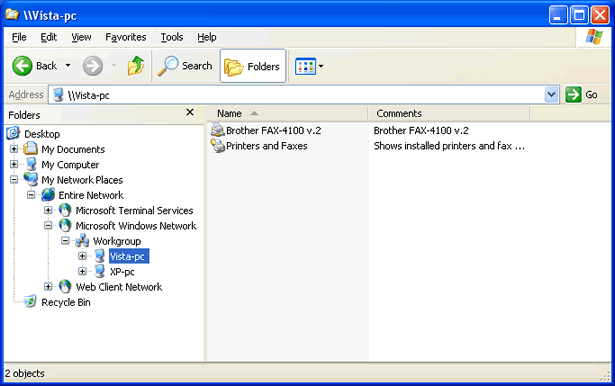
When the authentication process is completed, the shared resources will be displayed.
-
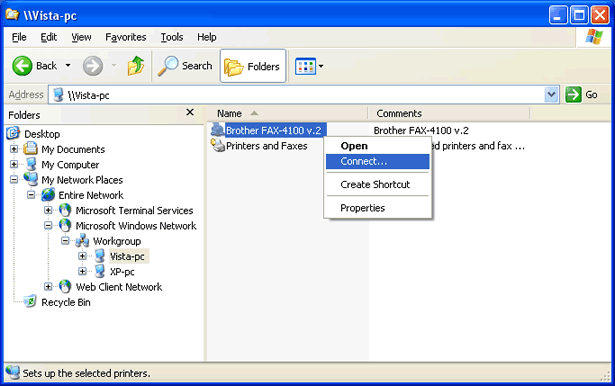
Right-click the printer icon that you want to share, and click [Connect...] in the pop-up menu.
-
On the following window, click [Yes].

-
On the following window, click [OK].

-
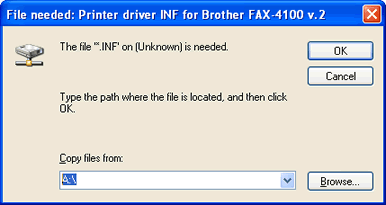
"File needed:" window will appear.
-
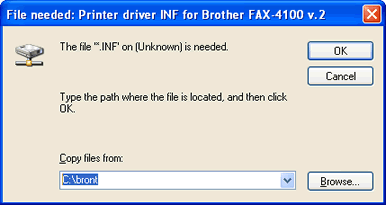
Specify the path of downloaded driver files and click [OK].
-
Click [Continue Anyway] to complete.
