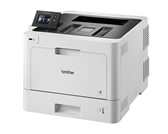
HL-L8360CDW
FAQs & Troubleshooting |
Use Universal Print (Windows)
Universal Print allows you to manage your printer fleet through cloud services from Microsoft without installing any additional software.
- Universal Print is available only on Windows 10 Version 2004 (20H1) or later.
- Make sure your Brother machine uses the latest firmware.
- Before you begin, ask your Azure tenant administrator (Global Administrator) to activate Universal Print by registering the first machine with Universal Print in order to accept the Enterprise application "Brother Universal Print Hardware Client". From then on, users with the "Printer Administrator" or "Printer Technician" role will be able to register the remaining machines.
NOTE: The screens may differ depending on your operating system and your Brother machine.
1 1. Register your Brother machine with Universal Print
- Start your web browser.
-
Type "https://machine's IP address" in your browser's address bar (where "machine's IP address" is the IP address of the machine or the print server name).
For example: https://192.168.1.2 -
If the machine prompts you for a password, type it, and then click
 .
. - The Web Based Management page opens. Click the Network tab.
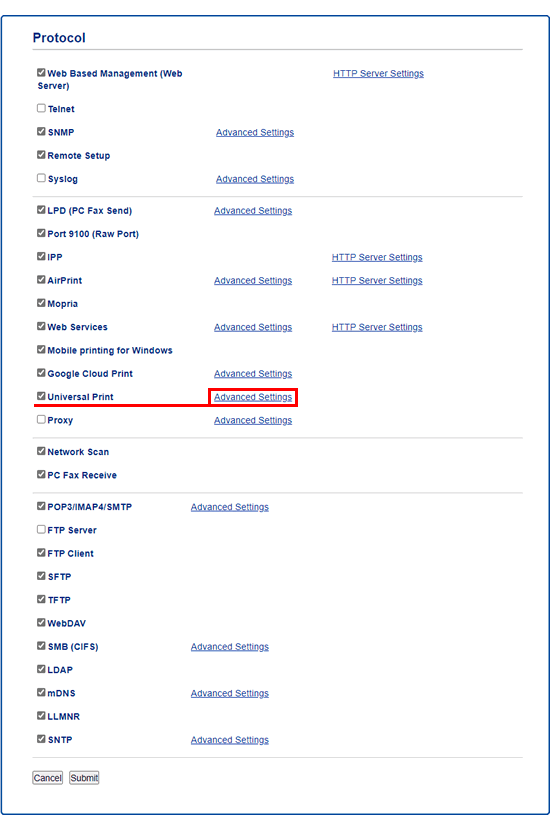
- Click the Protocol menu in the left navigation bar.
-
Click Advanced Settings next to Universal Print.
-
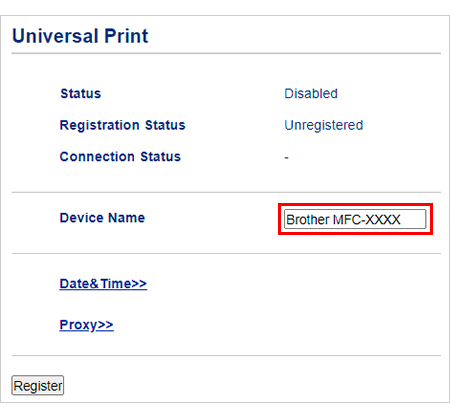
Change the Device Name if necessary.
-
Set the correct Date & Time.
NOTE: If your network uses a proxy server, enable the Proxy setting and configure its Advanced Settings. -
Click Register.
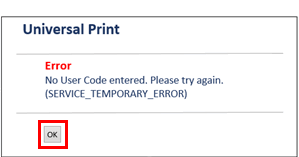
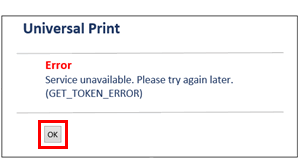
If an error occurs, click OK and go back to step 7.
- Write down the code listed after Enter the following code to authenticate.
-
Click Sign In.
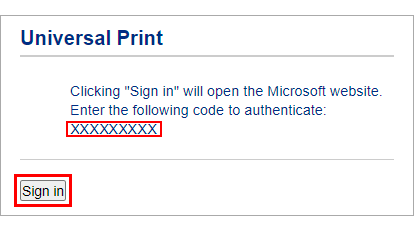
- When the Universal Print portal page opens, enter the code you wrote down.
- Select the account you want to use with Universal Print.
-
Close the Universal Print portal page and go back to the Web Based Management page.
When Registration complete screen appears, click OK.If an error occurs, click OK and go back to step 7.
-
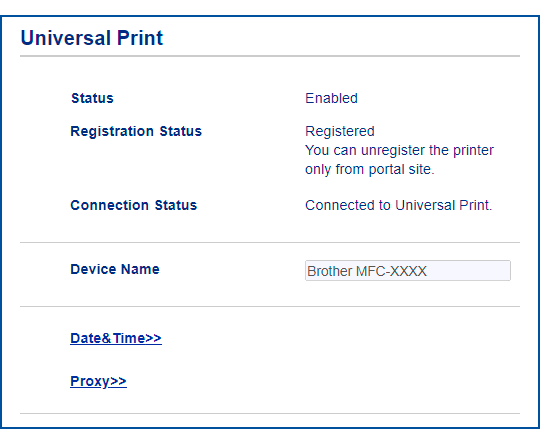
Check the Registration Status to confirm whether the registration has been successful.
- Access the Microsoft Azure portal website.
- Select Universal Print.
- Select Printers under Manage.
- Select the machine you want to use and then click Share.
- Select the user you want to allow access to and then click Share Printer.
If you get the message "Unsupported document format: application/pdf", register your machine using the Universal Print connector.
1 2. Install Universal Print connector
- Download the Universal Print connector.
- Run the Universal Print connector installer.
- Click the Login button and sign in.
- In the Connector name field, type the name you want, and then click the Register button.
1 3. Install the printer driver
For models with the scan function, you can also download and install the "Printer Driver & Scanner Driver for USB" file.
1 4. Register your machine using the Universal Print Connector
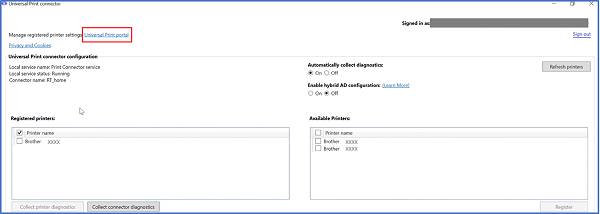
- Run the Universal Print Connector.
-
Select the machine you want to register with Universal Print, and then click the Register button.
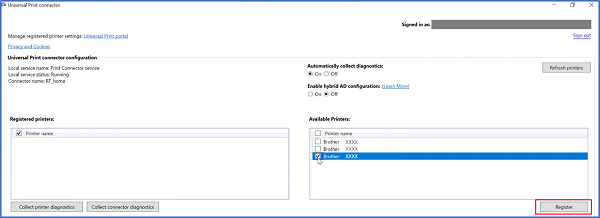
- Check that your machine is listed under the Registered printers heading.
-
Click Universal Print portal to access the Microsoft Azure portal.
- Select the account you want to use.
- Select Manage Printers.
- Select the machine you want to use, and then click Share.
- Select the users you want to allow access to the machine, and then click Share Printer.
2. Add the registered machine to your computer
-
Do one of the following:
(Windows 11)
Click > Settings > Bluetooth & devices > Printers & scanners > Add a printer or scanner, and then click Add device.
(Windows 10)
Click >
>  > Devices > Printers & scanners > Add a printer or scanner.
 - Select the printer from the list and then click Add device.
3. Unregister your Brother machine from Universal Print
To unregister your Brother machine, use the Microsoft Azure portal page. You cannot unregister the machine using Web Based Management.
- Sign in to the Microsoft Azure portal page.
- Click Printers.
- Select the machine you want to unregister.
- Click Delete Printer Share.
