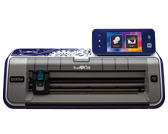
CM900
FAQs & Troubleshooting |
Instructions for sending patterns created in CanvasWorkspace to the cutting machine for cutting or drawing.
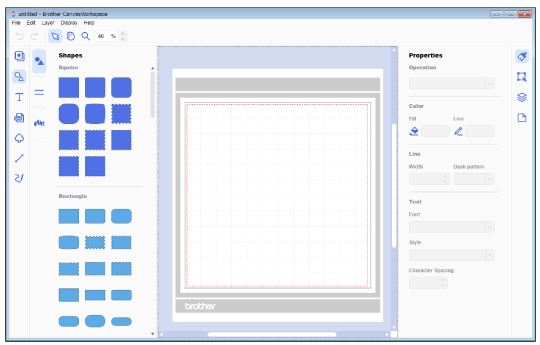
There are 2 CanvasWorkspace applications that allow you to create and edit cutting or drawing pattern data on a Brother cutting machine.
For CanvasWorkspace, go to CanvasWorkspace.
You can download the CanvasWorkspace from the Downloads section. Click here to visit the download page.
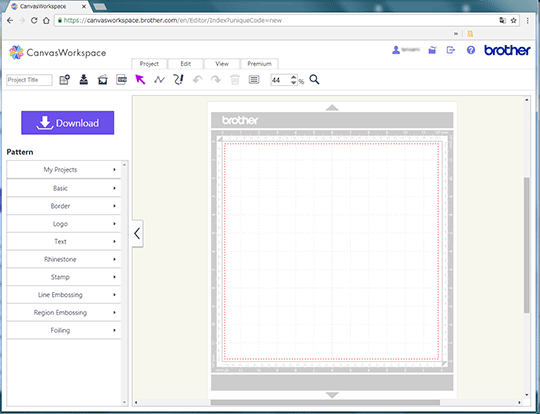
For CanvasWorkspace (Web), go to CanvasWorkspace (Web).
If you use Tablet, go to CanvasWorkspace (Web).
- For details on CanvasWorkspace, refer to About CanvasWorkspace.
- For details on the differences between CanvasWorkspace(Web) and CanvasWorkspace, refer to What are the differences between CanvasWorkspace(Web) and CanvasWorkspace?.
- The screen that is displayed depends on your OS.
CanvasWorkspace
A pattern can be sent to a cutting machine using the following three methods.
- Via a wireless network connection
- Using a USB flash drive
-
Using a USB cable
The USB flash drive and USB cable are sold separately.
Sending via a wireless network connection
A pattern created in CanvasWorkspace can be sent via a wireless network connection to a cutting machine, where it can be cut out.
Before sending data with this method, the following setup operations must be performed.
-
A computer and the cutting machine must be connected via a wireless network connection.
For details on wireless network setting, refer to How to connect my machine to a wireless network using the Setup Wizard -
ScanNCut Online must be set up.
For details on ScanNCut Online, refer to How to register Your Machine with CanvasWorkspace
-
In CanvasWorkspace, create the pattern to be cut out (or drawn).

-
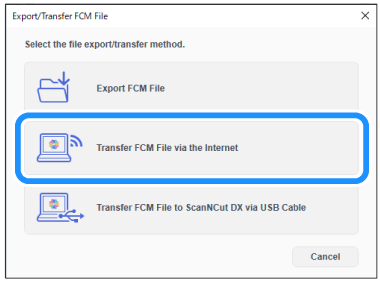
Select [Export / Transfer FCM File] from the [File] menu.

-
Select the file [Transfer FCM File via the internet] .
The pattern data is transferred to the cutting machine.
-
Click [OK] .
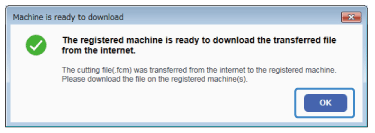
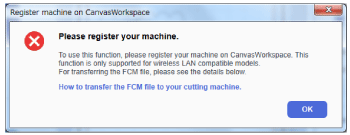
If the following screen appears, register your machine from Account Settings in the Help menu. For details, refer to How to register Your Machine with CanvasWorkspace.
-
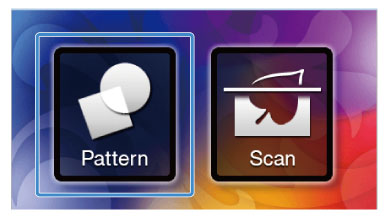
Select [Pattern] in the home screen that appears in the LCD panel of the cutting machine.
-
Touch
 .
.
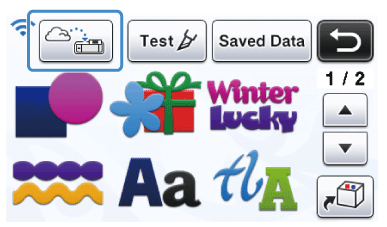
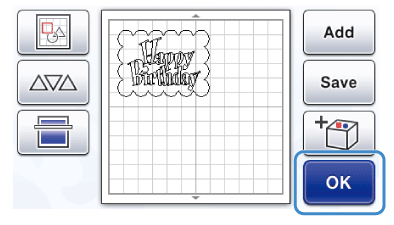
The pattern transferred from CanvasWorkspace is displayed.
Check the pattern, and then touch [OK] .
-
Attach the material to the mat, and then insert the mat into the cutting machine.
-
Install the blade holder.
-
From the LCD panel of the cutting machine, select Cut (or Draw).
Before cutting the material, be sure to perform test cut (trial cut). For details on trial cutting, refer to How do I perform trial cutting? (Test Cut).
Sending using a USB flash drive
-
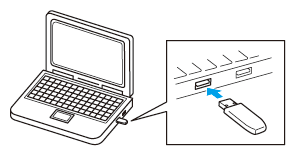
Plug the USB flash drive into the computer.
The "Removable Disk" icon appears in "Computer (My computer / This PC)" on the computer.
-
In CanvasWorkspace, create the pattern to be cut out (or drawn).

-
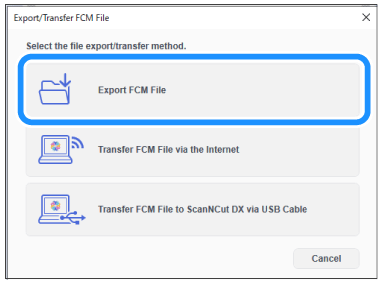
Select [Export / Transfer FCM File] from the [File] menu.

-
Select the file [Export FCM File] .
-
Save the pattern data to “Removable Disk”.
The pattern data is converted to cutting data and saved as an FCM file.
-
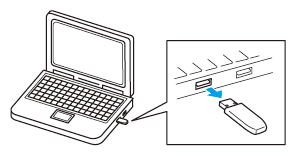
Unplug the USB flash drive from the computer, then plug it into the cutting machine.
-
Recall the pattern in the cutting machine.
Select [Pattern] in the home screen that appears in the LCD panel of the cutting machine.

-
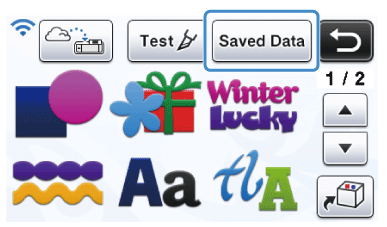
Touch [Saved Data] .
-
Touch
 .
.
-
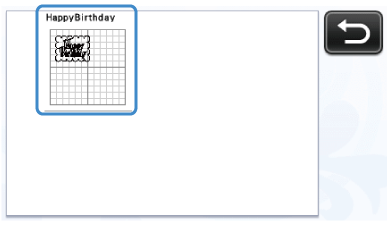
Select the pattern to be cut out (or drawn).
-
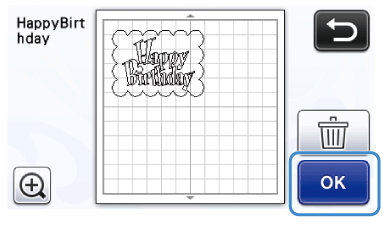
Check the pattern, and then touch [OK] .
-
Attach the material to the mat, and then insert the mat into the cutting machine.
-
Install the blade holder.
-
From the LCD panel of the cutting machine, select Cut (or Draw).
Before cutting the material, be sure to perform test cut (trial cut). For details on trial cutting, refer to How do I perform trial cutting? (Test Cut).
Sending using a USB cable
-
Connect the computer and cutting machine with a USB cable.
The "Removable Disk" icon appears in "Computer (My computer / This PC)" on the computer.
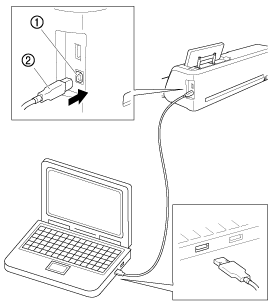
(1) USB port for computer
(2) USB cable connector
-
In CanvasWorkspace, create the pattern to be cut out (or drawn).

-
Select [Export / Transfer FCM File] from the [File] menu.

-
Select the file [Export FCM File] .

-
Save the pattern data to “Removable Disk”.
The pattern data is converted to cutting data and saved as an FCM file.
-
Recall the pattern in the cutting machine.
Select [Pattern] in the home screen that appears in the LCD panel of the cutting machine.

-
Touch [Saved Data] .

-
Touch
 .
.
-
Select the pattern to be cut out (or drawn).

-
Check the pattern, and then touch [OK] .

-
Attach the material to the mat, and then insert the mat into the cutting machine.
-
Install the blade holder.
-
From the LCD panel of the cutting machine, select Cut (or Draw).
Before cutting the material, be sure to perform test cut (trial cut). For details on trial cutting, refer to How do I perform trial cutting? (Test Cut).
CanvasWorkspace(Web)
A pattern can be sent to a cutting machine using the following two methods.
- Internet connection required when sending the data via a wireless network connection.
-
The USB flash drive is sold separately.
Enclosed accessories differ depending on model.
Sending via a wireless network connection
A pattern created in CanvasWorkspace (Web) can be sent via a wireless network connection to a cutting machine, where it can be cut out.
Before using this method, the following setup operations must be performed.
-
A computer and the cutting machine must be connected via a wireless network connection.
For details on setting up the wireless network connection, refer to to How to connect my machine to a wireless network using the Setup Wizard -
A machine is registered with CanvasWorkspace must be set up.
For details on registering with CanvasWorkspace for your machine, refer to How to register Your Machine with CanvasWorkspace (“ScanNCut Online” Setting)
-
Open CanvasWorkspace (Web) <https://canvasworkspace.brother.com> , and then log in.
-
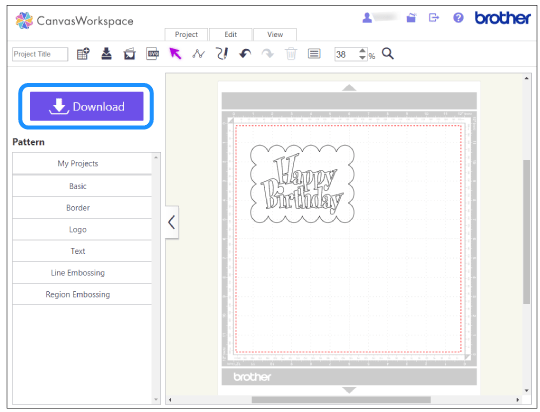
Create the pattern to be cut out (or drawn), and then click [Download] .
-
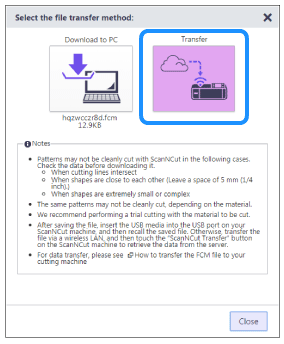
Click
 .
.

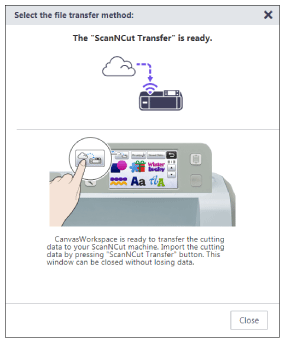
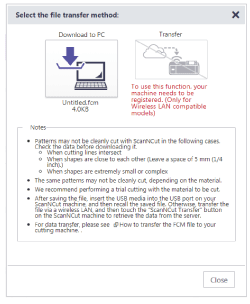
If you cannot select the Transfer icon, register your machine on CanvasWorkspace. For details, refer to How to register Your Machine with CanvasWorkspace (“ScanNCut Online” Setting).
-
Select [Pattern] in the home screen that appears in the LCD panel of the cutting machine.

-
Touch
 .
.

The pattern transferred from CanvasWorkspace (Web) is displayed.
Check the pattern, and then touch [OK] .

-
Attach the material to the mat, and then insert the mat into the cutting machine.
-
Install the blade holder.
-
From the LCD panel of the cutting machine, select Cut (or Draw).
Before cutting the material, be sure to perform test cut (trial cut). For details on trial cutting, refer to How do I perform trial cutting? (Test Cut).
Sending using a USB flash drive
-
Plug the USB flash drive into the computer.

-
Open CanvasWorkspace (Web) <https://canvasworkspace.brother.com> , and then log in.
-
Create the pattern to be cut out (or drawn), and then click [Download] .

-
Select
 .
.
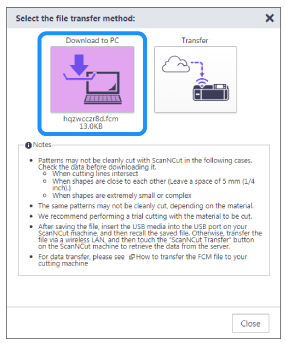
-
Open the "Computer (My Computer)" folder on the computer, and then select "Removable Disk" . Save the pattern data to "Removable Disk".
>> The pattern data is converted to cutting data and saved as an FCM file.
-
Unplug the USB flash drive from the computer, then plug it into the cutting machine.

-
Select [Pattern] in the home screen that appears in the LCD panel of the cutting machine.

-
Touch [Saved Data] .

-
Touch

-
Select the pattern to be cut out (or drawn).

-
Check the pattern, and then touch [OK] .

-
Attach the material to the mat, and then insert the mat into the cutting machine.
-
Install the blade holder.
-
From the LCD panel of the cutting machine, select Cut (or Draw).
Before cutting the material, be sure to perform test cut (trial cut). For details on trial cutting, refer to How do I perform trial cutting? (Test Cut).
Sending using a USB cable
-
Connect the computer and cutting machine with a USB cable.
The "Removable Disk" icon appears in "Computer (My computer / This PC)" on the computer.

(1) USB port for computer
(2) USB cable connector
-
Open CanvasWorkspace (Web) <https://canvasworkspace.brother.com> , and then log in.
-
Create the pattern to be cut out (or drawn), and then click [Download] .

-
Select
 .
.

-
Save the pattern data to “Removable Disk”.
The pattern data is converted to cutting data and saved as an FCM file.
-
Recall the pattern in the cutting machine.
Select [Pattern] in the home screen that appears in the LCD panel of the cutting machine.

-
Touch [Saved Data] .

-
Touch
 .
.
-
Select the pattern to be cut out (or drawn).

-
Check the pattern, and then touch [OK] .

-
Attach the material to the mat, and then insert the mat into the cutting machine.
-
Install the blade holder.
-
From the LCD panel of the cutting machine, select Cut (or Draw).
Before cutting the material, be sure to perform test cut (trial cut). For details on trial cutting, refer to How do I perform trial cutting? (Test Cut).
