HL-3040CN
FAQs & Troubleshooting |
Replace Drum
Follow the procedure below to replace the drum unit.
The Brother machine has separate consumables the toner cartridge and the drum unit. Verify you replace only the drum unit and not the toner cartridge. If you want to know their difference, refer to "What is the difference between the toner cartridge and the drum unit?"
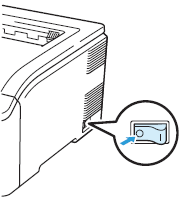
- Turn off the printer power switch.
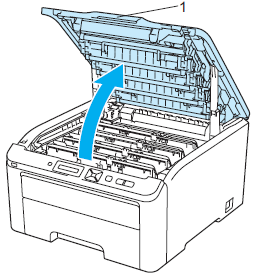
- Fully open the top cover by lifting up on the handle (1).
NOTE:
If the cover is not completely opened, the drum and toner cartridge assembly may be difficult or impossible to remove from the machine.
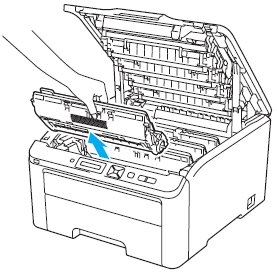
- Take out the drum unit and toner cartridge assembly for the color shown on the LCD.
- Push down the green-labeled lock lever (1) and take the toner cartridge out of the drum unit.
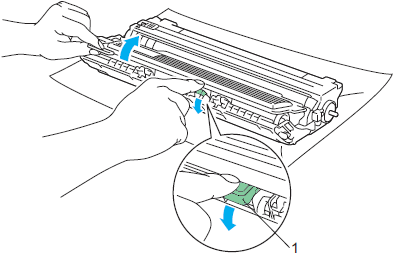
- DO NOT put a toner cartridge into a fire. It could explode, resulting in injuries.
- Be careful not to inhale toner.
- We recommend that you place the drum unit and toner cartridge assembly on a clean, flat surface with a sheet of disposable paper or cloth underneath it in case you accidentally spill or scatter toner.
- To prevent damage to the printer from static electricity, DO NOT touch the electrodes shown in the illustration.
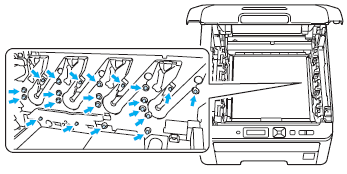
- Handle the toner cartridge carefully. If toner scatters on your hands or clothes, wipe or wash it off with cold water at once.
- To avoid print quality problems, DO NOT touch the shaded parts shown in the illustrations.
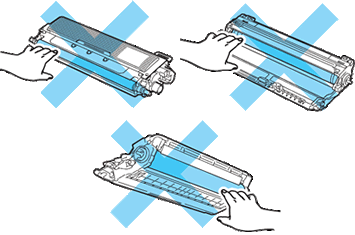
- Be sure to seal up the drum unit tightly in a suitable bag so that toner powder does not spill out of the cartridge.
- Please discard the used drum unit according to local regulations, keeping it separate from domestic waste. If you have questions, call your local waste disposal office.
- Unpack the new drum unit and pull off the protective cover.
Wait to unpack a drum unit until immediately before you put it in the printer. Exposure to direct sunlight or room light may damage the drum unit.
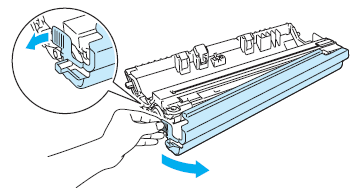
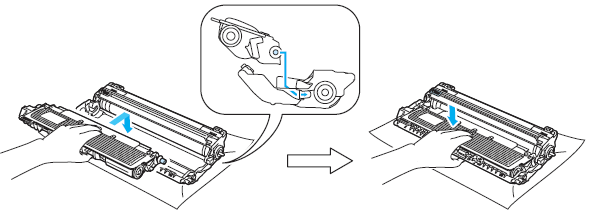
- Put the toner cartridge firmly into the new drum unit until you hear it lock into place.
Make sure that you re-install the toner cartridge properly, or it may separate from the drum unit.
- Slide the drum unit and toner cartridge assembly into the printer. Make sure that you match the toner cartridge color to the same color label on the printer.
C- Cyan, M- magenta, Y- Yellow, K- Black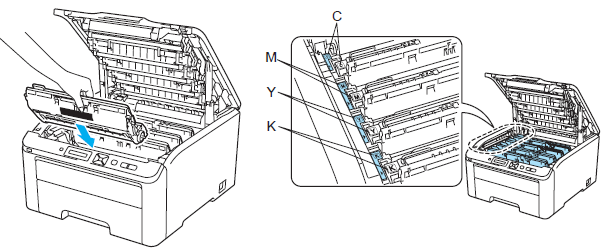
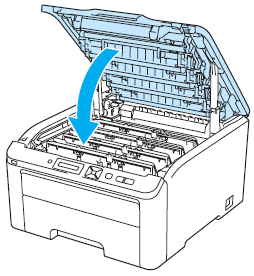
- Close the top cover of the printer.
When you replace the drum unit with new one, you need to reset the drum counter. Go to the Step 9 to complete the steps.
- Reset the drum counter as follows:
Do not reset the drum counter when you only place the toner cartridge.
- Turn the printer power switch back on.
- Press + or - to choose "Machine Info.".
- Press OK to proceed to the next menu level, and then press + or - to choose "Reset Parts Life".
- Press OK, and then press + to choose "Drum Unit".
- Press OK, and then press + or - to choose the color that you replaced.
- Press OK two times.
Content Feedback
To help us improve our support, please provide your feedback below.
